Leaderboard


Popular Content
Showing content with the highest reputation on 10/06/2011 in all areas
-
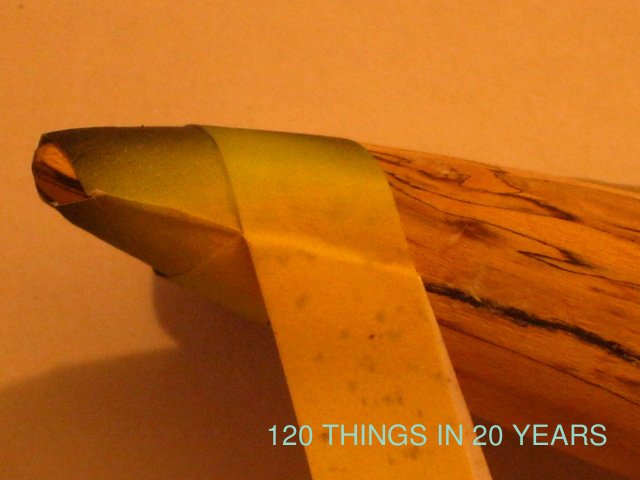
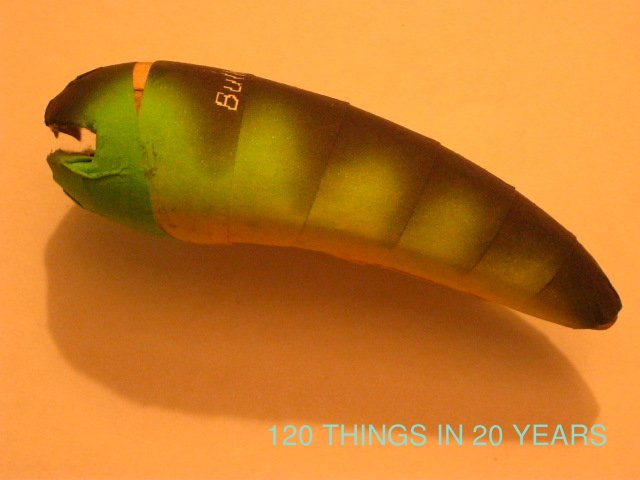
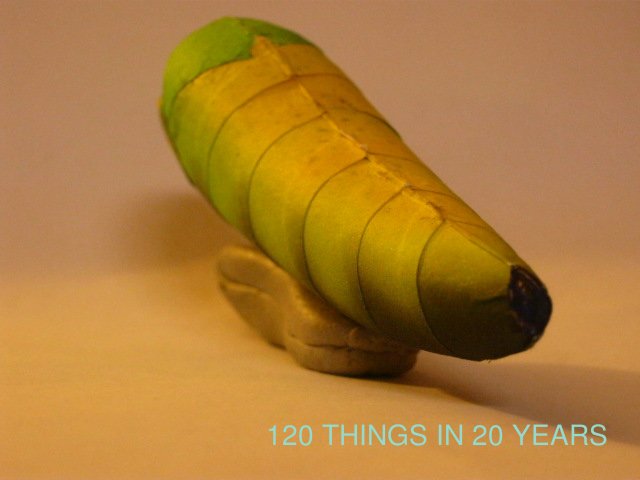
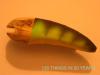
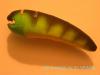
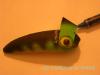
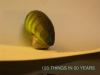
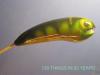
Firstly, thanks people, all this info is great. I've been around for a while as bamboochochacha or was it bullwinkleII? But I lost my account details. I'm also seen around the net as BullwinkleII or "120 things in 20 years" in case anyone thinks I'm plagiarizing myself This post simply represents where I'm at after picking everyones brains by reading and learning everything I could from here and a few other similar forums. This is the finished printed lure. The aim here is to make a quick to manufacture lure that I wont be scared to lose and so I can get in close to the snags. The aim is also to not have strangers point and laugh when setting up at the boat ramp , and to catch a few fish. This method needs no real skill, I got my 67 year old mum to make one and she did it first time with only the instructions on my blog (just a more comprehensive version of this post) (I made the actual wooden carved lure blank, she just did the design and stuck it on. If I could ever get it away from her desk, I'm pretty sure her first ever lure would catch fish. The final bone dry product was a little wrinkled, because I rushed between coats to get the howto completed for my blog, but the finish can be, of course, as good as you care to make it. I started with a graphics program called the GIMP. Its free and available for download whatever operating system you use. Just search for "GIMP download". I wanted to keep the design simple to showcase the method rather than the final result in the howto, but there is no limit to how complicated the design could be. I found it useful to start with a line running from top to bottom down the centre of the page. The finished graphic is made by copying the one side, flipping it, and pasting it to match the original. Print out the design. Allow around 30% larger than the length of the lure body you want to cover. Cut the design into strips, and glue onto your lure body starting from the back, and overlapping by perhaps 2mm. Where the two ends meet fold the glued ends first one way then the other to crease them. Then trim as close as you can with scissors. No need to wait until its dry, in fact its best to do it when the glue is still wet so you can squash the join flat. In a design with stripes its a good idea to cut your strips so that the cut is always through the middle of the stripe. The goal here is to keep it consistent. I haven't been as accurate as I could have been but it really doesn't matter, the end result always just seems to work out in spite of where I go wrong. I tend to leave the eye strip last as they can cover mistakes. Check the eyes before they are stuck. There a few ways to do the eyes. I've glued them on as cut out circles, Ive attached laser foil in the shape of eyes(from birthday cards and toothpast packaging) or even hand made eyes made to enable final last minute weight adjustment (http://120thingsin20...lures-eyes.html) but I dont think it matters that much. They always seem to work out ok. The underside looks like this. Not the normal belly of a lure I agree. but I think it adds rather than annoys. But then I'm biased Actually I think it looks a bit like the belly of a shrimp or a moth or something. It looks natural. I've even traced around the seams in red pen to highlight them. That makes the lure look even more like a shrimp. I don't think fish care. My final step before the clear coat is to go over any wacky looking bits with a dark marker pen. Rough as guts, just scribble over anything that looks like white paper, glue, or even wood. It wont matter, once the final coat of clear is on It will look ok. I have a great deal of respect for those amazing people out there in forum land that paint incredible works of art, but sadly I'm not one of them/you. This technique isn't designed to approach their works of art, but rather to allow an artless crafter to make a lure in spite of my lack of natural talent I then stick a toothpick into the rear hook hangpoint hole, and dip in a clear varnish. I don't have spray gear. Ill coat them 4 times or so with a light sanding between each. I can make one in about an hour from a lump of tree to being ready for hooks (plus a stack of drying time (I dry them by rotating them on a geared down 9 volt motor) If you give it a crack I promise it will work better than you expected Thanks again for all this amazing info. if anyone does give it a go, can you let me know how it went


 1 point
 -
If you're interested in trying to achieve a flawless finish (meaning as flawless as possible...lol, seems like theres always a flaw if you look hard enough)...try to slow down when applying the final topcoats. Put down a clean piece of paper for a work area. It can be an old magazine or the backside of something you copied, but its always good to have a clean work area and a clean spot to place the lure before you begin. Wash your hands thoroughly first. Your hands very often contain dust of one type or another which will fall onto the sticky surface and show in the final finish. Clean your brush of all dust particles by fanning it with your finger or thumb till you can no longer see dust flying off the bristles. Also remove any loose bristles so they can't get dragged into the epoxy during the application process. Mix the epoxy on a clean non-porous surface. Some guys like the bottom of a soda can. I like medicine cups because if you buy them by the hundred count, they are cheap and disposable...about 4 cents a piece...for four cents, I don't have to slow down and clean anything when I'm done and if I'm mixing envirotex instead of Devcon 2 ton epoxy, the medicine cups have markings on the side which help you achieve a perfect 50/50 mix every time. I prefer use acid brushes for applying the epoxy. I crimp the tip near the bristles with a pair of pliers to lock down the bristles and fan the brush to remove loose bristles and dust. I do not clean the acid brushes. I toss them when I'm done, because for the cost (about sixteen cents if you buy them in bulk), I don't have to repeatedly expose myself to the toxic solvents required to clean any type of epoxy. For me at least, it is not worth the health hazard, which you will repeatedly encounter if you make baits in any quantity at all...say 50 baits a year times only two coats per bait...you are inhaling highly toxic chemicals 100 times per year...unless you wear a mask and how much trouble is that? I prefer to avoid mixing on paper or any other surface that might have tiny loose particles on it, because the tiniest of particles will usually show in the finish after it dries. Mix thoroughly. I use wooden sticks similar to popsicle sticks and despite the idea that it may throw a few bubbles into the mix, they work great. The heat gun remove all bubbles anyway. I know others prefer plastic mixing sticks of some type but I have easier access to popsicle sticks so I use them and toss them after using both ends several times. 99 times out of a hundred if you have bad patches which are still tacky after 24 hours, you failed to mix properly. Once in a great while, I've gotten a bad tube of Devcon. Devcon seems to have a finite shelf life. Try to buy the tubes that have the least amount of yellow in the one tube. It seems to be the "freshest" stuff and goes on a LOT easier and does not have the abbreviated working time that the very yellow tubes have. I've had no such problems with Envirotex lite. After application of the epoxy, take a moment and turn the bait over as you hold it under a light and carefully examine it for any fish eyes, missed spots or dust boogers. If you find dust, you can at times just remove them by wiping them off with your finger or rolling a toothpick next to them to sort of roll them onto the toothpick. If I find minor dust or epoxy specks in the finish during the first one or two coats, you can usually leave them as they are and just sand them lightly with fine grade sandpaper prior to the application of the next coat. Of course the final coat is the one where you won't have the luxury if ignoring them because you can't sand them out afterward without scuffing the final finish. Once you apply the epoxy LEAVE IT ALONE and put it on the spinner or spin it by hand by holding the bait by the tail with a vice grips. Don't keep brushing it and trying to spread it...It will only get progressively worse and it will almost always flow itself out nice and level after normal brushing. Try to apply the next coat before the previous coat has fully cured...once the first coat has dried to the point where the bait can be carefully handled. By doing this, the next coat will chemically bond to the first giving you the best possible bond between coats. I've had occasion to have to sand out aberrations in a finish and have noticed that allowing the epoxy to fully cure between coats creates a distinct separation between the two, which could create the possibility of delamination of the latter coats, especially with envirotex under certain conditions and most especially if the first coat is applied over foiling. With Devcon, I try to apply the second or next coat after 4 to six hours. With envirotex, which I use almost exclusively these days, I find that leaving it sit with a cover over the medicine cup (to preclude dust settling on the surface...I use a piece of scrap Lexan as a cover) makes it gel slightly. Because it is a bit thicker after allowing it to sit for ten to 15 minutes, it behaves much more like Devcon...goes on evenly, less prone to run, and far less prone to show dust and foreign particles. It will only slightly abbreviate your working time, but it will go on a bit thicker and require less coats to achieve any desired level of protection. By allowing it to thicken just a bit, I find that I can usually get by with three to four coats instead of four to six thin coats and the finishes are clearly superior and have far fewer flaws. It is probably the best tip I can share about envirotex. I've found that applying envirotex immediately after mixing encourages separations and fish eyes. I know there are times when you only want one thin coat, but even then I let it sit for 10 minutes and try to apply it sparingly while still covering the bait completely.1 point
-
PDF Tutorial Attached. flexcoat plugs.pdf flexcoat plugs.pdf flexcoat plugs.pdf flexcoat plugs.pdf flexcoat plugs.pdf flexcoat plugs.pdf flexcoat plugs.pdf flexcoat plugs.pdf flexcoat plugs.pdf1 point