Leaderboard


Popular Content
Showing content with the highest reputation on 04/05/2014 in Posts
-
PDF Tutorial Attached Photo Finishing Foil and Faux Finishes The following Tutorial is for those of us who want to create very realistic finishes with a minimum of hassle. This is not to say it is the only or best way to achieve that goal, but I found it to be a very viable alternative to decals, and much less costly. Truth be told, I also find it easier to do. In addition, the supplies are more readily available. With very little practice, anyone can get wonderful results. I developed this technique after realizing that it is not practical to print on foil. Doing so, is a tribute to Murphy Photo Finishing Foil and Faux Finishes.pdf Photo Finishing Foil and Faux Finishes.pdf Photo Finishing Foil and Faux Finishes.pdf Photo Finishing Foil and Faux Finishes.pdf Photo Finishing Foil and Faux Finishes.pdf Photo Finishing Foil and Faux Finishes.pdf Photo Finishing Foil and Faux Finishes.pdf Photo Finishing Foil and Faux Finishes.pdf Photo Finishing Foil and Faux Finishes.pdf1 point
-
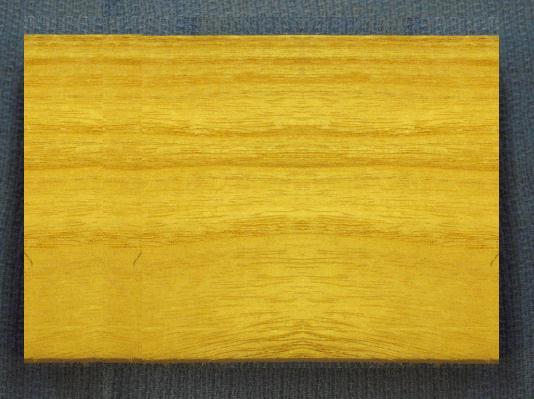
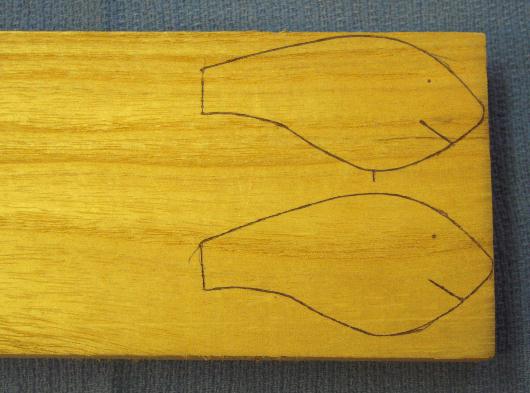
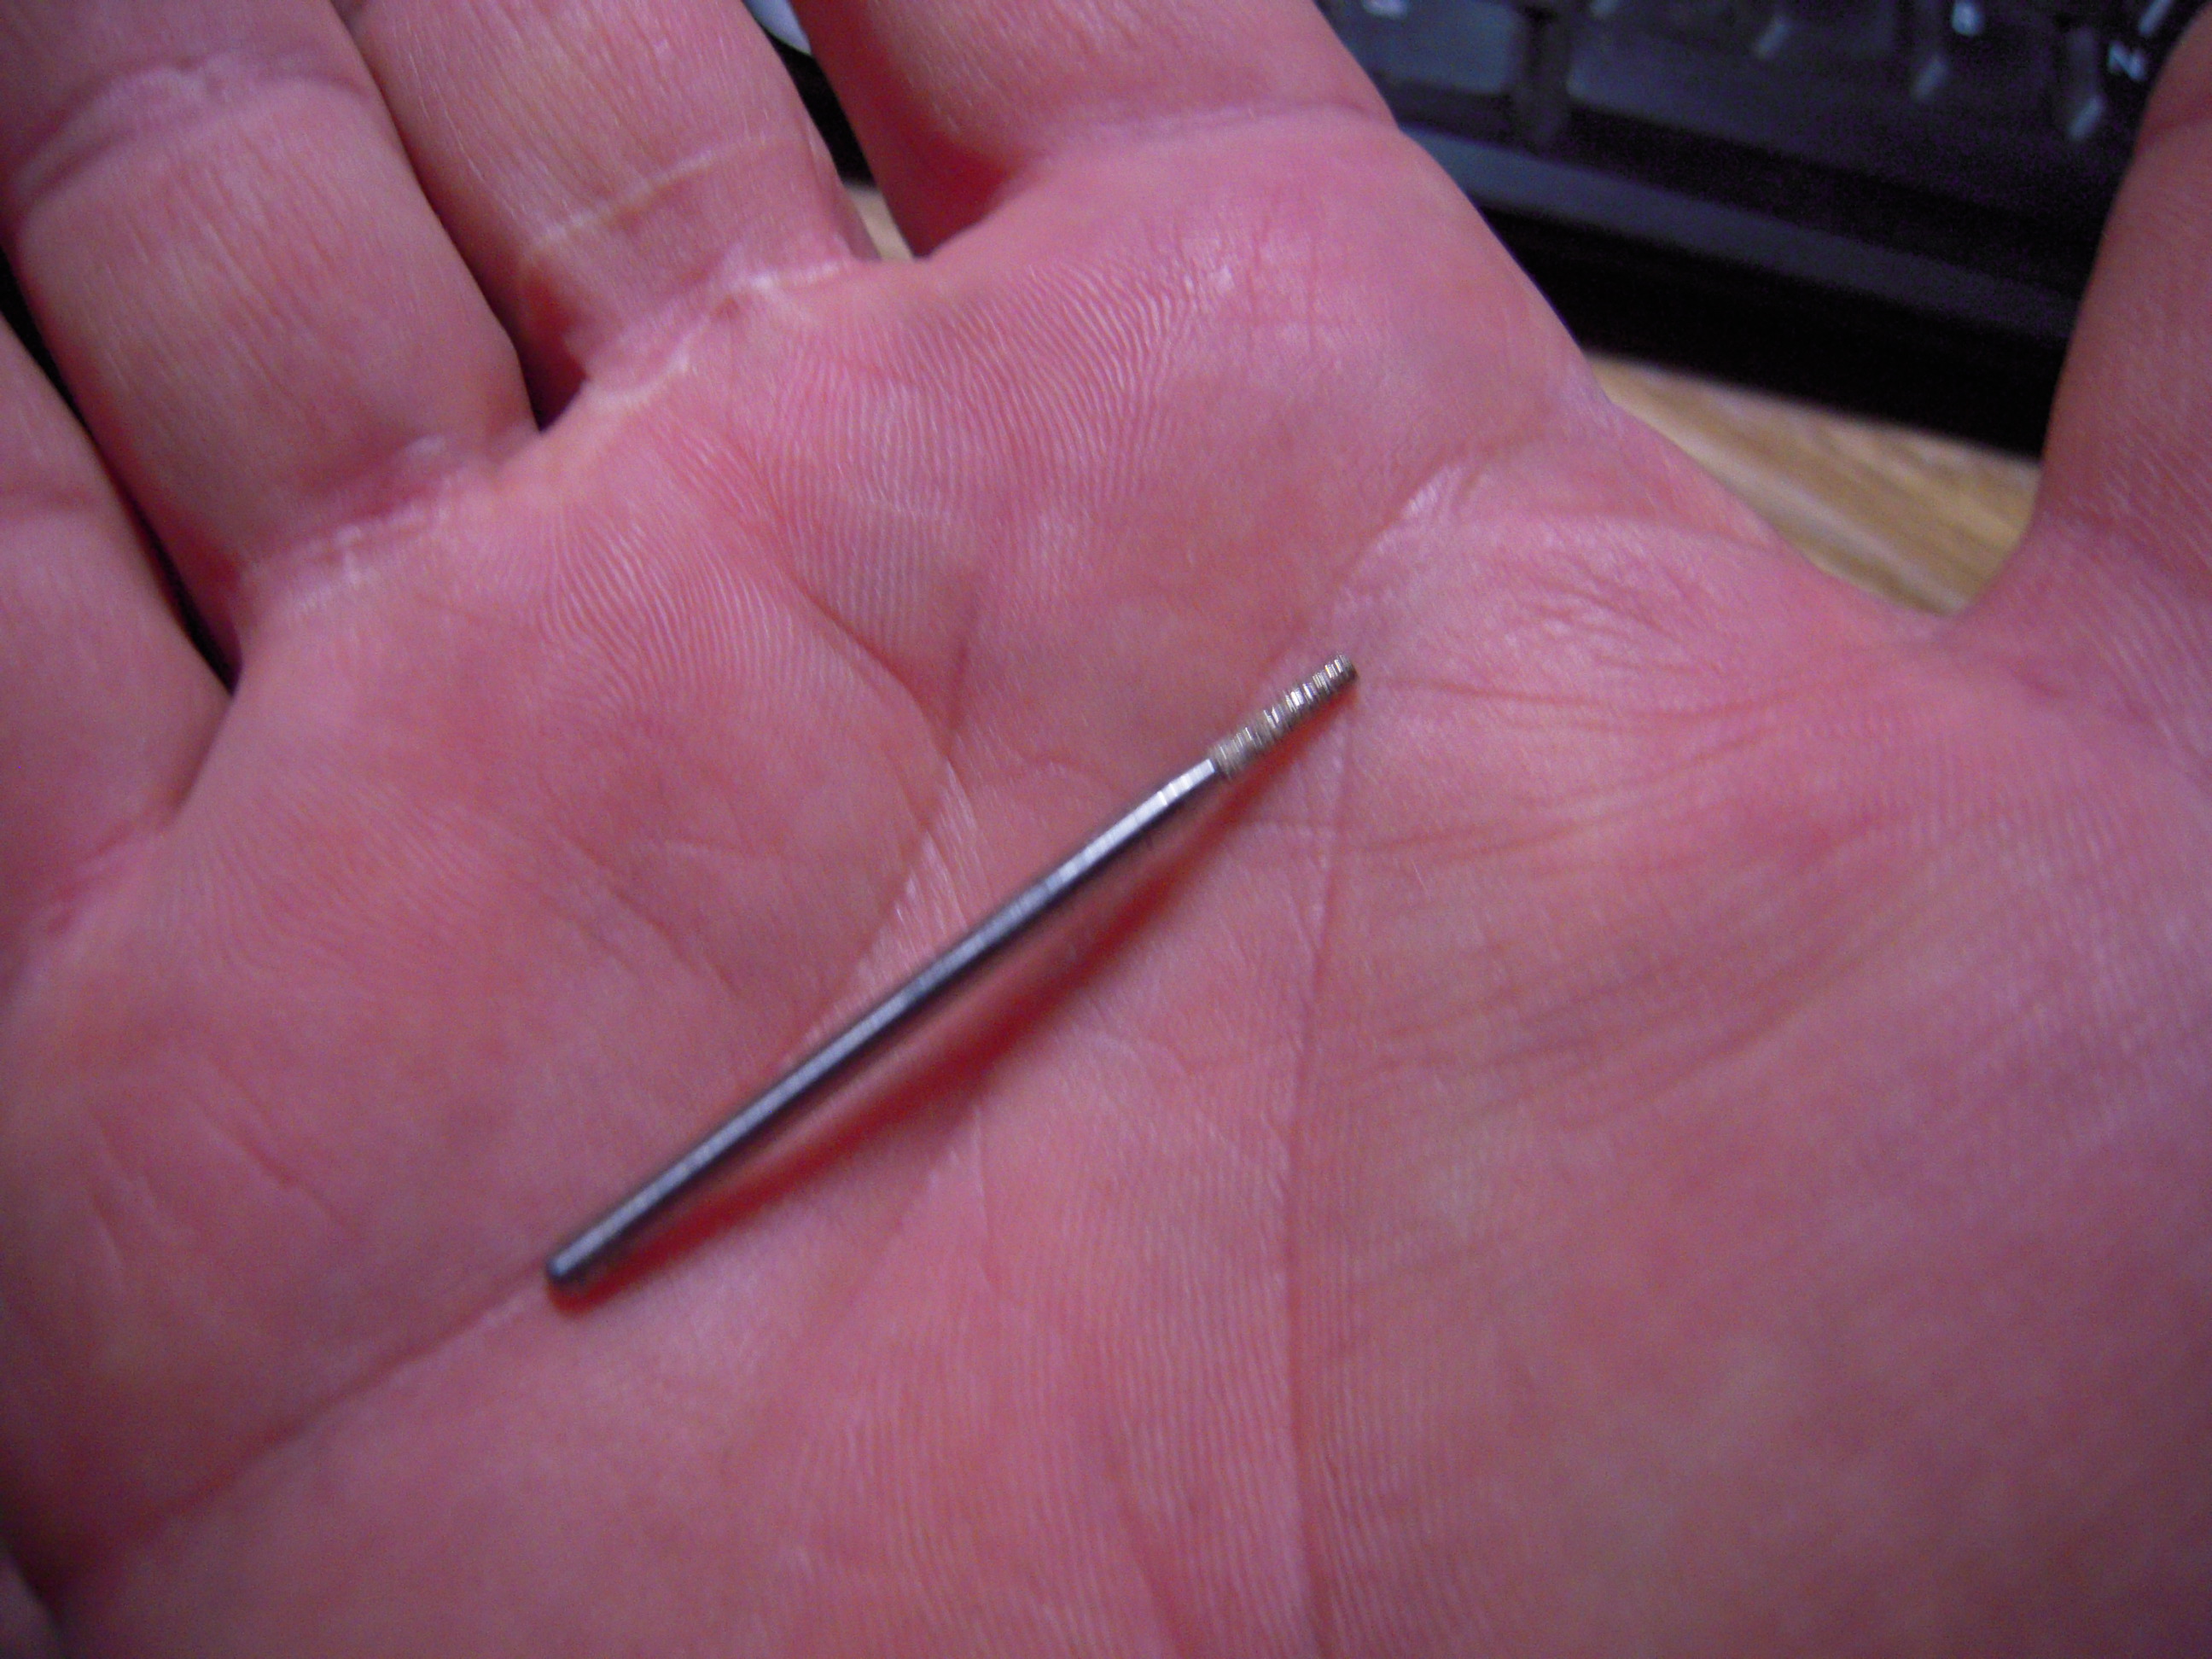
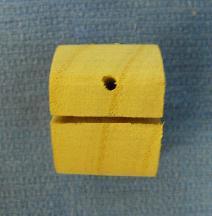
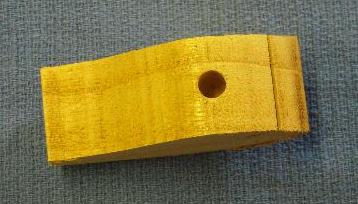
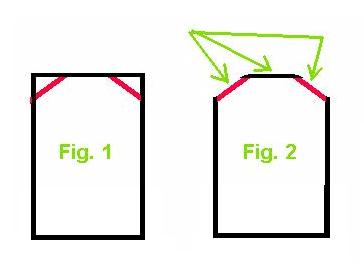
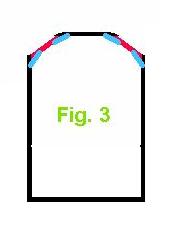
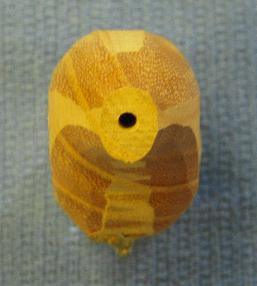
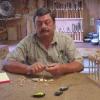
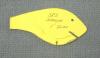
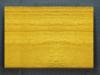
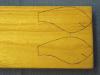
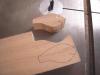
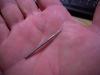
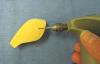
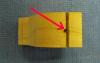
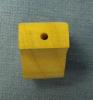
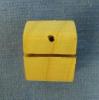
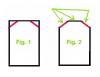
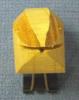
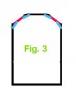
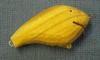
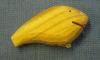
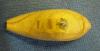
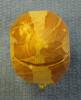
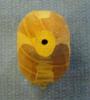
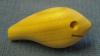
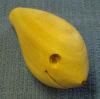
HAND CARVING YOUR OWN FISHING LURES Do you have an idea for a “new and improved” lure or an oldlure that’s not available anymore? Or would you just like to copy another lureand make some modifications to it? That’s not a problem any longer. I'm going toshow you in the following steps how to hand carve your own custom lures. If you follow the steps below, you'll find outthat it's really not a hard thing to do and you can step away from repaintingother people’s lures. I’ll start by selecting a pattern for my lure. This can be apattern that somebody else has drawn up or I can create my own pattern. I usecardboard for my lure patterns. I then write on my pattern any informationabout that lure such as: location of hook hangers, location and amount ofweight for the lure, thickness of the lure, eye placement, lip angle and type,and any other pertinent information. That way the information is always handy.I also cut the lip slot into the pattern. Select the wood that you want to use to carve your crankbaitout of. Here, I'm using Paulownia. I have several boards that I have planned tospecific thicknesses. You can also use a block of wood and after you cut outthe profile of your lure, you can just cut the lures off at the thickness thatyou want. There are other various woods that can be used including basswood,balsa, and poplar. The choice is up to you. I’ll trace my pattern onto the wood making sure that I markthe location for the eyes and for the lip slot. I also want to make sure thatthe grain of the wood runs the length of the lure and NOT from top to bottom.This will ensure that the lure has structural integrity. Once I've completed that, I’ll take the wood over to theband saw and cut out the profile of the lure. At the same time, I’ll cut thelip slot. Before I cut out the lure I will check and see that the table of theband saw is 90-degrees to the band saw blade. This ensures that the lip slot will beperpendicular to the lure. If I wait until after I carve the lure, it's hard tocut the lip slot and get it right. Using a small 1/16-inch drill bit, I’ll drill a guide holefor the placement of the eyes. NOTE: This is optional. I do it to give me areference point to countersink my eye sockets. In this step I will widen the lip slot. For that I use a1/16-inch diameter diamond grinding bit. I like to use one that has a 1/16-inchshaft. That way I can get deeper intothe lip slot. This bit will follow the already cut lip slot almostperfectly. Be sure to widen the lip slot before you do the tapers on your lureas the bit will sometimes tear out a small chuck of wood as it exits the lipslot. After I widen the lip slot, I then hollow out a smallchannel at the bottom of the lip slot that will allow me to insert the back endof the line tie if the line tie is in the lip. Next, I'll go ahead and drill the holes for the rear hookhanger and line tie (if the lure’s line tie is not going to be in the lip). I willalso drill a hole to accept the belly weight. The next step is to taper the nose on both sides and thentaper the tail. I can do this taper either by carving the taper with a goodcarving knife or I can sand the tapers on a belt sander. I’ll try to keep thesetapers as symmetrical as I can. You can see in the picture that the nose istapered about a quarter of the way back from the nose and the tail is taperedfrom about midway of the body to the tail. This taper may vary depending a loton the type of lure that you're making. Now I’m ready to start carving the lure. I will start bycarving the shoulders on either side of the back as in Fig. 1 above. I willcarve until the widest point on both sides is about the same width as what I'veleft across the back. I want those threeplanes to be basically the same width. You'll see what I'm talking about in Fig2 above. Once I get those flat planes carved on the shoulders I will roll thelure over and do the same thing on the belly. I originally started with four corners on the lure. Now thatI have carved those corners off, I have eight corners. Carve those corners offand that will basically round the edges of the lure for you. For you guys thatare carving musky lures or large swimbaits you will wind up with sixteen corners.Just carve them off like I did the eight corners. That should be enough tofinish the rounding of your larger lures. After I carve the lure I glue in the belly weight, the rearhook hanger, and the line tie, if there is one. My carving is now done. I’m going to sand the lure. I liketo use the fingernail sanding sticks that you find in the beauty department ofyour local shopping center. The ones at Wal-Mart are 100-grit on one side and150-grit on the other side. I use these because they tend to round the lurebetter than just sandpaper. Sandpaper tends to follow all of the contours ofthe lure and doesn’t give me that good rounded finish that I want. It’s just myway. Your way may work better for you. After I have finished sanding the lure Iwill sand the lure again with some 220/240-git sandpaper to give me a finalfinish. I give the lure a final inspection to ensure that I have allof my tapers symmetrical, all of my knife marks are sanded out, and the lurehas a general overall good appearance. My lure is now ready for a couple of coats of sealer. A few final notes: keep your knife sharp, take your time,and always check and make sure that you keep both sides symmetrical. I hope that you’ll give this a try. One you create your ownlure that swims like you want it to, there will be no holding you back. Good luck and I hope this helps. Gene Graham aka “Lincoya”


 1 point
 -
Thank you all ! My name is Chris Graham ! I live n Charlottesville Va ! I am 46 years old have two kids! My son will be graduating from college this year and my daughter is freshman in college! Ha....can you say highway steak for me and my wife! I have worked at Lowes for 23 years ! I started pouring my own jigs and painting crankbaits to try and gain any advantage I could tournament fishing ! It just seemed like everyone wants to look in the boat! Flattering I guess ! So, I felt the need to come up with something that couldn't be bought at the local sporting good stores ! I hope no one takes offense to that ! This forum has helped me get through the winter months and I wake up daily to check the site! Everyone of you have shared ideas,trials and tribulations that have helped me in posts in the forum! I have shared to those who have asked and will continue to! Thank you all again!1 point
-
Looks beautiful , ...but the low temps disturb the curing of my epoxy topcoats ! Greetz , diemai1 point
-
Very interesting thread to me , as English is not my first language . May not quite fit in here , but here's a little one from across the Great Pond , yet still related to a famous and great American actor , ......read about it in a local paper . Some years ago Mr. Morgan Freeman came over to a visit to Hamburg/northern Germany . He said , that immediately that he stepped on German ground , he became quite irritated , because many people around him seemed to call him by his surname , he was quite confused and always turned and looked around whether someone was talking to him . It took him a little while to find out , that people around were not calling him , but just greeting one another saying the German term "Morgen" , which is short for "Guten Morgen" , .......just like in America you'd use the short "morn" for "good morning" , .......the spoken German word sounds exactly the same like Mr. Freeman's surname . Greetz , diemai1 point
-
I agree with what Woodie says except for the fact that wire thru IMO is not necessary for all baits regardless of wood used except for perhaps for balsa (which you shouldn't be using in the first place for musky) .092 screw eyes anchored properly will never fail. I got some pretty good tips here on TU in fact. I can see thru wire on jointed crankbaits where both halves connect though. It's the only place where I would see it beneficial as screw eyes will loosen but again, not necessarily fail. I personally don't do wire thru as I can't justify all that extra work especially when the screw eye method hasn't failed me yet. Something else will fail before the screw eyes do. I am currently experimenting with a different hook hanger for cedar that should prove stronger than screw eyes and thru wire, gotta apease the nay sayers who really have no clue about lure buiding you know! As for woods, maple, oaks, cedars, mahoganey are my favorites. s561 point
-
Husky, Mike P here. I love this forum. The sharing of ideas here is equaled by none. I've been building since the 60's which corresponds with my age! I started with jigs as I had a stubborn habit of trying to yank stripers out of the rocks and store boughts, even in those days, got expensive. I was one of the first in my neck of the woods to go to soft plastics. I have a penchant for molding baits and have had great success with my foamies and now my Resin castings. I started making poppers and then swimmers and I have to say, nothing beats catching on home mades when others are getting skunked. Tight Lines1 point
-
Just Kidding Hazmail.. I always like your post bud... Matt 36 live in CONCORD, NC.. I feel as if Im a giver in life and a taker of advice. However all the advice I took was given to me by some great people! Thanks TU!! you guys are the best. If you would like to ask me something I dont mind to give you my opinion or advice or a tip or two I have learned.. if I dont know the answer.. I got Dean's PHONE NUMBER!!! we can call him and bug the crap out of him at 4am!!! if his not up.. we will call FAT!!!1 point
-
Blackjack, not sure if this was the response that you had in mind for this thread, but it has the makings for a very interesting read. I do understand your message and agree. My name is Dave, I’m 51, bald and constructed from 200lbs of relaxed muscle. I am a design engineer, I solve problems for a living. I am a hobby inventor and find that lure design fits in with my life’s experiences perfectly. I love fishing but very rarely get the chance these days, work is severely interfering with my quality of life. I am new to lure design, but I have been involved with fly tying and rod building in the days before my eyes and body started to fall apart. You too may be new to lure design but you are not a ‘newby’, a term I despise with a passion, I vote that it be removed from the TU vocabulary. Everyone has life experiences to draw on, use them, apply them to this craft, join in and contribute. What is good about TU? A world wide collection of like minded addicts, from rank amateurs to life long professionals, all hungry to learn more and share to further the art of lure design. TU is all consuming, first thing in the morning, lunch break and last thing at night, the posts get checked. I have made many good friends, none of which I have ever met, one day I hope to remedy that situation. What is bad about TU? I hate those patronizing, condescending, negative responses that seem to come my way on those oh! too frequent occasions when I get it wrong. Also, when ever a large group of people join together in a club like TU, cliques are inevitable. Normally harmless and invisible, but occasionally they do interfere with the harmony of the group and the progression of the art. The good points out weigh the bad by far and then some. I am here to stay and hope one day to call myself a professional lure designer. Thanks TU, you feed my mind.1 point