Leaderboard


Popular Content
Showing content with the highest reputation on 06/05/2015 in all areas
-
Yeah I have to give credit to JRHopkins. I tried this method after purchasing his DVD a while back. Really good resource for anyone starting out making pvc swimbaits. Like anything with bait making you can follow other builders advice and then adapt your approach based on what works for you and the materials you have on hand.2 points
-
Here's a cheap and easy way to make 3D fish eyes for larger lures (I make Muskie lures, so they work out nicely). I got a box of 300 thumbtacks from the dollar store. I had some Mod Podge Gloss craft decoupage already around the house, but I think I picked up 32 oz of that at the craft store for $12.00 (32oz will last just about forever if this is all you use it for). I had some black vinyl stickers available (the leftover stickers I used to put the # on the side of my boat). I stuck the thumb tacks into a piece of foam. Used a standard paper hole punch to punch out a bunch of holes that turned out to be just about the right size. Since these were vinyl stickers, I only had to peel and stick them to the center of the thumb tacks. I've not tried it yet, but I bet you could do the same thing with black paper and a little glue. I then used a craft paint brush and dipped it into the Mod Podge and dabbed a little on each of the thumb tacks (I ended up using a paint brush made of something resembling hair, the cheap ones you get with the plastic bristles kept wanting to leave bubbles in the Mod Podge). The Mod Podge is white, but it dries crystal clear. I didn't want the finish to crack because I put too much on at a time, so each eye has three coats of Mod Podge with quite a bit of dry time between coatings (I just wait until it turns completely clear, then I know it's dry enough for another coat). The third coat of Mod Podge I put on pretty heavily, it was almost ready to drip off the brush before I touched it to the eye. I swirled the paint brush around a little on this last coat so the Mod Podge was reaching all the edges and bubbled up nicely for that 3D effect using the surface tension of the liquid (make sure all of your tacks are very level in the foam or some of your eyes might be lopsided since the Mod Podge is pretty thin). This final coat took 2 days before it was clear. The Mod Podge is some type of hardening rubber, I believe, so I plan to stick these in my bait and then top coat the entire lure with concrete sealer to give the eyes a bit of a harder finish. I've not tried this last part yet, so I'm not sure if the Mod Podge will react or not. If it does, I'll just put the eyes on after the lure finish coat.

 2 points
 -
I know a lot of you in the Plastic Forum would want to know that Ron "Bojon" Kochevar passed away yesterday (Wed 3/5/14). He has not been active on the forum for some time due to health problems. His Daughter In Law sent me an E Mail this AM to inform me of it. He made a big contribution to the makeing of Tubes. I know he helped a lot of You guys and has had an influance on others .. We will miss him Jim C.1 point
-
For a swimbait that size, I use .072 X 7/8" screw eyes, and they hold in PVC just fine. They should work for resin, too. I've tested that size screw eye, and 30lb. test line will break before the screw eye fails. I predill a pilot hole, run the screw eye in and then back out again, to cut threads into the pilot hole, coat the screw eye with gap filling crazy glue, and then run it back in. The excess glue that accumulates at the base of the screw eye makes a seat that locks the eye, and keeps in from twisting. Lately, I've been using Spro swivels for my line ties, # 8 for cranks (50lb), and #6 or #4 for swimbaits, and they don't fail. Having a swivel on the treble keeps the fish from using the weight of the swimbait to twist the hook out. I put a small piece of spinnerbait wire through the hidden loop of the swivel, from side to side, to insure it can't pull out. I've found several things that work for me with my jointed swimbaits. First, I use a 2/1/1/1 ratio for my four piece baits. The longer first section/head keeps it more stable. Second, I use a V profile for my bodies, tapering up from 1/2"+ at the belly to 7/8" at the shoulders, with flat sides. That removes more of the buoyant material from the belly, making it naturally less likely to roll. I can burn a bait back in, and it won't roll. Last, I keep my ballast as low as possible, and keep it as forward as possible. If I can put the ballast I need in the first section alone, I do, and only add it to the next sections if I can't get enough ballast in the head to get the action/fall rate I want. I never weight the last/tail section. That way, the tail is always more buoyant, and the bait swims level on even a slow retrieve.1 point
-
I have been trying to email "bojon". I am interested in getting his dvd. has anyone spoken to him or know where i can buy his video?1 point
-
I always make a negative of any mold I make (soft negative to a hard mold, hard negative to a soft mold). You can then very easily replicate the mold for higher production or for back-UPS.1 point
-
Years ago, when it first came out, a friend who was a medic in Vietnam said they used it to hold ruptured organs together in their trauma treatments, because there was no way to do sutures. I use it all the time to close cuts. But I never use the accelerant to speed it up. That will cause bad burns from the chemical reaction. Been there, done that. But the fumes are nasty, whatever they are. They raise hell with my sinuses I do my super gluing with a fan behind me, and the big door to my garage open, or outside completely, if possible.1 point
-
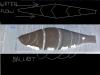
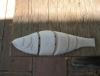
PVC jointed bait with through wire. 1. form wire 2. heat wire and place in position 3. immediately slap the two halves together and hold until wire cools the two halves will remain together until you separate them. utility knife works good.
 1 point