Leaderboard


Popular Content
Showing content with the highest reputation on 05/16/2017 in all areas
-
There is no finish regimen for crankbaits that is not a "witch's brew" of coatings from different manufacturers, so we mix and match trying to find a regimen that is compatible and in which all the coatings will harden and lay flat on the lure. The simplest I know is to undercoat with slow cure epoxy, lightly sand to promote paint adhesion, paint the lure, then topcoat with the same epoxy. Since epoxy does not contain any reactive solvents and is chemically inert after curing, it is a good choice. Not knowing precisely what coatings you are trying to use and not having tried them ourselves , we cannot really say why you are having problems except to say that different solvent based coatings can react with one another to cause each other to fail to harden, or to bubble, etc. As a first step, I'd lose the primer and paint directly onto the lightly sanded sealer with acrylic latex, then topcoat. If you still have the problem, your sealer and topcoat are incompatible.3 points
-
It was a simple mistake on my part. I simply did not have it tight enough to seal. When I tightened it up I couldn't smell not one fume.2 points
-
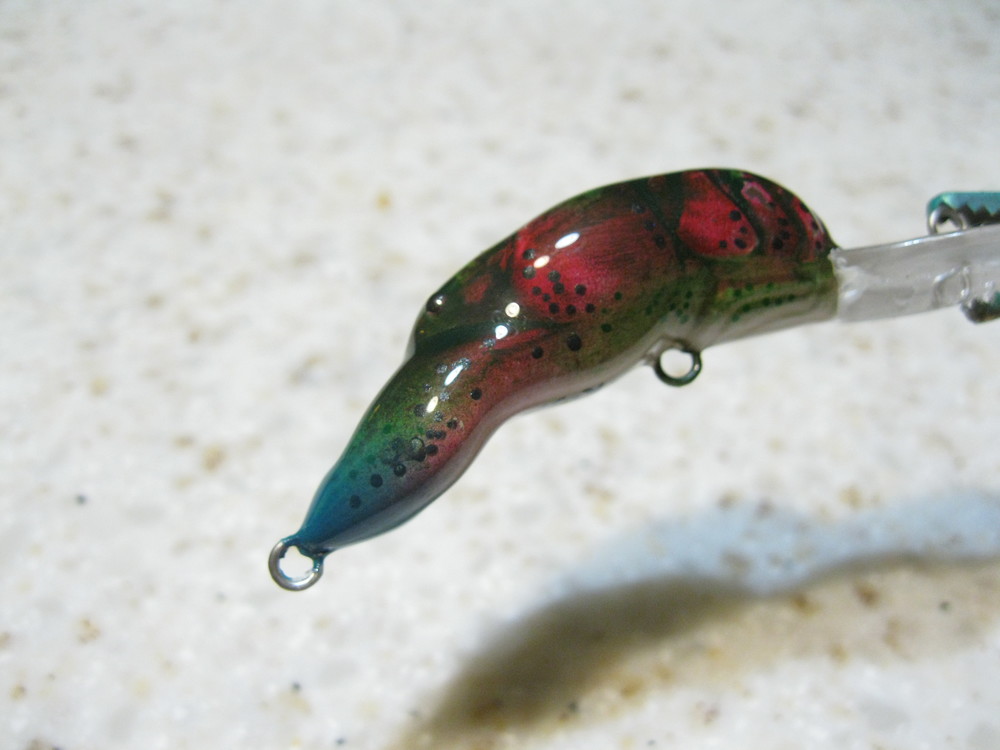
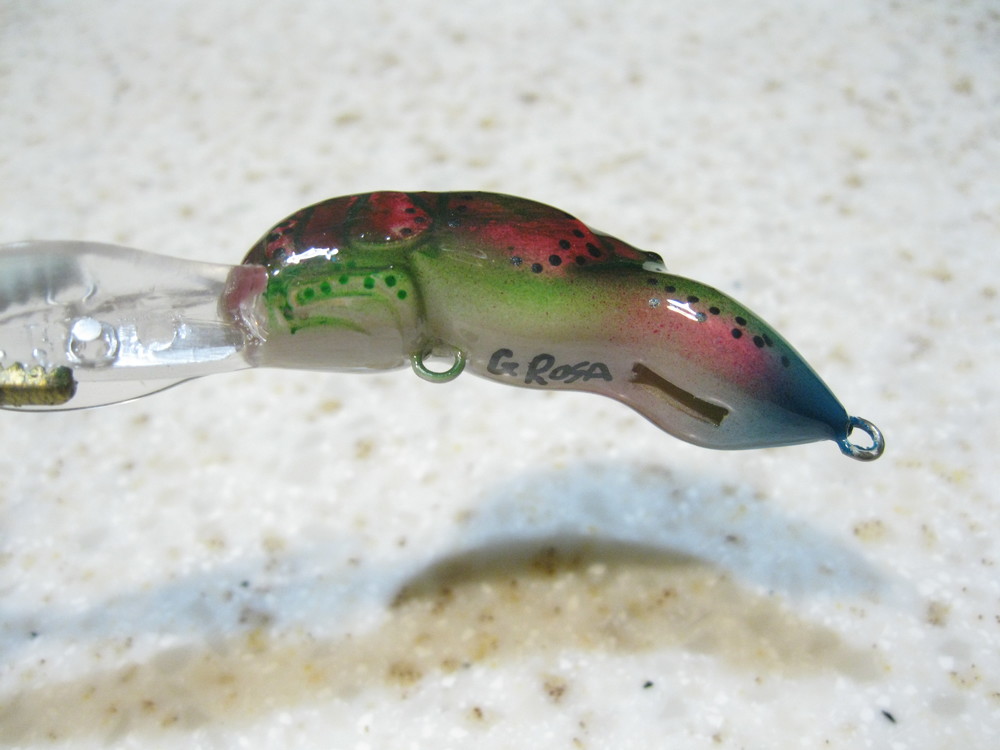
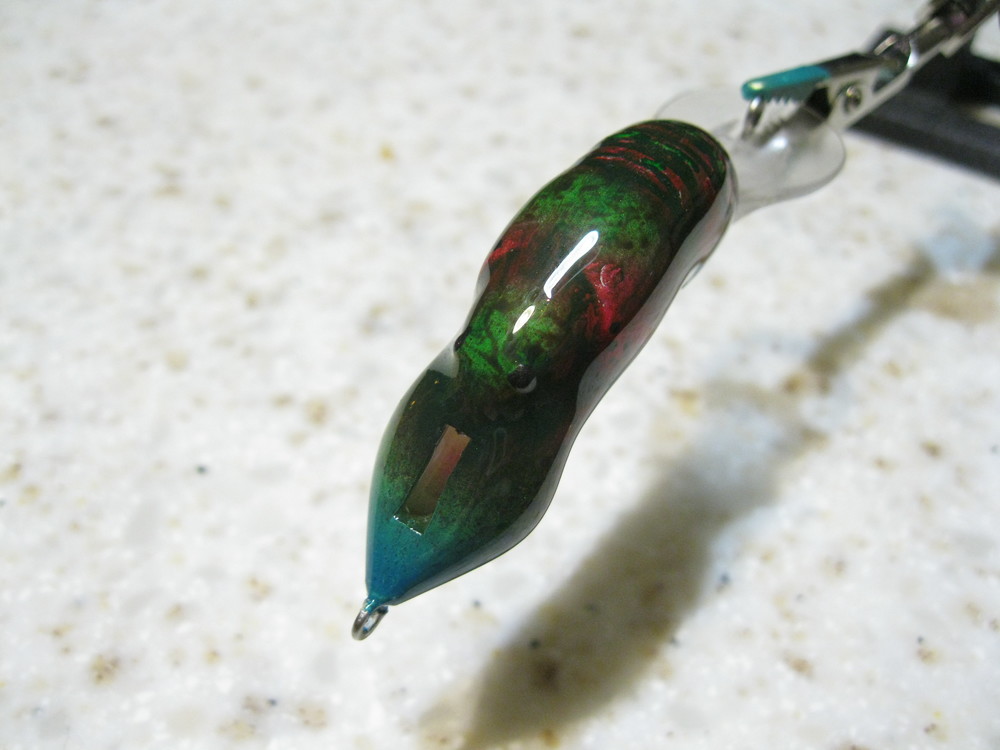
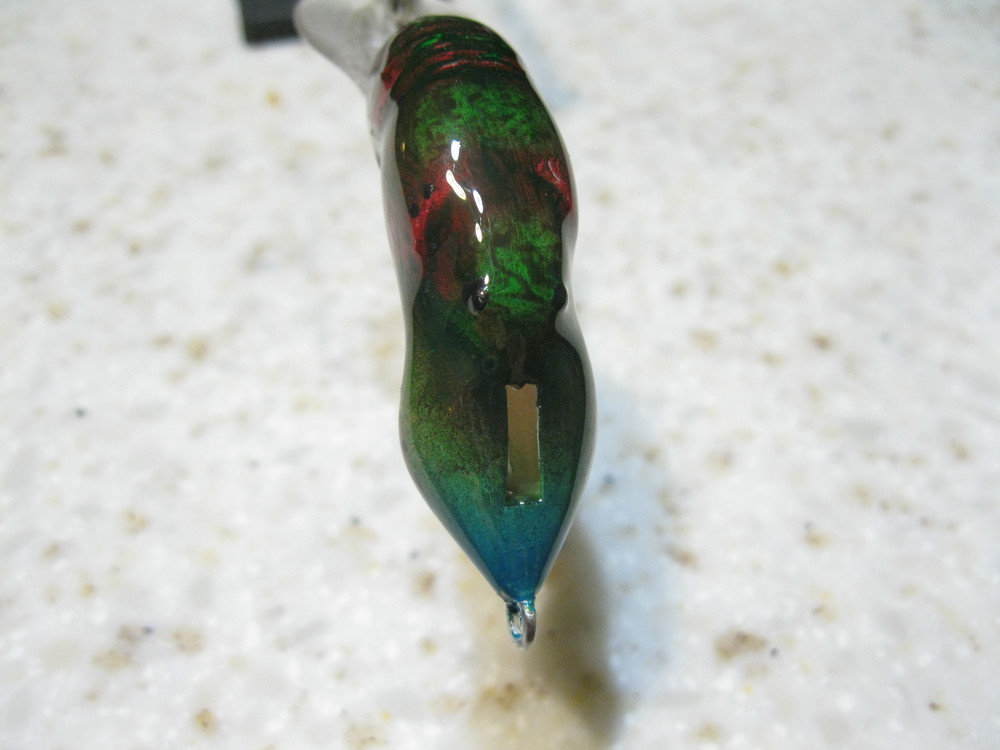
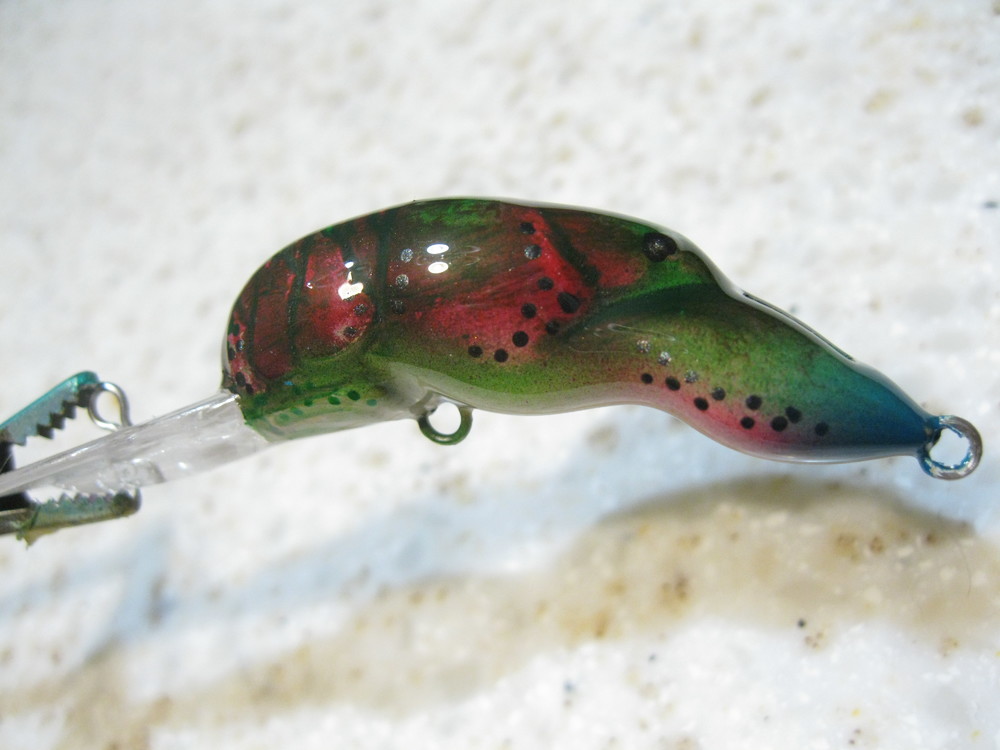
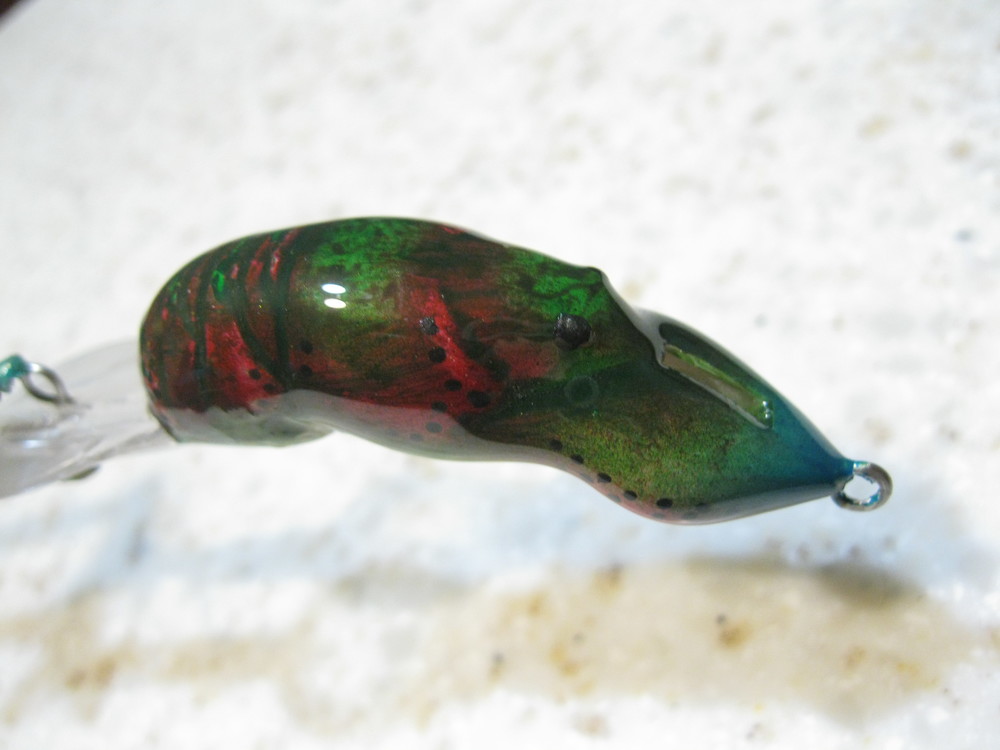
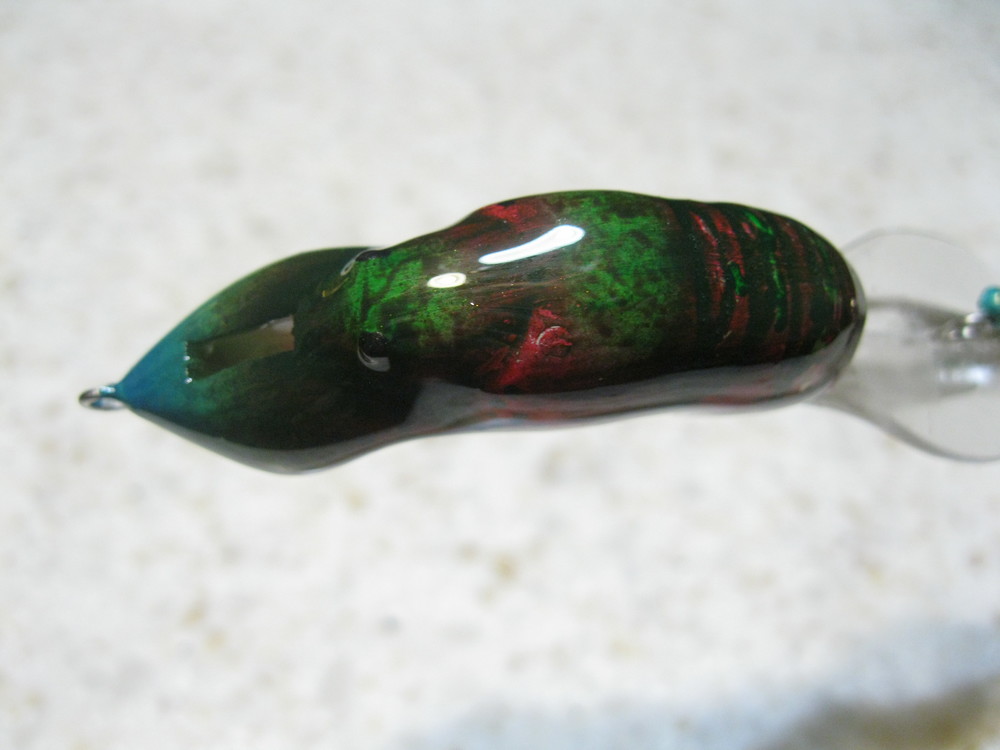
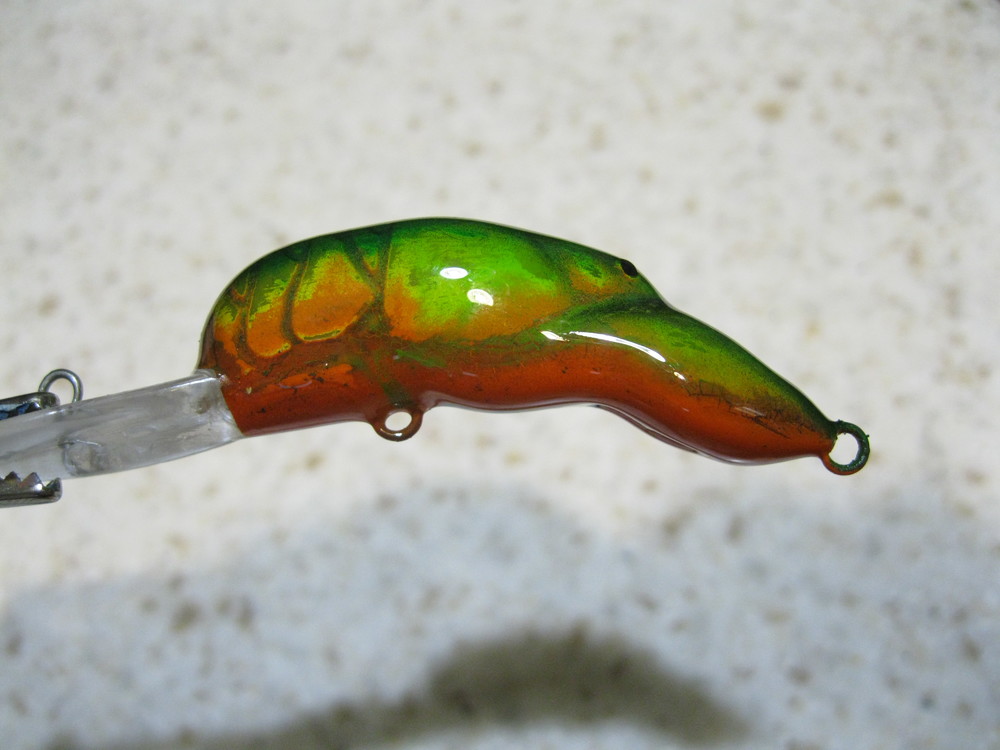
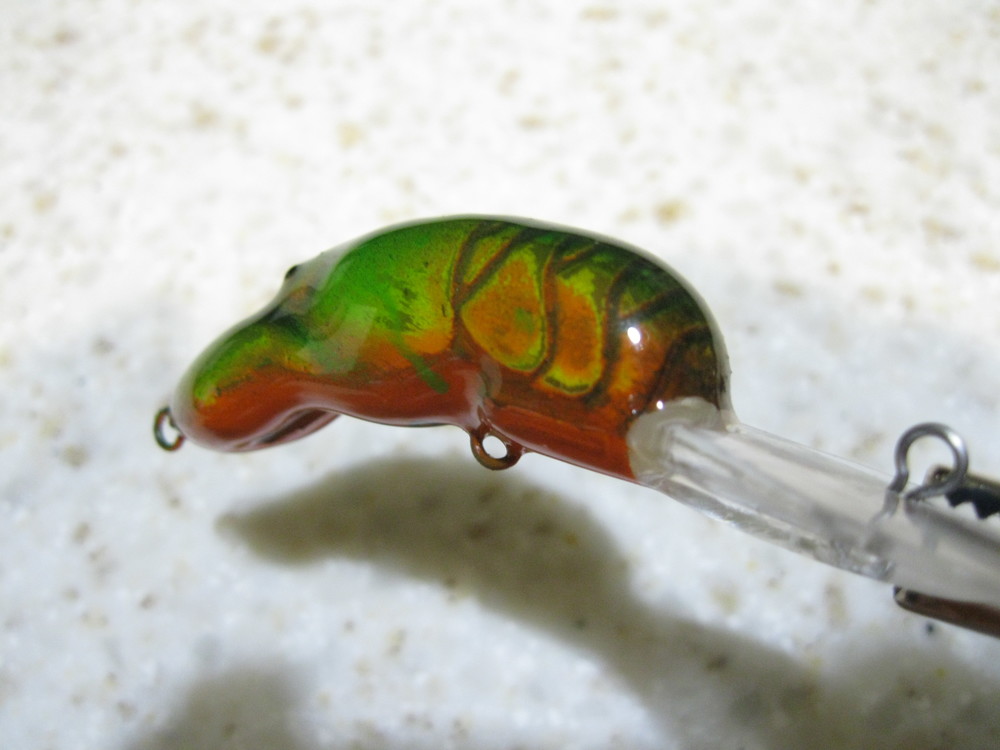
Here is a crawdad I painted by wiping off the paint. I painted the blank base white and heat set. then I painted it pearl lime, heat set then I put some Windex on a paper towel and wiped off certain spots so it gets to the layer before it.Then I sprayed transparent red and wiped off certain spots. Then cranberry and wiped off certain spots, heat setting in between colors. then on top I dabbed black with a paper towel and wiped some off. Painted the claw tips blue and added the black spots with a Sharpe and clear coated. The last two pictures show the same technique with lighter colors.

 1 point
 -
Bear is dealing with some health issues. Prayers to him and his family. I ordered a few mold and didn't realize he was sick until I went back to his home page. Yall pray for him..1 point
-
Spike it.1 point
-
Correct, You have an e-mail from me.1 point
-
Baz--I think you may be starting at the wrong end of the process ?? Get the required amount your medium (I'm assuming it's water based) and add DISTILLED water until your medium is close to thickness you want for spraying, then add green pigment (or paint ) and mix in until you get the color you like--you may need to test this at stages, simply take samples and dry them (with a heat gun) to get the color intensity you want--thin again to desired viscosity for your brush and spray away. It's the same with any medium for C/Colors, add the color to the medium, NOT the medium to the color, this makes the colors semi opaque or ''clear''. Pete1 point
-
Thanks, Ted. All my molds are sprayed with drop-out, but that is a good reminder to recount them from time to time. I us the 20 lb (green) furnace bought from a ammo making site - can't recall name but I have it cranked to 900. It appears that I will need to make my own wires that wrap over the hook in order to get the durability I'm seeking. We took about 40 of these baits to El Salto in Mexico recently and were using the 3/4 & 1 oz baits in lieu of 8XD crank baits for deep fish. The big girls loved them with a size 4 willow blade but they were hard on the baits., tearing out most of the wires. We did catch some 8-9 lb Bass, though the 3 & 4 lb fish did most of the damage. Currently 50/50 use of soft & ant-lead is working if I keep the mold VERY hot, but am now bending my own wires, .042 stainless from McMaster Carr with Boggs wire bender for the loop. I haven't field tested them yet but hope to soon.1 point
-
If this is your first, it is always good to pursue because you will learn so much. The profile is not especially new so I see nothing there that will cause a problem. The issue may be that you say turn with a lathe. That makes the cross section always round. The top version, with the diving lip, will be harder to get enough ballast low enough in that round shape to make it stable, but, it is doable. Again, I see nothing new or especially unique about it so go for it and see what you can learn. The bottom version is just like a 100 other surface and subsurface slap and glide baits already on the market, so properly shaped, and ballasted, I see no issues. Jump into it and see what you can come up with. You never know where it will lead you.1 point
-
I got a 64 cavity that pulls the rods out for you automated. No hand tubes yet tho.1 point
-
George Castanza's counter-clockwise swirl apparently works really well.1 point
-
Yes, MCU seems pretty expensive even with the discount provided to TU'ers by Dick Nite. I haven't done the math but I think the price is competitive with epoxies like Devcon Two Ton when you take into account that the MCU is a much thinner coating and you get more baits out of whatever volume of finish you buy. Remember that Dick Nite is custom formulated for application on metal lures, specifically the spoons that are Dick Nite's main business. You found the same thing I did, that epoxy really isn't a good topcoat for metal lures since it is too thick and heavy, plus it tends to easily wear off quickly from any sharp edge. It also may yellow over time. IMO, MCU is definitely the best product to use on metal lures. I also use it on plastic lures with no problems. If you use the "tap the can" storage method, that avoids the problem of MCU going off in the container.1 point
-
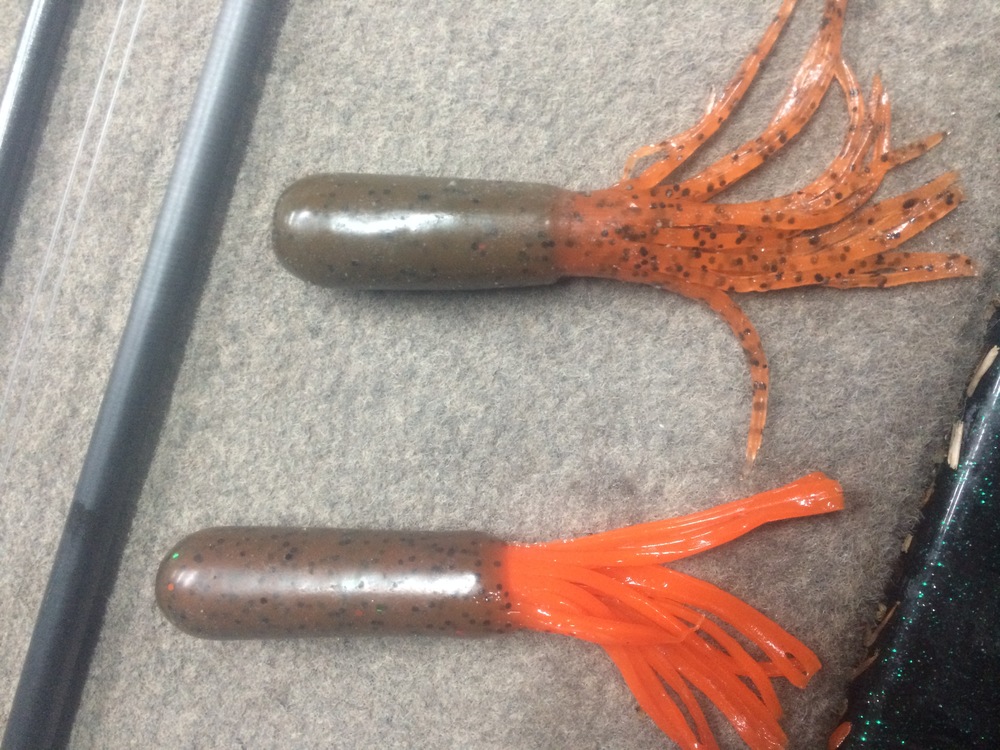
I have an angling ai injection 4" double dipper tube mold & it is an excellent mold. You have to cut the tails by hand, but i made a beefed up version of lurecrafts press & attached their deluxe plastic cutter to it to make it easier on my shoulder. As far as the mold goes it is top notch. I have to let it cool every now & then because i get on a roll & get it hot sometimes. lol I ordered an extra set of rods for it & you can actually roll them out pretty quickly, but i think i'm going to order 3 more sets for a total of 25 so i can put out more in a relatively short time. I have been injecting tubes in the colors i want the tails to be & then hand dipping for 2 color tubes too & they come out good as well dipping them to the line the mold leaves. Heres a couple pics. The first one injected & then hand dipped & the second is straight out of the mold & the tails are cut with my press.
 1 point
 -
I agree with Bob, something doesn't make sense. Assuming A &B were of equal parts and they were mixed correctly. Most likely it was applied to heavy and temp was too cold to flow properly. From Data Sheet: For best results, coat at temperatures between 70° F and 80° F1 point
-
If the turner works at 6 rpm you shouldn't have had any problem with the epoxy regardless of the orientation of the lure while rotating. That speed should have kept the epoxy in situ. Are you sure the epoxy did not pool to one side of the lure before you put it on the turner? Did you apply a heavy coat, maybe too heavy, before turning the lure? Something just doesn't seem right with the scenario to me. If you applied the epoxy immediately after mixing it versus waiting for it to gel for 10-15 mins, it may have remained liquid long enough to migrate.1 point