Leaderboard


Popular Content
Showing content with the highest reputation on 01/14/2019 in all areas
-
With small lures, members discovered that very thin fiber/circuit board lips were more effective than thicker Lexan lips in creating waggle action. The thinner the lip, the better the action. The reason for this has not been discussed much, if at all. It is all about the sharp edge. Water can flow around a round object with minimum 'peeling off' of the flow, thus minimum disturbance of the water. Conversely, flow cannot negotiate a sharp corner; it cannot change direction that quickly. This causes a low pressure area behind the edge of the lip. Water gets sucked back into this low pressure area and thus the vortex is born. At very slow speeds, the shape of the water flow is symmetrical, the same both sides of the lure. But, as the lure speed increases, a certain speed is reached were the vortices start to interact. There is not enough room for the vortices to exist independently so they take turns. The vortices start to alternate, forming one side then the other. This effect is called ‘vortex shedding’, a ‘vortex street’ or ‘Kármán vortex street’. This alternating vortex is the engine that drives the lure, causing the desirable ‘waggle’ or action of the lure. This also explains why a lure has a minimum speed before the action starts. The sharper the edge is, the stronger the low pressure area, the stronger the vortex and therefore the stronger the action. Larger lures in the range of 8” and larger will require a thicker lip in order to survive bouncing off rocks with all that body weight behind. But the thicker lip is not going to produce as much action as the knife edge lip of the 3” lure. The solution is to cut a chamfer behind the lip face. This reintroduces the knife edge and improves the vortex strength and thus the action. Another way to improve action is to make the face of the lip concave. This causes pressure to build up in front of the lip which further increases the strength of the vortex. Here is a video that shows vortex shedding, and the start transition explaining the minimum speed. Dave1 point
-
1 point
-
1 point
-
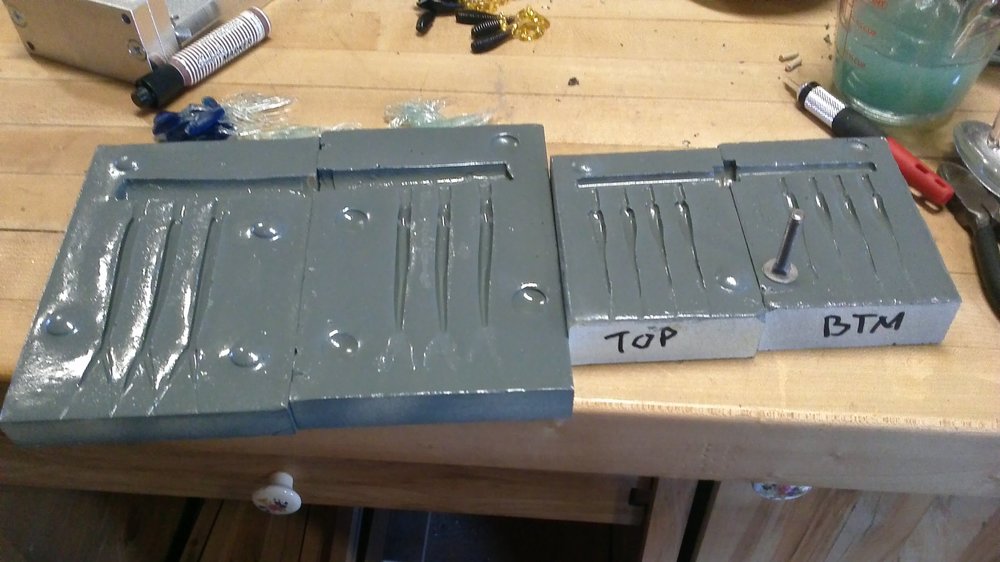
Look about five threads down. Making a mold. One of the best mold making threads I’ve seen. Very nice tutorial.1 point
-
So spinnerbait and most jigheads made of tungsten in two parts like the two halves of a through wire crankbait. The hooks and wire are then added and like you said they somehow fuse them together. The Keitech ones are different as they are a mixture of powdered tungsten with epoxy. If you hold a Keitech head they feel plastic instead of metal. I know they are not a solid piece of metal as I have chipped chunks out of them hitting pilings. Allen1 point
-
free image host So, to not hijack the titanium wire thread anymore I figured I would start another thread on tungsten. Here is a pic of a tungsten shakeyhead that I made using sithered tungsten powder and epoxy with some Lure Craft GP for the GP color. Tried to duplicate the Keitech jigheads but I cannot get the density correct. Allen1 point
-
sold sorry1 point
-
Thank You both. I use my pancake for airbrushing so I can dial down pretty well, but I'm seeing that aquarium pumps aren't too costly so I'll probably go that route. I'm actually going to remove a lot of the wire in order to use them as chatterbaits so that shouldn't be a problem. Another question....if I want to add or paint eyes, when in the process should that happen, assuming I'm going to bake the finish. Thank again.1 point
-
See if your local auto shop will let you in on their clearcoat, or see if they will throw a few lures in on their next clearcoat run.1 point
-
Hard to powder paint spinnerbaits in a fluid bed. You can use the brush tap method with good results, powder paint airbrush, or regular airbrush. Hook and wire get in the way. You can use your pancake compressor but may have to add a low pressure regulator before your fluid bed. Depends on how much control you get with the regulator that’s on it.1 point
-
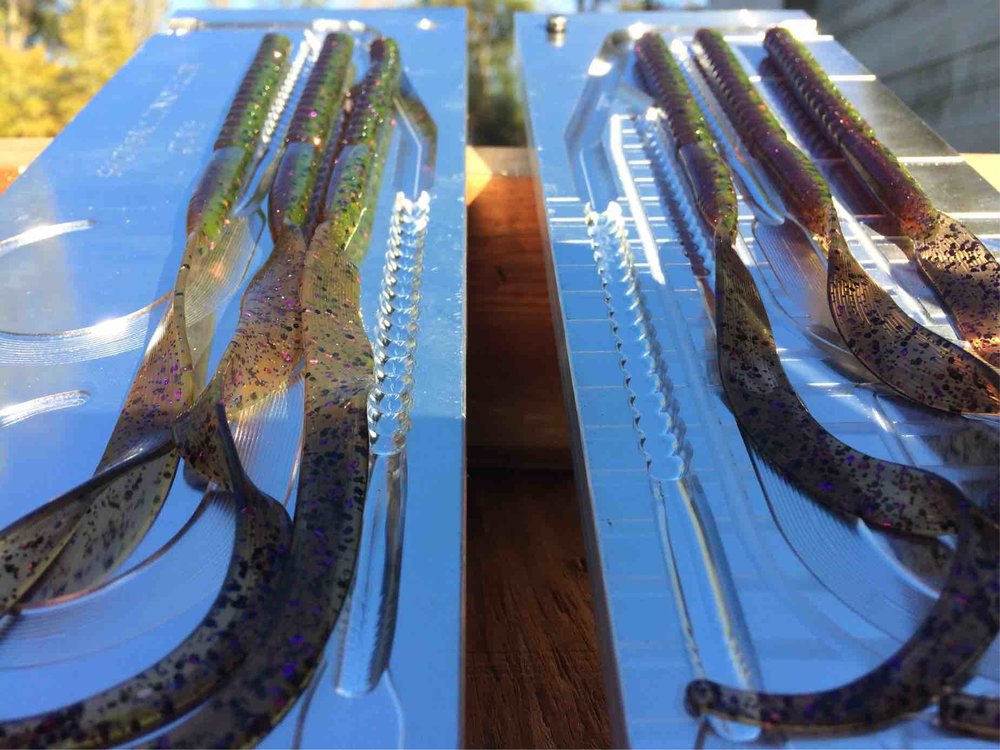
I have this mold and it’s a great worm and shoots well. Laminates well too. I have some pics and I’ll try to add those in an edit. https://www.baitjunkys.com/Monster-worm_p_650.html
 1 point
 -
That mold uses both regular and flat eye hooks I believe. The 805 is a heavy wire and so the Mustad 32796, the Eagle Claw 2706BP, and the Gamakatsu 594 should all fit.1 point
-
Without proper ventilation and a good respirator auto clear is pretty toxic. You want to take every precaution you can when using it. That being said it does make for a very good clear on lures.1 point
-
Mark - This is the theory behind it all. I don't know how significant the chamfer is, but the same goes for diving lures. If you take a perfectly balanced and tuned diver and then add the chamfer, you will likely find that the lure is now out of wack. Because the vortices are stronger, the lip pulls down to a slightly deeper angle. If the tow eye was positioned for maximum depth then the lure will no longer hit that depth. As for the lure getting down faster; yes, the slightly lower pressure behind the lip will pull down harder, making the lure dive faster. Dave1 point
-
Del at Del Mart makes a ten cavity stick mold. I picked one up on the used market some years ago and it shoots good and makes goot baits. Laminates well. Takes a large injector, though. Can’t fill it with a 3 ounce with one shot. Takes a six ounce. Might want to ask around before ordering. At one point he was way behind and even his website says long lead times on his molds. Not sure of his present “position”.1 point
-
Poured this in my Do-It mold as a test case actually. Problem is the tungsten to epoxy ratio has to be really high to get the desired density. Such ratios do not pour very well so I am guessing Keitech has some sort of high pressure injection machine. Allen1 point
-
I am happy that you found a solution that works for you. Great feedback, valuable information for anyone else starting out with this material. Dave1 point
-
![20180511_140403[1]](https://www.tackleunderground.com/community/media/monthly_2019_01/small.1184604613_20180511_1404031.jpg.145226ce25fa947e9d2c0444b7892c4d.jpg) Spun this one up to see if it would work. Got the idea from an e-book. Tested great.1 point
Spun this one up to see if it would work. Got the idea from an e-book. Tested great.1 point -
after making a few durhams molds I have a few tips. use 1/4" carriage head bolts for index, if you push the head down just to the edge of the bolt head, leave until lower half of mold sets up the bolts snap out of the durhams easily and make a very nicely rounded locator. pop your mold halves apart while still warm, this gives you a little time to work on the cavaties ,clean up and cut your vents prior to full set up. I used a piece of plastisol for the sprue, if you use something ridged it better be exactly half way in the mold, the plastisol has a lot of give or stretch easily pulls out when mold has set weather half way in or not without deforming mold. I also used high temp engine paint to seal the mold, let it cure completely or it will stick to the other mold half and peel away. purchase a 25lb tub of durhams it will save money in the long run. 8 lb will yield 2-3 small molds. definitely make the mold thicker, too much is better than a broken mold. all in all durhams is easy to work with. thanks to all that have helped with my endeavor in mold making, I think I will stick with durhams rather than silicone or vac 50, it is cheaper.
 1 point
 -
Most use Delta Labs clear.1 point
-
I am a hobby pourer, so, for me, a microwave works best. Just take your time, heat it a minute at a time until you get close to the 350 degree conversion temperature, and then do small time intervals until you get it the right temp. I use a wire coat hanger, bent double, to stir my plastic, which seems to cut down on stirring bubbles. Buy a digital thermometer, so you can check the plastic's temp. as you heat it. Once it starts to read 325 or more on the surface, and it has become more clear and runny, stir it, because the plastic heats from the center out, so it will be hotter than the surface reads. You don't want to heat it much past 350 overall, or you can scorch the plastic, which makes it yellow and useless. I always add a little heat stabilizer (1/2tsp to 4 oz of plastic) because I do lots of reheats, and that keeps the plastic from yellowing. If you mess up a batch, toss it, and learn what not to do from your mistake, but don't get discouraged. We've all thrown away our share of plastic. Once you've begun pouring, let us know how you do, and do ask questions. Everything I know about pouring soft plastics I learned here, from members who shared their knowledge.1 point
-
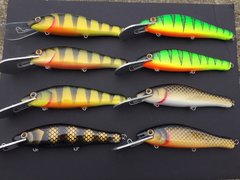
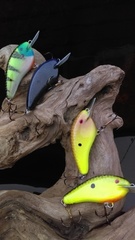
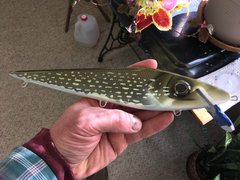 11” narrow body shallow diver cedar musky bait1 point
 -
1 point
![20180511_140324[1]](https://www.tackleunderground.com/community/media/monthly_2019_01/small.825485745_20180511_1403241.jpg.c0be2b6e0345dc7b82a293e0faea117f.jpg)