Leaderboard


Popular Content
Showing content with the highest reputation on 04/13/2019 in all areas
-
When I’m done shooting baits for the year due to fishing and outside work I clean my molds up. I use a scrub brush with soft nylon bristles and an old toothbrush for the cavities with Dawn dish soap. I scrub the entire mold front and back, dry with a towel and then air dry. This winter they will be nice and clean ready to go.2 points
-
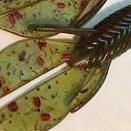
I use the BTS 5" stick bait molds and I wanted a way to do laminates while waiting for an actual laminate block or attempting dual injector w/ blend block. I needed a more precise way to shoot laminates without trusting my poor hand pouring skills. I'm a bit of a perfectionist sometimes and I just could not get the results I liked. Enter Reynold's Pitmaster's Choice heavy duty foil... I folded and creased the foil to cover one side of the mold and entrance hole and attempted my first laminate shot. The shot came out great! The idea worked. I removed the foil sections, closed up the mold and shot the second color. DISCO! We're in business. Now, I can shoot some laminates while waiting for my laminate block. Below are some I've done. The first is one I call Watermelon Slice and the other is the old reliable Red Shad. Btw, that red/pearl color is a pain.1 point
-
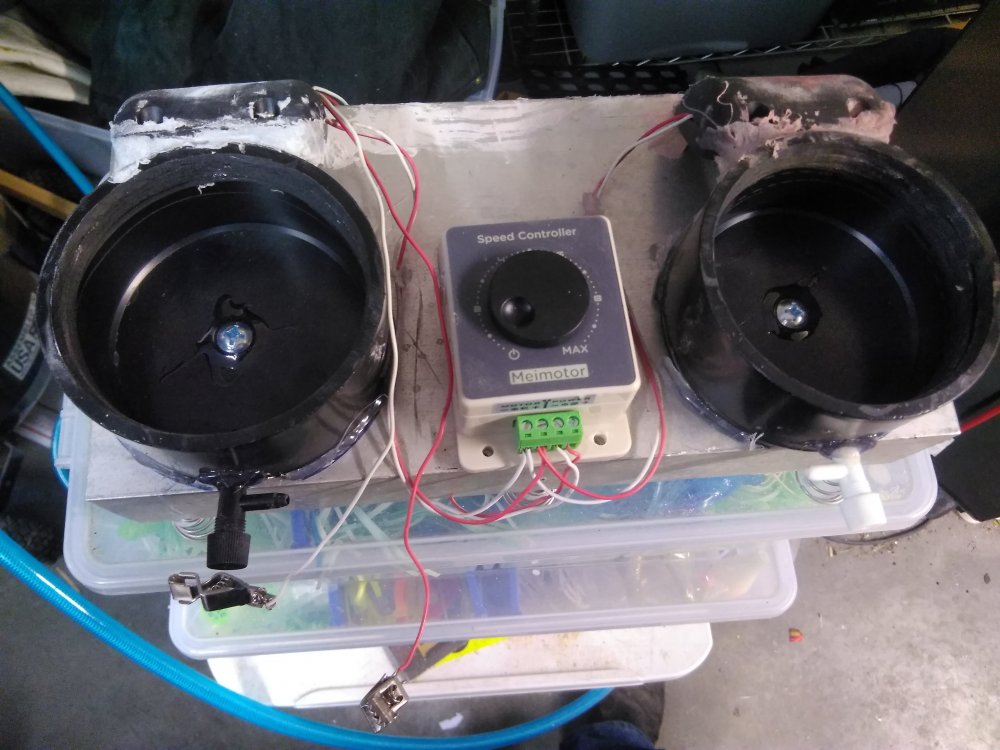
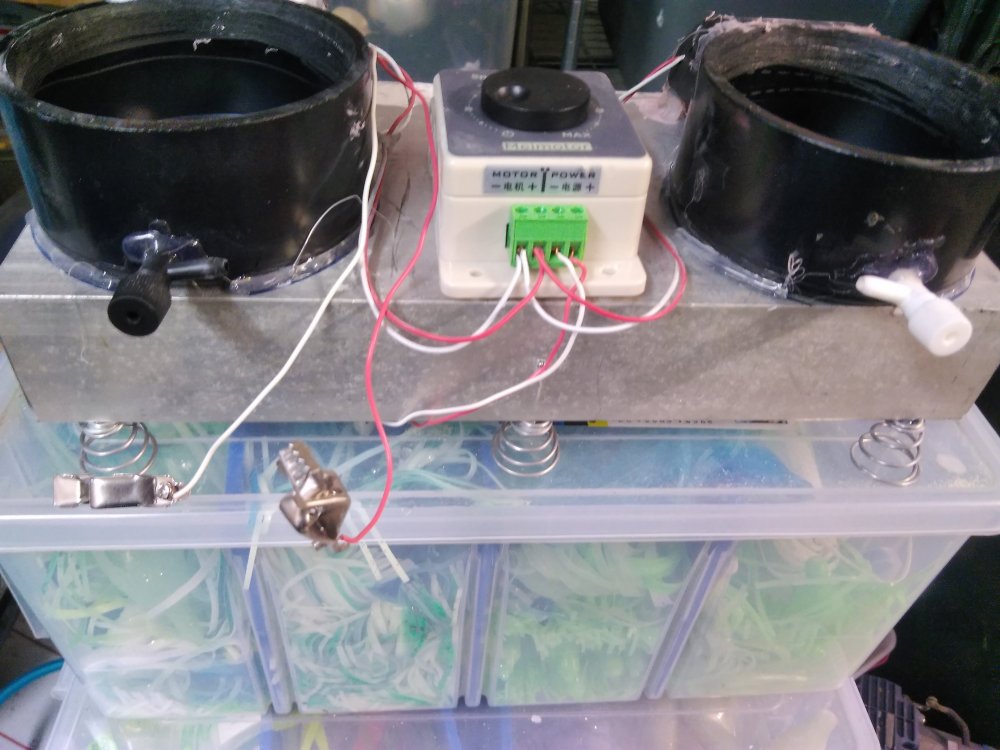
. So this came up in another thread and I figured I would post it here. I made a vibratory fluid bed awhile back and some people were asking about it. I used aluminum C channel for the base. Then I drilled and tapped it for some cone shaped spring feet and bolted them on. Originally I built a T piece for attaching a vibratory sander. This didn't work well so was eventually removed. I then bolted on some 3" ABS flat caps. Bolting was required as installing and removing cups would rip them off with just epoxy. A hole was drilled in each cap near the bottom to accommodate a plastic aquarium valve which was epoxied in. I then attached a small vibratory motor on the back of each fluid bed securing to the base. The wires from the motors feed into a speed controller. The current power source is a small(old snowmobile) 12v battery. Cups are made by cutting some 3" ABS (or PVC) pipe. Put in a knock out test cap and knock out the center and discard. Retain outer ring. Cover with Tyvek and replace ring. You now have a cup with a tight membrane on the bottom. Use another knock out test cap as a lid for the cup. I use a cheap 30/60 aquarium air pump from Walmart for air. For a 2" fluid bed press in a 2x3 adapter and 2" cup. This way you now have a dual 3" or 2" fluid bed. Vibration is adjustable via the speed controller and air via the aquarium valve. Vibratory motors and speed controller came from eBay. Spring feet from McMaster-Carr. C channel was scrap from work. Aquarium parts from Walmart and ABS from Home Depot. It works well for me though I'm sure I'll tweak it some more. And likely add an adapter for outlet plug in capability.

 1 point
 -
Didn't get sick. Quit before any symptoms developed.1 point
-
Newest Jig Video is Up! Thanks for all the help from this community. Stealth Bug1 point
-
it will be fine .1 point
-
we would strip the bait to original wood. enviroteck it. then re-paint.1 point
-
1 point
-
Sorry to hear that you have given up on lead-based tackle. I'm guessing there's something in the methods you use your hygiene practices, or somewhere in there that is causing you to have high lead levels. I once worked in a lead/zinc mine and was covered head-to-toe in the stuff. Had my blood drawn every 3 months to check for lead. While my lead levels did go up I never got to a point where I was taken out of the mine. After a year-and-a-half I took a transfer to a job with a better schedule, better pay and less responsibility. Since then my blood levels have dropped significantly and I'm currently sitting at 1 mg/dl as of last month even though I cast hundreds of pounds of it every year. And yes my hands have been black from lead many many many times while cleaning up lead jigs, sinkers, down rigger weights etc. Proper hand-washing and good hygiene practices have kept me safe.1 point
-
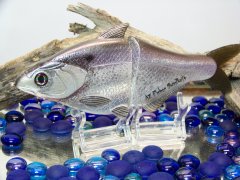
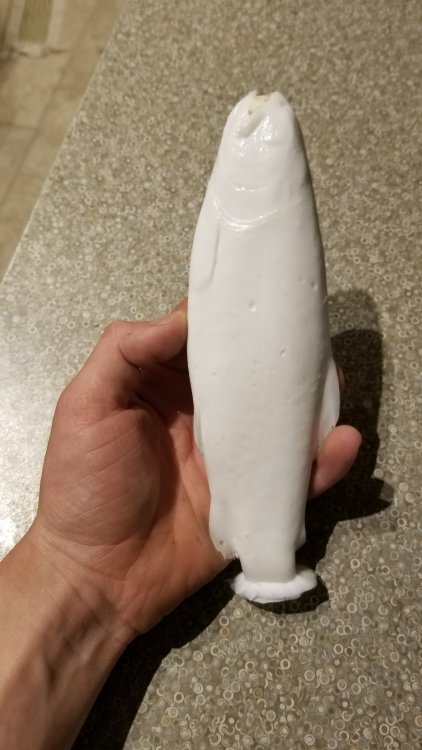
Maybe this has been brought up before, but just for fun I decided to make a mold and pour a resin fish. This is my first time trying this so I figured maybe someone else could take away from this. First off, I started with a fresh 9" or so trout that I froze. I made a mold box and suspended the fish tail up. Next time I do this I will probably skewer the fish mouth to tail because he wanted to flex on me when I poured the silicone. I used smooth-on Oomoo 30. I would have loved to de gas the mold but it was too big for my air chamber. Next time I'm going to use a smaller fish as well. This is a one piece vertically poured mold by the way. Upon demolding I noticed I lost lots of scale detail due to slime on the fish. Next time I will spend a lot more time making sure the fish is dry before I freeze and mold. Also going to again make a smaller mold so I can de gas. I do not have a picture of the mold but here is the finished product. Probably will mess around with it a little but I'll try again on a small bluegill or shiner next time. My plan with these it to mold the lures I produce from the blanks.
 1 point
 -
I forgot to mention, I cleaned the mold very well before pouring with alumalite amazing cast white. It cured fine, but here's a question for the alumalite guys. It says on the package I can mix 1 to 1 but fails to say if it's by volume or by weight. All the videos out there use tiny measuring cups and obviously I cant do so, as I used about 180 grams of resin. If it's by volume I will need to get large measuring cups. Also, I filled the mouth in with clay so I would not get mold material in there1 point
-
1 point