Leaderboard


Popular Content
Showing content with the highest reputation on 05/25/2019 in all areas
-
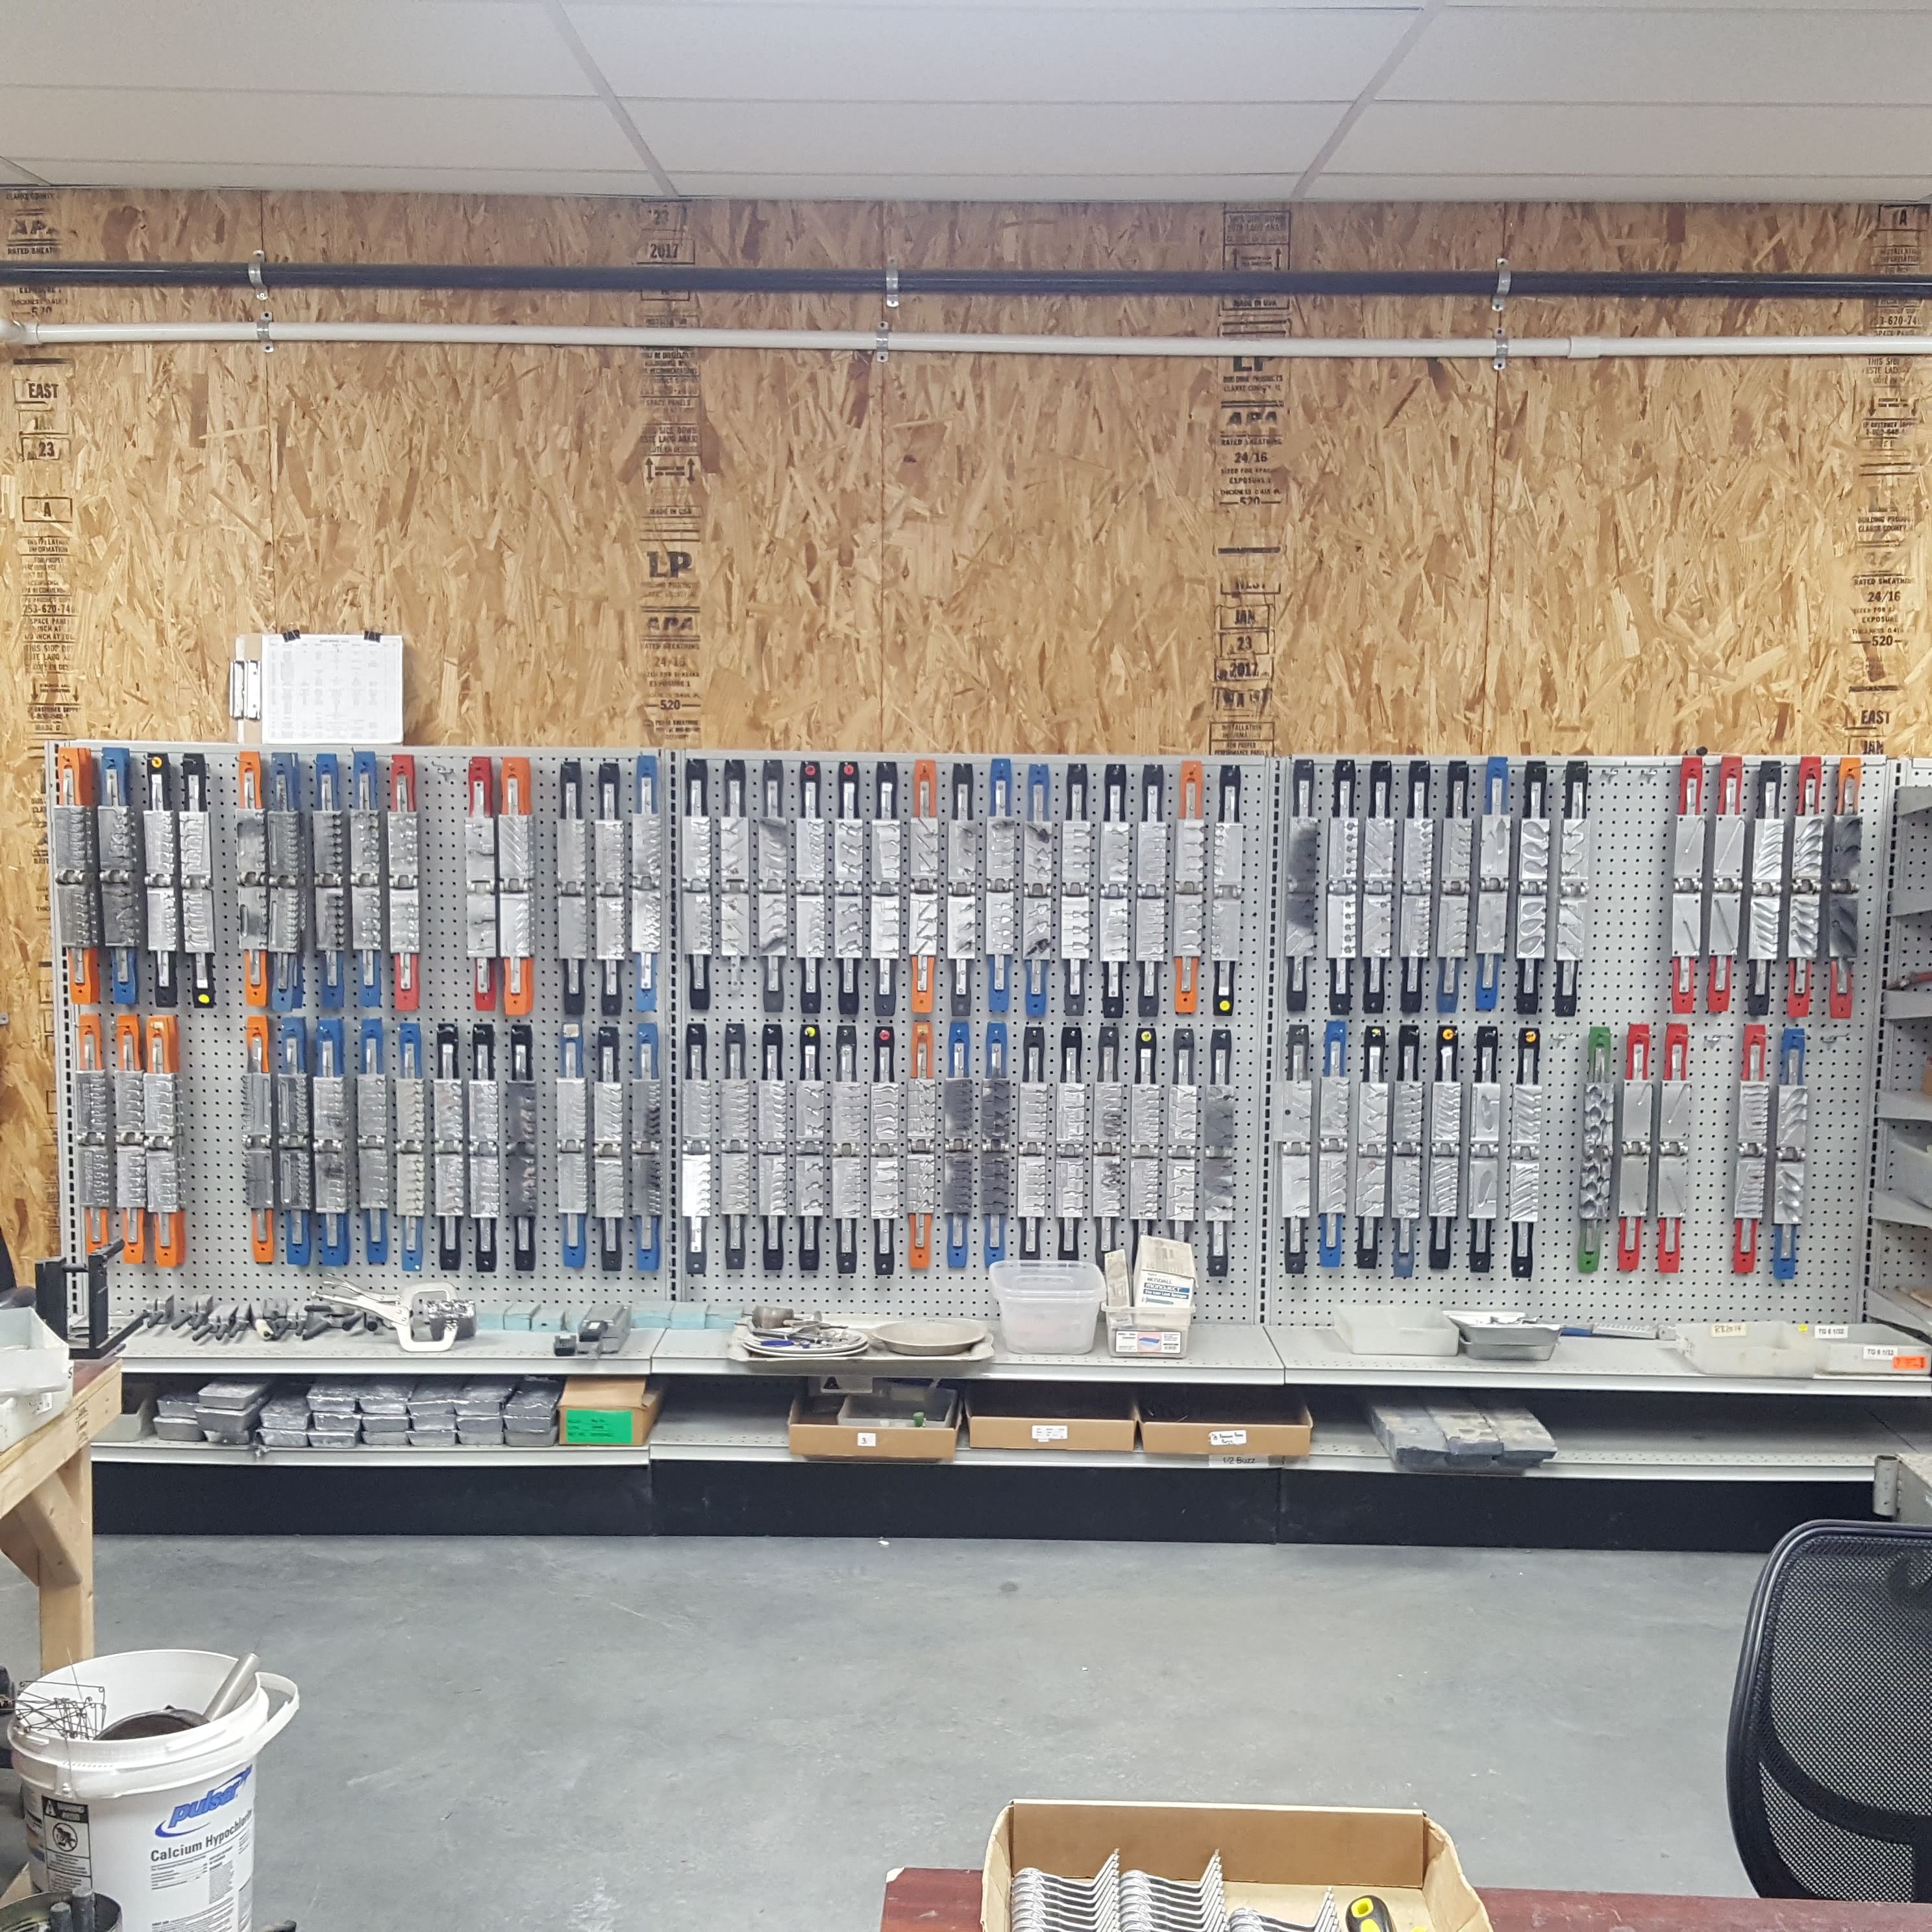
I cataloged all mine in a spreadsheet, printed out a list, had them closed on shelves with the number on the end of the wood handle showing so I could find it on my list, then looked for the number of handle. I had the shelves with numbers so I had location numbers on my list and still couldn't find what I was looking for when I needed a mold. so I put them on peg board .The pic of my molds takes up a lot of room but at least if can find what I am looking for. and while looking for a mold i'll see one that i forgot i had, so that is helpful.
 1 point
 -
Many on the site could fill your order. How many are you looking for as might drop some out of contention. I sent you a pm regarding a cheaper option if it will work for your needs.1 point
-
I can’t be much help except to say I have some experience with peg boarding molds. I thought it would be a pretty good method of storage too. So I put up the pegboard, bought the 12 inch long pegs for it thinking I could put a bunch of molds on one hook. I did that only to find out more than about two to a hook will eventually sag and pull that pegboard out of shape because of the excessive weight. Then they will slide down and fall off the pegs.1 point
-
I went through mine and got rid of ones that I seldom use. I'm down to a couple of dozen. I have a set of shelves in the back of the garage behind my boat. I keep my molds on the top of the shelves. I took a small paint brush and labeled the end of one handle on the molds so I can just read the name of the one that I want and pull it down.1 point
-
you need a light dimer for that burner! but a hotplate is much easier to control the temperature1 point
-
I don't use screw eyes, but I use 30 minute epoxy applied with a syringe and a large bore needle to install twisted wire ties and hangers. This takes all the guess work out of this process as far as whether or not the joint has a 100% bond between the tie and the wood. It's probably overkill, but this is just one less thing for me to worry about. As far as cleanup is concerned it's not that complicated. I keep 2 medium sized pill bottles on my workbench filled with DA. One is "dirty" alcohol and one is "clean". By doing a series of fill and purge with each bottle I'm still using the same syringe and needle I've been using for years. I wouldn't recommend using 5 minute epoxy. It can be done, but you don't have much time to clean the syringe by the time you install and align your hardware Ben.1 point
-
Most often an epoxy with a longer cure time is also a stronger adhesive as well1 point
-
A long work time is one reason I like Rod Bond paste epoxy; its stays in gel form for at least an hour, plenty of time to install hardware and lips on a batch of baits.1 point
-
we start a pilot hole. put epoxy on screw eyes and install. always set screw eye with the opening forward. if the screw eye ever opens a bit your hook/fish stays pinned.1 point
-
I keep some of mine in a cabinet on shelves. Shelves are numbered by column and row. I then can stack about 4 molds per column. Next I have a sheet on one of the shelves that has a list of every mold I have. On this sheet, each mold has the mold model number and name along with a column number and a shelf number. If you are very meticulous on where you take them from and where you put them back, the sheet works fine. The mold will always be found where you put it back last time. I also keep all my mold model numbers on a spread sheet. The ones I use regularly, I also keep on a shelf in a box. The box has the names of the mold I have in there. Also in these boxes, I keep all my football molds together in one box, all my round molds in another and all my spinnerbait molds yet in another. This all works for me. I'll take a pic later tonight.1 point
-
I have invaded the small apartment we have above the garage for my painting and plastics. Not much in the way of ventilation in the winter..., open windows in the summer. My wife has allowed me this space. We have an old (nice though) entertainment center that is too small to house current size TVs, making it all but worthless. I have all of my paints, molds, and supplies not in use in this entertainment center. Lots of cardboard box "storage containers". An old cd player finishes out the setup. All my lead work is done in the garage below.1 point
-
I called them & asked specifically about the 10 ouncer & Sarah walked into the shop & said they only had two. Luckily i got one of them.She did say they weren't listed on the website & sent me a link to it.1 point
-
I have a 12 ft bench in my shop/bait shack. From left to right 4 ft of it is a small wire shelf that hold all my color , flake and additives . 2 ft off free board space for general purpose. The last 6 feet is where all the majic happens. 30 inch hood vent with 2 mics with storage below for baits and curing. More than enough room to do what I want.1 point
-
For plastics, I use glass beads in a plastic or metal tube. If you don't want to make a rattle, they do sell them on DIY online tackle shops.1 point
-
Drill pilot hole, feed in eye screw dry, cover threads with a liberal coating of cheap 4hr super strong 2 part epoxy from the hardware store and done. Have not had one fail and I use my lures on pike, salmon, and Lakers mostly (wish I had musky close). I do this for both cedar and resin poured baits. I also don’t recommend super glue on large fish.1 point
-
I make mostly resin baits but use the same process with wood. I use D2T 30 min and use a toothpick to get the epoxy down into the hole as well as coat the threads of the screw. I also made a eye screw bit for my drill driver so I can zip them in pretty quick and then a quick alignment, dab up the excess epoxy and on to the next one. I have used super glue before and it works, but have had some failures. It didn't work well for the hinge screws on some swimbaits I made, they kept loosening up and the bait wouldn't swim straight. Don't seem to have that issue as much with epoxy. For larger, heavier baits I want D2T. I can install 10-15 screws before a small batch of epoxy becomes unworkable. I used the 3 pc Harbor Freight nut driver tip kit to make the tools, one for .072 and one for .092.1 point
-
I use Columbia coatings chrome powder with pretty good results. Have never cleared with KBS. Regarding Chrome powders like the nail stuff ................. I've found that just about any clear coat dulls it .1 point