Leaderboard


Popular Content
Showing content with the highest reputation on 04/02/2020 in all areas
-
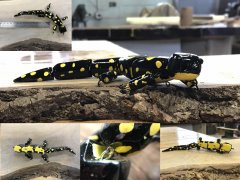
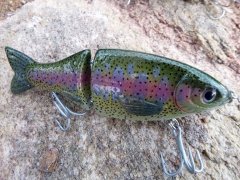
 Almost didn't see the spider haha...looks sick!2 points
 -
You can also make or buy a stencil with little holes, maybe in different sizes, to speed the process along if you're doing a bunch of them. The trout patterns are definitely cool.2 points
-
1 point
-
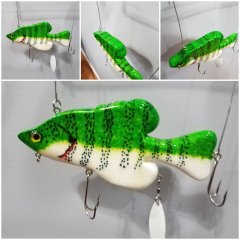
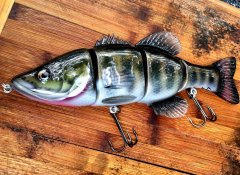
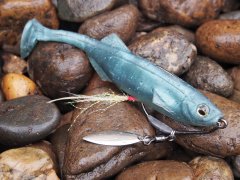 Carved this little minnow swimbait as my first attempt at making a soft bait. The main body I carved from basswood and the fins were carved out of a lexan sheet. The bait features a slit belly and back hook channel to hide the point of a 4/0 weedless swimbait hook. I made a two piece silicone mold but don't have an injector so I get maybe one good pour out of ten haha. Enjoy and thanks for looking! Dan1 point
 -
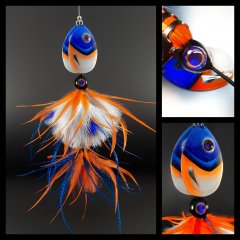
© Metalhead Blade Baits
1 point -
1 point
-
1 point
-
1 point
-
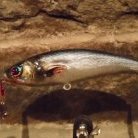
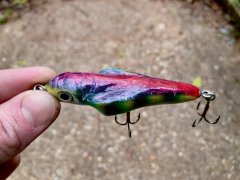
.jpg.611662fe249ed08d857bc2d596344ea8.jpg) Roach pattern lateral rattle jerk bait1 point
Roach pattern lateral rattle jerk bait1 point -
I used to use these but if they are full of hot plastic and you squeeze them hard enough to pick them up they partially collapse and hot plastic can spill out the top. IF you only fill them 1/2 they work great, plus the seem to keep the plastic hot longer than glass. I tried to figure out some type of holder for them but was never successful. The large size didn't fit any kind of beer can holder, so I was out of luck!!!1 point
-
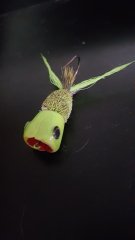
 A soft formed weedless slider/popper style frog.1 point
 -
This might work. It's what I heat my plastisol in: https://www.amazon.com/Norpro-Silicone-Measuring-Flexible-Dishwasher/dp/B002MKP24K1 point
-
Here they are from Eagle Claw's website. They say these don't have a curved point and will be offered in the laser sharp and Trokar models. Supposed to be available in July of 2019 they still aren't here, I'd like to see how different they are as well. https://www.eagleclaw.com/l570vp-pro-v-jig-hook1 point
-
You have nothing to be sorry for...LOL. TW causes confusion by listing that hook differently than other sources. I would also say it is part Eagle Claw, they might have sold those hooks to TW as the pro v model. When Eagle Claw retooled and introduced the new hooks they also had a new finish which was originally marketed as the "black pearl" series. Later on they changed it to the "black platinum" series which we all know as BP after the number. I'm beginning to wonder if Eagle Claw just decided there is no reason for another hook and just scrap the entire thing. BTW, there is a hook made by Mustad, the 32500 skipjack hook which is Mustad's version of the sickle hook. It is more of a hybrid between a round bend and a sickle as the angles aren't as sharp as Matzuo or Eagle Claw. The skipjack hook is a little heavier and stronger while the lil nasty is much sharper, pros and cons to each.1 point
-
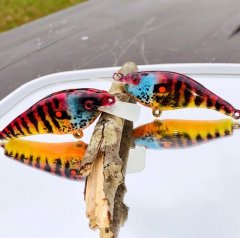
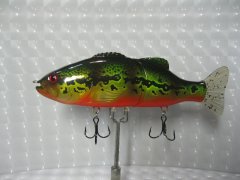
 Very cool paint scheme1 point
 -
1 point
-
1 point
-
.jpg.db5933e892ff7df9348812a9d05576d4.jpg)
© peter w
1 point -
© Douglas Fir Lures
1 point -
 Looks awesome!1 point
 -
Notice is says "Pro - V bend jig hook" and not 570 pro-v. They are just the regular 500BP lil nasty as TW has had them since 2017. The 570 pro v was only announced at the 2019 ICAST show and even the description is the same as what is used for the 500BP lil nasty word for word. For some reason TW was calling that hook a pro v from the start but I believe it was due to Trokar having a model called a pro v so it just carried over. Go back and read the description, "designed with super fine wire" which wasn't used to descript the 570 pro v. The only thing I saw of the 570 pro v is the use in jig heads and jigs like the Jewel pee wee football jig. So far the plain hook hasn't been made for retail yet and as I said, TW had that hook before there was even mention of a 570 pro v.1 point
-
 Some of your photos were removed because you posted multiple photos of one lure. If you want multiple photos to be shown for your entry, you will need to delete this one remaining photo and create a collage, showing your entry from different angles. You can then upload the collage to replace the current photo.1 point
 -
1 point
-
Al, not to be an A$$, but I offer that when the sticky was started, a number of experienced members posted recipes. Within a year or so, the discussions and question posts began. Not sure how big a job it is to clean it up but it would be nice. Maybe as a moderator, you can just delete and not have to go into the HTML file and manually delete line by line.1 point
-
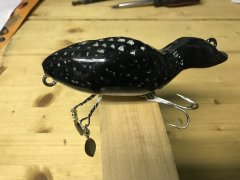
 Carved & built out of Basswood.1 point
 -
 Very cool man. Great lure for a geat cause!1 point
 -
Very cool ! Great job !1 point
-
1 point
-
That was my system. I will try and find the photos and diagrams for you and re post. .1 point
-
1 point
-
1 point
-
There are a lot of guys that have forgotten more about making inlines than I know and some of those have already made a few suggestions in this thread. One thing that hasn’t been discussed and one of the elements or variables on an in-line is the type of blade used. I noticed Kevin has used quite a few Colorado blades. On an in-line, a Colorado doesn’t spin well. The French blade or Indiana blade is a much better choice for inlines with a clevis. As suggested, they need to be sized correctly. Please look at Toadfrogs first post with the pics of his inlines. Notice how the end of his French blades would come about to the end of the brass weight on the in-line. That’s sized correctly. Now, I’m not saying you can’t make an in-line with just wire and beads because you can. I’ve had success using an Indiana blade and no weight.1 point
-
I’ve never heard of anyone vacuum chambering their plastisol. What you can do is wait a minute or two to let the bubbles rise to the top. Some of the bubbles will pop and disappear on their own. When most of the bubbles are at the top, you can take a propane torch or a heat gun and run that over the top of the plastic and it will pop the bubbles that rise to the top. Breaks the surface tension. Be careful not to scorch your plastisol. The heat trick works on epoxy also.1 point
-
If you are talking about bubbles in the silicon mold there is one thing that definitely helps. When pourIng your mold only cover your master with a thin layer of silicone and stop. You will be able to actually see the bubbles form an pop. This only takes a few minutes to pass then you will be able to continue pouring. it makes a big difference and I kick myself every time I rush and forget this step. When I do this with a master that was clear coated master I get an extremely smooth mold cavity. You will still have bubbles in the rest of the mold1 point
-
Not in some time, but I did make some once when I took some fins, cut them off, froze them, then put them in fresh Alumilite HS2. I pushed them in so they were flush with the top but not covered by HS2. Put them in a freezer and let the HS2 cure (24 hours). Next coat was to apply some mold release then poured a second layer. The fin was removed 24 hours later and the mold was allowed to warm. I then poured the fins (squish mold type) out of 1)Silicone (tough, easy, can't color), 2) Alumilite Flex 20 (can be colored but it starts out light yellow). I used mold release with every pour so that they did not stick to the silicone (silicone sticks to silicone otherwise). My results were good, but I had to make a fin out of Alumilite White (not flexible) and then used that to make a new master that had attachments. I never got the color right for me, and I changed focus on what I was developing, but, this might help some. This was several years ago, so there are some paints now that are silicone based and may stick to silicone. I have not pursed that direction.1 point
-
You need to mix slower, pour in one corner and let the mold material flow from one corner to fill the mold box. I use Alumilite products now, but they concept is the same for both. But, yes, in the end, for production quality you may just need to pony up and get a vacuum chamber. Still, I have one and almost never use it.1 point
-
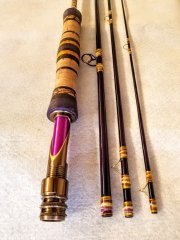 9ft.5wt. 4pc. D.M. Custom Rods1 point
 -
1 point
-
1 point
-
1 point
-
1 point
-
 Deep diving walleye. I've been painting for a little less then a year and this forum has really helped the learning curve.1 point


.JPG.67a1b66aeb98157d8009339728d7f506.JPG)