Leaderboard


![350><]-[u|\|T3r](data:image/svg+xml,%3Csvg%20xmlns%3D%22http%3A%2F%2Fwww.w3.org%2F2000%2Fsvg%22%20viewBox%3D%220%200%201024%201024%22%20style%3D%22background%3A%23629dc4%22%3E%3Cg%3E%3Ctext%20text-anchor%3D%22middle%22%20dy%3D%22.35em%22%20x%3D%22512%22%20y%3D%22512%22%20fill%3D%22%23ffffff%22%20font-size%3D%22700%22%20font-family%3D%22-apple-system%2C%20BlinkMacSystemFont%2C%20Roboto%2C%20Helvetica%2C%20Arial%2C%20sans-serif%22%3E3%3C%2Ftext%3E%3C%2Fg%3E%3C%2Fsvg%3E)
Popular Content
Showing content with the highest reputation on 08/26/2020 in all areas
-
Hi Dave! Not sure if anyone has pointed this out to you but your specific gravity for envirotex lite is actually incorrect. According to the spec sheet here (https://www.eplastics.com/pdf/envirotex-lite-resin.pdf) the HARDENER has a specific gravity of 0.97 but if you scroll down to page 9 you'll see that the resin has a specific gravity of 1.15 Since these are mixed in a 1:1 ratio I would assume (maybe incorrectly) that the specific gravity would then be 1.06 when mixed together; making it more dense than water. In which case I would agree, more etex buildup near the thickest part of the lure (the head) will cause the nose to dip down. - Andy2 points
-
I just went out and checked my stash... have two heat stabilizer bottles - one I bought YEARS ago - and it's pretty yellow looking... another I bought last year that is LESS yellow. Maybe it doesn't go "bad" but turns yellow over time when exposed to moisture/etc. J.1 point
-
yup ., just add some heat stabilizer to it and it should cure the problem .1 point
-
Again, thanks for all of the help. I'd be so lost without this forum and the help I've received. I got some more wood and this evening it was cool enough for me to get outside in my "temporary tent shed" and cut-out a blank. I ballanced slightly nose up, accounting for the 4 gram leader, confirmed that it still had a slightly nose up ballast after drilling the holes and placing the weights (only needed 28g per weight this time). I went to the river to test the glide and it was extremely good! Now it's cooking on the rotisserie with a little basting of etex. Going to test it again before I paint and will post the results. On a another good note, I gave one of my functioning baits to a friend to test and he had phenomenal results fishing from the bank. While he didn't catch anything during the hour and a half he fished, he had several followers and one particular fish lunged at the bait at the end of the retrieve and banked itself lol. It looks like this FalI/Winter is going to be awesome once I get rid of these nose divin blues.. Fingers crossed for tomorrow's test!! I'll definitely post the results. Thanks again to everyone that has helped. From the ballast calculator, to the faustner bits, to the Lowe's rotisserie and everything in between - this website (and the people on it) has definitely made my bait making easier. I look forward to contributing as I continue to learn.1 point
-
SB paints dry fairly quick, usually you can handle them in 5 to 10 minutes. Dry time is affected by how much paint you lay down and ambient conditions as well. Some residual tail solvent will take longer to completely leave and it is recommended to let them dry over night before packing if doing so. As far as the other Post there is something else going on as it shouldnt be tacky, need more info on that one. See above. Same applies to for all SB paints as Clear 3000. The addition of SB Coat Retarder if needed will slow dry time, the amount added will determine the final dry time. The process of handling or fishing a recently painted bait should be treated different than if you package them for storage or re-sale. This is where a over night dry time should be practiced to avoid "fumes" becoming entrapped in the packaging imparting a less than pleasant smell; even though the paint is dry and should have no issue with adhesion its the smell is what you want to avoid for obvious reasons. If by "brush" you mean an actual paint brush and not airbrush then note the following: Since the SB Coat series is solvent based it can re-wet underlying paint layers which can ruin your pattern if you over work an area. Unless you have a technique that works or your pattern requires the use of a paint brush for detail work an airbrush works best. Obviously any paint can run if you apply too much either by brush or air brush. Controlling the flow or amount you load into the brush like all paints is the best method, as well as how fast you pass with your airbrush. The Dotting series are better designed for detail work since the are thicker and have a higher pigment load for coverage; trout speckles is a good example if you dont want to use a template and want that hand crafted look. The Clear SB Coat Dotting is designed so you can mix your own colors in and create your own custom colors as needed. SB Coat paint can build up on the tip like all paints but usually doesnt clog as in dry in the airbrush unless you forget about it and leave it for hours. Most clogging issues arise with Pearl colors or even Fluorescent colors as the pigments can jam in the needle orifice. Needle size and orifice size may need to be swapped for a larger size, or open up the needle to allow more material through. While still wet Acetone can work for clean up, If dried it is recommended to use the SB Thinner 3001 as it is more aggressive and can re-solvate dried paint. Regular lacquer thinners are not recommended as they can be incompatible or may not be aggressive enough to re-wet dried paint. As far as I know most all airbrushed are designed to handle solvent based paints. There shouldn't be a need to purchase a separate airbrush unless that is your preference. Do note LureWorks is blessed to be busier than ever in this crazy 2020 Covid-19 year. Just understand that the sheer volume of inquires and orders has made it difficult to respond in a timely manner. Let me know if you have additional questions.1 point
-
It certainly is not a stupid question. I had to go away and think about it for a few hours. There are four lines to consider: 1 - nose to tail, the designers line. 2 - the line that the lure floats. 3 - the technical line from the tow eye through the COF (center of forces) this point is a combination of the COG (center of gravity) which is the center of down forces and COB (center of buoyancy) the center of upward forces. 4 - the line that the lure actually swims, the most important line. All the testing done in a bucket with the lure not moving forward are called static tests. BUT, once the lure is moving, water forces start to affect the float line (1). The faster the lure travels, the more effect the water forces have. These are called dynamic forces. Essentially, the dynamic line is the most efficient path through the water, possibly close to the designers line (1). For a nose-down glider, this means that when the lure is propelled, the lure swims nicely through the water despite the ballast dragging the nose down, but as the lure speed slows, the nose starts to drop. The nose drop gives more resistance and so the lure slows faster and so on. In other words, the glide is not as long as the designer would like. The important line is the dynamic line. as a designer, if we can make the static float the same as the dynamic, then the maximum glide would be achieved. The technical line has no real bearing on things. The only thing that matters is that the COF MUST be below this line in order to stop the lure from rolling over. In other words, keep the ballast low down as possible. Dave1 point
-
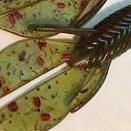
I have had hit and miss results with willow blades on in-line spinners. You don´t get a lot of separation from the shaft and you have to run them too fast for them to work well. I would recomend using French or even Indiana blades.1 point
-
The front half is two screw eyes, and the rear half is a hinge pin that runs through the bait from top to bottom.1 point