Leaderboard


Popular Content
Showing content with the highest reputation on 11/14/2020 in all areas
-
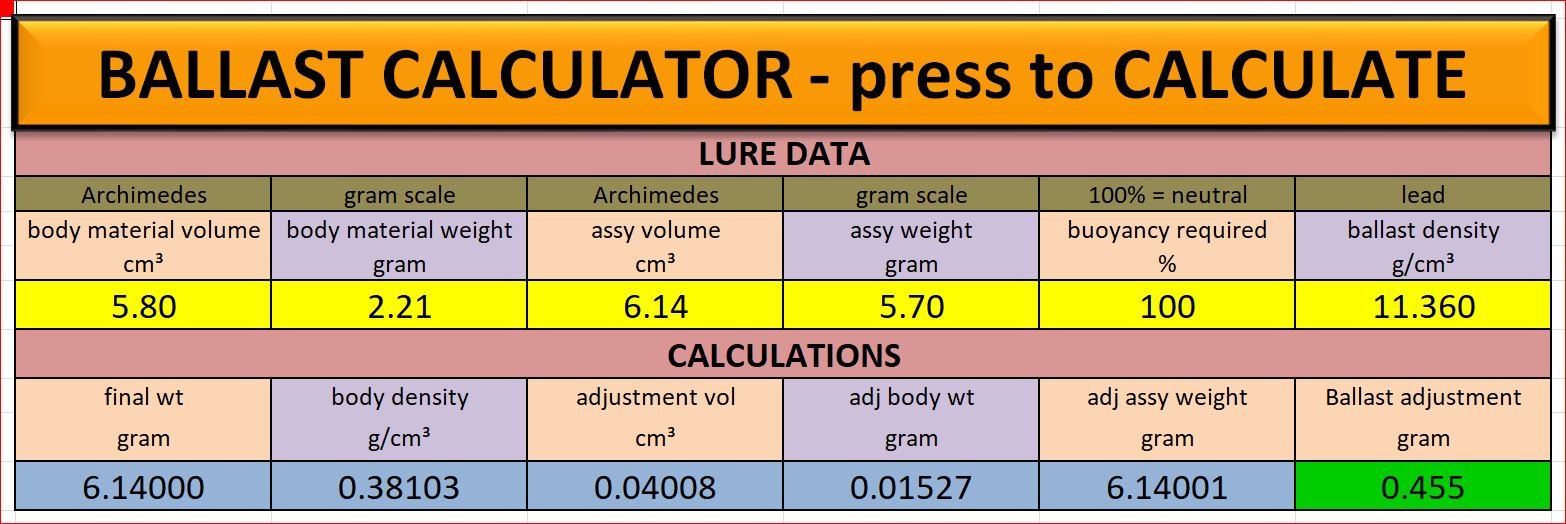
I have done a lot of work on ballast calculators in the past. I have never offered them up for use by TU members because I considered them complicated and clumsy. This one however, I consider to be very slick and versatile. You can enter data from a first prototype and it will calculate how much ballast you need to add or subtract to achieve the buoyancy that you desire, be it slow sink, neutral or float. Boxes 1 and 2 are merely to collect data on the body material in order to obtain the material density. Boxes 3 and 4 are measured from a completed lure with hardware, hooks and topcoat. Box 5 is your desired buoyancy, 100% = neutral buoyancy. Box 6 is the density of the ballast. This can be changed if not using lead. The calculation takes into account the body material removed or added to make room for the ballast. PM your email to me if you would like to try this spreadsheet. Dave
 1 point
 -
This gets me real close to Yamamoto watermelon , 8 oz plastic add salt black flack 16 drops Lure Craft watermelon ( mite be 4-5 years old ? not sure if it matches the formula they have now ? ) it is not the same as they had before this . 8 drops lure craft root beer 2 drops lure craft black1 point
-
Let me add that this stuff is not intuitive, it is not obvious or easy. If anyone who has been sent the tools is not grasping the idea, PLEASE contact me by PM or post here for public viewing, and allow me to help you understand how it works. I am good at the technology but not so good at the interaction. Please allow me to redeem myself Dave1 point
-
The only way I could ever track the success of a pattern I built was through sales when I was in business. I have a list someplace of those lures. But if you make complicated patterns make notes like a bill of material and a picture. Then when you get old as me it will be handy .1 point
-
Slow steady retrieve, you don't want to give it too much action.1 point
-
Nice Mark! I too use super glue all the time. A really neat thing I do is use it to build small wooden things like stands or jigs ect. . Just apply the glue to one piece of wood and moisten the other piece with accelerator then carefully line them up before they touch each other then press them together and hold them tightly togather for about 10 sec. . The resulting bond is very strong, Not quite nailed together, but still way stronger than you would need for many applications. It's just cut and glue instant building of whatever wooden thing pops into your mind.1 point
-
Yep other than a couple lurecraft colorants all the rest of mine are lureworks & i buy them by the pint& i have several of them.1 point
-
Good reply Anglinarcher. My prey are bawal, a deep bodied very aggressive fish, which explains why I only need a belly hook. Dave1 point
-
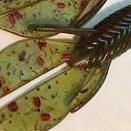
Hello anglers friends, greetings from Peru. It has passed long time since my last visit to the Forum. I hope you all and your families are doing well. After more than three years without posting any video of my work in my Youtube channel, I restarted again to work on one of my favorites hobbies which is lure making. I want to share the last lures that I’m making for trout fishing at my homeshop. I think that the passion and emotion that every angler who ties or make a wooden lure is the same. Our common dream is to catch our beautiful preys with something done by ourselves. This time, I want to talk and show these tiny balsa wooden lures made with the purpose to have fun when I go for catching trouts in the creeks located in Peruvian highlands. The Attila Trout Hunter is a tiny lure made of Balsa wood, about 1 5/8” length (4cm), 5/16 oz weight (3.2gr), fantasy and natural colours, armed with #12 or #14 Gamakatsu hooks, and small 3D homemade eyes. Something important to say, each lure is “one of a kind”. To have a plenty and pleasure fishing experience using the Attila Trout Hunter, it’s needed to use a good ultralight equipment (UL rod 5.5', 6-8 lbs line, 10-12 FC leader). In this way you can be accurate when casting these light lures, and when you catch a trout feel in HD the fight with those gorgeous fishes. Something to remark, given that I love the beautiness of trouts, I always do C&R. Therefore, before to use any of these lures, first I kill all hooks barbs. I invite you to watch my video using the below link, and please let me know your thoughts, and give me your comments and recommendations. Thanks, https://youtu.be/cnfk_dn9U-E1 point
-
Tough question for sure, and a lot of personal opinion is involved. Personally I think it depends on the size of lure, the type of fish you are after, even the type of lure you are making. I should take more time to explain myself on this, but this is the short version. (This could take a chapter of a book to explain) On species that are less aggressive, like many freshwater trout species, I find that the tail hook is important. On larger lures, lures that often work much better than people think, the trout will tail tug or test the lure first and tail hooks really up-the-catch rate. Still, when the fish are aggressive, the trout will hit the front and on larger lures a tail-only hook will miss the strike. On species that are more aggressive, the real predator species, or any species that is fired up, they are eating and an eating fish eats head first so that they can swallow the fish (presumed thing we are imitating) without the fins chocking (getting stuck in the throat) the predator. Even species that "stun" their prey first usually strike head first or center body, so hooks placed more toward the head seem to be the ones that hook up. On lures that invoke reaction strikes, the front to center hooks usually are the ones that hook up IMHO. On lures that are strait swimmers, ones normally used for neutral mood fish (based on active, neutral, or negative moods of feeding fish) the tail hooks are often the ones that take the most fish. On negative mood fish, fish you may need to put the bait on their nose and keep it there for a time, the strike may be at any point and hook placement is always a guess. I could go on and on, and the lines get blurred a lot: for every rule there is an exception, so I don't want to even start trying to say one is better than another, but.......... here is my best advise. On smaller lures relative to fish size (how small is small?), when fishing for aggressive fish, front hooks are probably all you need. On larger lures, relative to fish size, fished for feeding fish, front of center hooks are probably more important, but tail hooks help. On any lure fished for neutral or negative fish, especially larger lures, front of center hooks and tail hooks are important. And..... well you get the point. In my experiences, I have fished a lot of very clear water. In my area, trout, like Rainbow, Cutthroat, and Browns are a common target. I have watched them follow a lure for several feet and just keep picking at the tail. Without a tail hook catching them would be impossible. On the other hand, I have also seen the same fish just appear out of the dark and grab the lure by the front and than a hook front of center is critical. As for a single hook, when used for a tail hook it works fine for me. I often replace my tail hooks with a single hook to make releasing a fish easier. When used for a front of center hook the hook often lays along side the lure and does not connect with the fish. I have used trout as an example because I have so much experience with them, but I have seen similar behavior in species in the Gulf of Mexico, off the coast in the Pacific Northwest of the USA, Musky and Pike in Minnesota, and on and on. I think it was In-Fisherman Magazine that I first saw the explanation of aggressive, neutral and negative feeding moods of fish, but consider this concept when designing your lures. It might help some to answer your questions.1 point
-
I like a 1/0 hook with my marabou jigs. I also like the 3/32oz weight as that fits my needs, yours may differ. I have several different versions that I tie but they all work well. I like the worm nose jig as well as the Midwest finesse jig for my marabou jigs.1 point
-
You could bend them with some nails. Put some nail in a board where you want them and then bend away. You may have to re-locate the nails a few times to get what you want, but it is cheap and easy. Also 24 ga. wire is easy to bend. Good luck and Welcome to TU.1 point
-
1 point
-
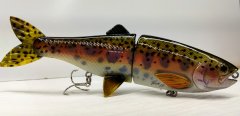
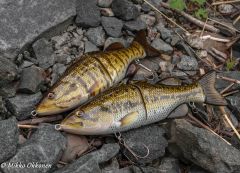 Well i have not posted anything in here for a really long time i've been enjoying the finnish summer and going fishing which i have been doing alot. anyways i decided to paint some bass themed baits and attempt to make them as realistic as possible with combining hand painting and airbrushing, the results should speak for them selfs.1 point
 -
First of all, fantastic looking lures and paint jobs! Second of all Ohh man! I feel your pain! I was in a very similar boat. All the work it takes to carefully design, shape, weight and painstakingly pain a bait only to have it ruined by a final epoxy layer, that hurts. I also make lures for pike and musky, and I do love epoxy. Stick with it! I have found for me that to get the best results, I have to make sure the room I do the epoxy in is at least room temp, if not slightly higher. I used to do my epoxy in the garage where I make the baits, but the cooler environment played havoc with my epoxy and all the problems I had. What helped me (besides learning all the contamination issues), was warming up the bottles of epoxy in warm water for a while before I applied it. And making sure that wherever they cure on my turner, that room is at least 20 degrees Celsius. Lots of guys will turn on a light near the baits to keep that area a bit warmer. That seemed to help me a lot. The epoxy on the last few rounds of baits I did have turned out really well. Good luck, and stick with it. Many people will recommend other finishes, but I agree, epoxy done right looks amazing on a lure.1 point
-
If you're interested in trying to achieve a flawless finish (meaning as flawless as possible...lol, seems like theres always a flaw if you look hard enough)...try to slow down when applying the final topcoats. Put down a clean piece of paper for a work area. It can be an old magazine or the backside of something you copied, but its always good to have a clean work area and a clean spot to place the lure before you begin. Wash your hands thoroughly first. Your hands very often contain dust of one type or another which will fall onto the sticky surface and show in the final finish. Clean your brush of all dust particles by fanning it with your finger or thumb till you can no longer see dust flying off the bristles. Also remove any loose bristles so they can't get dragged into the epoxy during the application process. Mix the epoxy on a clean non-porous surface. Some guys like the bottom of a soda can. I like medicine cups because if you buy them by the hundred count, they are cheap and disposable...about 4 cents a piece...for four cents, I don't have to slow down and clean anything when I'm done and if I'm mixing envirotex instead of Devcon 2 ton epoxy, the medicine cups have markings on the side which help you achieve a perfect 50/50 mix every time. I prefer use acid brushes for applying the epoxy. I crimp the tip near the bristles with a pair of pliers to lock down the bristles and fan the brush to remove loose bristles and dust. I do not clean the acid brushes. I toss them when I'm done, because for the cost (about sixteen cents if you buy them in bulk), I don't have to repeatedly expose myself to the toxic solvents required to clean any type of epoxy. For me at least, it is not worth the health hazard, which you will repeatedly encounter if you make baits in any quantity at all...say 50 baits a year times only two coats per bait...you are inhaling highly toxic chemicals 100 times per year...unless you wear a mask and how much trouble is that? I prefer to avoid mixing on paper or any other surface that might have tiny loose particles on it, because the tiniest of particles will usually show in the finish after it dries. Mix thoroughly. I use wooden sticks similar to popsicle sticks and despite the idea that it may throw a few bubbles into the mix, they work great. The heat gun remove all bubbles anyway. I know others prefer plastic mixing sticks of some type but I have easier access to popsicle sticks so I use them and toss them after using both ends several times. 99 times out of a hundred if you have bad patches which are still tacky after 24 hours, you failed to mix properly. Once in a great while, I've gotten a bad tube of Devcon. Devcon seems to have a finite shelf life. Try to buy the tubes that have the least amount of yellow in the one tube. It seems to be the "freshest" stuff and goes on a LOT easier and does not have the abbreviated working time that the very yellow tubes have. I've had no such problems with Envirotex lite. After application of the epoxy, take a moment and turn the bait over as you hold it under a light and carefully examine it for any fish eyes, missed spots or dust boogers. If you find dust, you can at times just remove them by wiping them off with your finger or rolling a toothpick next to them to sort of roll them onto the toothpick. If I find minor dust or epoxy specks in the finish during the first one or two coats, you can usually leave them as they are and just sand them lightly with fine grade sandpaper prior to the application of the next coat. Of course the final coat is the one where you won't have the luxury if ignoring them because you can't sand them out afterward without scuffing the final finish. Once you apply the epoxy LEAVE IT ALONE and put it on the spinner or spin it by hand by holding the bait by the tail with a vice grips. Don't keep brushing it and trying to spread it...It will only get progressively worse and it will almost always flow itself out nice and level after normal brushing. Try to apply the next coat before the previous coat has fully cured...once the first coat has dried to the point where the bait can be carefully handled. By doing this, the next coat will chemically bond to the first giving you the best possible bond between coats. I've had occasion to have to sand out aberrations in a finish and have noticed that allowing the epoxy to fully cure between coats creates a distinct separation between the two, which could create the possibility of delamination of the latter coats, especially with envirotex under certain conditions and most especially if the first coat is applied over foiling. With Devcon, I try to apply the second or next coat after 4 to six hours. With envirotex, which I use almost exclusively these days, I find that leaving it sit with a cover over the medicine cup (to preclude dust settling on the surface...I use a piece of scrap Lexan as a cover) makes it gel slightly. Because it is a bit thicker after allowing it to sit for ten to 15 minutes, it behaves much more like Devcon...goes on evenly, less prone to run, and far less prone to show dust and foreign particles. It will only slightly abbreviate your working time, but it will go on a bit thicker and require less coats to achieve any desired level of protection. By allowing it to thicken just a bit, I find that I can usually get by with three to four coats instead of four to six thin coats and the finishes are clearly superior and have far fewer flaws. It is probably the best tip I can share about envirotex. I've found that applying envirotex immediately after mixing encourages separations and fish eyes. I know there are times when you only want one thin coat, but even then I let it sit for 10 minutes and try to apply it sparingly while still covering the bait completely.1 point