Leaderboard


Popular Content
Showing content with the highest reputation on 01/06/2021 in all areas
-
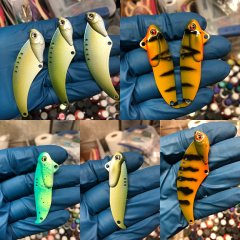
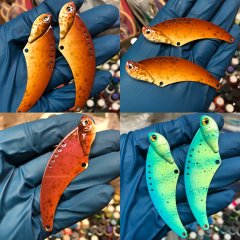
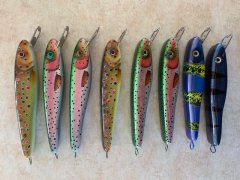
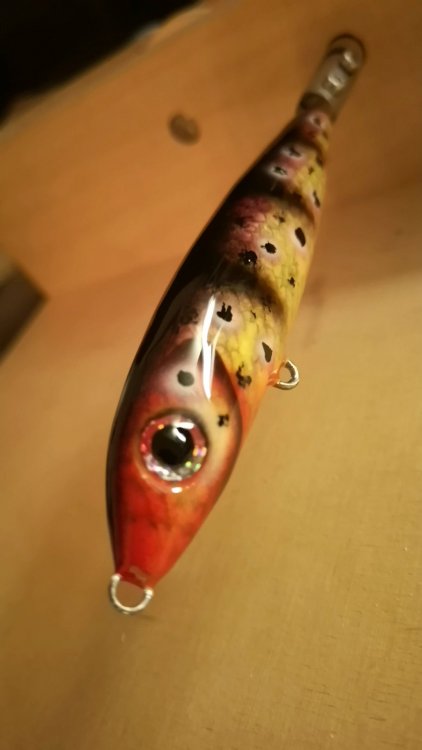
There are a bunch of different types of lipless crankbaits. A flatfish is just one type of many different types of lipless cranks. The one in your pic was a common style years ago similar to the Heddon Bayou Boogie, Pico Chico, Storm Whiz Bang, Buckeye Shad Lipless Crank. Poe's also made a lipless back in the day similar to your pic. Although some of the older style baits are still being sold, that older style seems to have fallen out of favor since the Rattle Trap type baits gained in popularity. Your pic does have the line tie lower than most of the older baits. The pictured lure's shape is somewhat like Strike King's Red Eye Shad with a steeper vertical face and lower line tie.2 points
-
+1 = I do exact same thing.... set up the pots - let them run while i get all my other crap together. Beauty is you really don't have to pay attention cause its automated. And to answer and earlier question.... Do you need an auto stirrer? - no - but - Is it super convenient - yep - Save plastic as Dave mentioned - yep - Make life easier.... absolutely. J.2 points
-
I tried that, years ago, but my ex-wife got pissed.2 points
-
And remember that is a 9 year old video. Things for me have changed. I have been using something I made years ago but never made a video of it. Soon I will make a video of it and you will see all that I have learned over the years from actually doing it. It’s simple to use and easy to fix if needed. And uses something about 3000 of you already have.2 points
-
35 is not as fast as you think it is. Get one and try it. Then you will know. And the plastic is thicker than you think. I can’t suck up anything if it is down to 1/2 an inch from the bottom.2 points
-
 Not exactly lures, but close. Some bottle openers that I made for Christmas (good painting practice)1 point
 -
Mine have 4 blades with holes in them. I don't recall any issue with bubbles.1 point
-
Hook points will wear through D2T eventually. D2T is one of the hardest and thickest topcoats out there. The only real solution I have found is to minimize the hook points scraping against the the lure. I will sometimes use nail polish or thinned epoxy to fill in a hook rash groove. That only extends the longevity some. Best to do that before it gets through to the paint. I have been switching over to T-type trebles (Owner St-35, Decoy T trebles) for belly mounted hooks. Those type of hooks reduce hook rash. When you put the hook on, make sure the flat side is against the lure. You can bend some trebles into a T with pliers. Some trebles like Owner St-36 are too stiff to bend and will break if attempted. So, be careful when attempting to do this (gloves, safety glasses). KVD triple grip trebles also reduce hook rash a little as the points are tipped in towards the shank a bit.
 1 point
 -
Hey Apdriver. Thanks for the mention. I do a lot of custom lead casting molds. I've got more than a dozen custom lead mold jobs (several are multiples) on the custom jobs board right now(and lots of plastics), but for anybody who contacts me and says, "Can you just do a knockoff?" or "Says just make it exactly like this photo copied from a competitor's website," I'm gonna pass. They need to be able to articulate a new idea or a significant product improvement. Sure there are only so many way to make a ball jig, but if its something less generic they need to be able to make it their own. I don't think its at all clever when I say to do a rough sketch of exactly what you want, and take the time to write a good description of important details, and I get a wordless reply with photos stolen off Tackle Warehouse. Again, Thank you for the mention. I still read the site periodically, but I don't post much because I think people would feel like I am spamming the group. Bob La Londe1 point
-
I use stuff similar to the above in making my Wels catfish rigs. Those larger diameters would probably work great for the hook sizes you mentioned. If you can't find a solution I'd be happy to send you some to try out.1 point
-
@exx1976 Here in Europe carp angling is big. Stuff like the image below is used in making hair rigs and other carp rigs. This would probably work great as you can find it in a variety of diameters. I have no idea if they have stuff like this in tackle shops over there but maybe this suggestion will point you in the right direction.
 1 point
 -
Well I was no professional, always lost a few, but for the most part they stayed in tact pretty well.1 point
-
I have a 35rpm in one pot and 50rpm in the other pot (got it for $10 so didnt care it was a little fast)..... and there are no bubbles (atleast that I notice)..... in reality - even at 50 rpm it's 1 turn per second almost half that for 35rpm.... I bet it if you measured how fast (RPM) we whip around plastic in a Pyrex by hand it's a whole lot faster.... Plus a presto has such a wide diameter - there is alot of surface area for bubbles to rise and escape - compared to a tighter diameter pyrex type cup. J.1 point
-
Wiring a PID into your presto pot eliminates a lot of the heating issues. I put raw plastic in the pot, turn on the stirrer, and set the PID to 350 and let it run. Once it hits 350 I turn the PID down to 300 - 310 and when it gets there I add my colorant and flake and shoot.1 point
-
The paddle has a lot to do with it as well as the motor rpm. Mine will start to aerate the plastic a little when it gets down to 1/2 inch or so of plastic.1 point
-
2Marshall8 - I freely admit that I am well beyond personal experience here, but you do not require experience to apply logic. Plastic is an insulating material, in other words, it does not transmit heat easily through the bulk. When you switch on a Presto pot, the heating element raises the temperature of the plastic in contact with the surface of the pot that is being heated. Because the heat transfer properties of the plastic is low, it cannot pass that heat energy to surrounding plastic fast enough and overheats, even though the surrounding plastic is cool. Either you stand over the pot and continually stir while the plastic is being raised to operating temperature or you employ a stirrer. If you do not stir constantly then you will scorched half your plastic yellow before you even reach production temperatures. Once the plastic is at production temperature, the thermostat will kick in and try to hold that temperature by switching the heat on and off. You still need to keep the plastic moving but not to the same extent, an occasional hand stir being sufficient. If I were to design a pot, I would include a low audible warning when heat was being applied to the plastic as a warning to stir. Alternatively, I would have the stirrer move slow when the heating element is off and faster when heating element is on. I would include a holder on the stirrer for the injector when not in use to avoid any fouling between stirrer and injector. Yes, there are mechanical limitations to this idea, but none that are insurmountable, it is just a design problem, there will be solutions. Design is ALWAYS a compromise; a mechanical stirrer for heating up and a manual stir when temperature is achieved is the accepted compromise. Dave1 point
-
You bring up another good point - adhere. I've seen hard masters being super glued down to their base plate to prevent shifting. Will regular super glue work on soft plastics as well? Any chance they are salvagable when you pull them up?1 point
-
Always best to clean them first. You are on the right track. I always placed mine in the kitchen sink (my wife LOVED that - LOL), cool water and Dawn. Make sure they are really dry so they will adhere to the pan. Good luck!1 point
-
Smalljaw .... I thought the same thing about why I'd need to modify it unless changing hooks. Here is a picture of the jig head from a Do it mold called Manix mullet .... I plan to use it on umbrella rigs. My reasoning for this mold is that I like the different weights of the jigs and the size hooks that match the weights ( 1/4 oz with a 3/0 hook 32786 black nickel ) that hook has worked well for trolling umbrella rigs for big hybrids. Another thing I liked about the head is the over sized eyes socket I appreciate any suggestions .... lead type, paint, eyes etc... Looking at ordering from Lurepartsonline. Thanks
 1 point
 -
 @Big EppIt sure was! As I was telling Dave above its a pretty special lake that's just full of giant perch. I'm out three or four days a week at the crack of dawn before work (its about a mile from my office) with the kayak.1 point
 -
 Looking good brother!1 point
 -
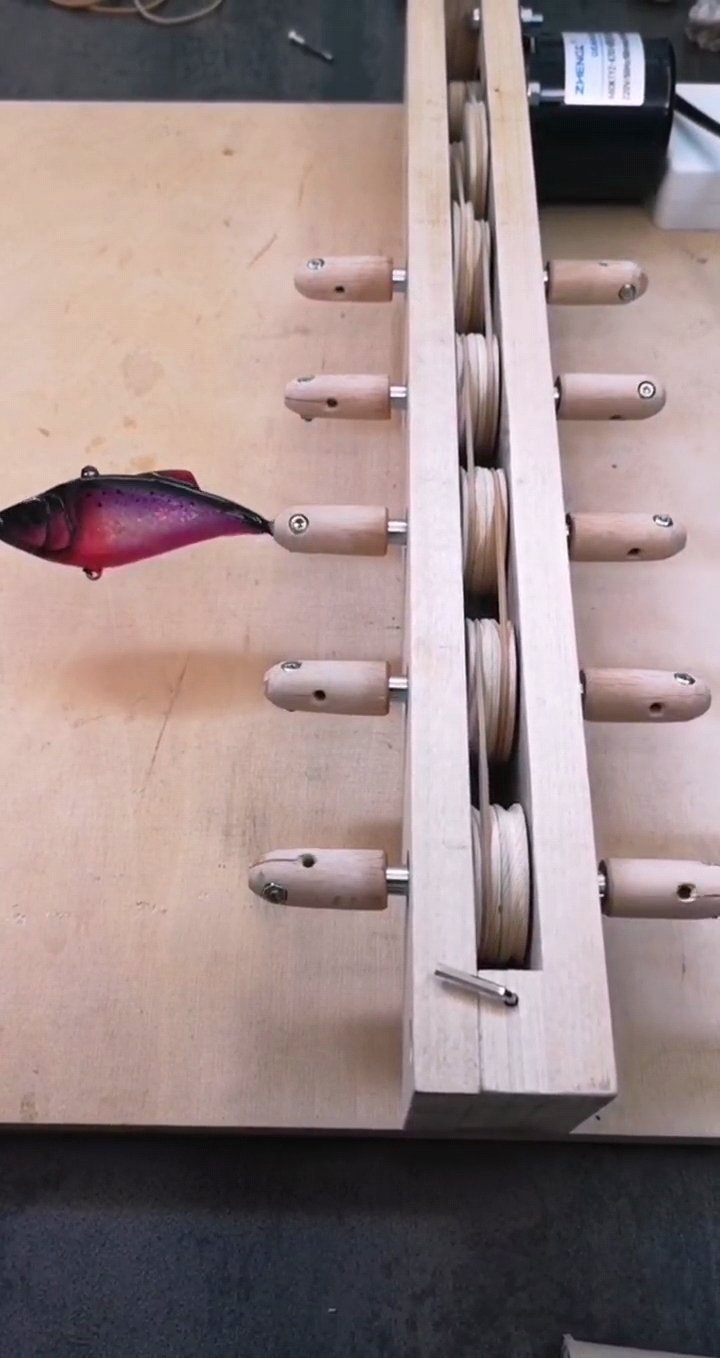
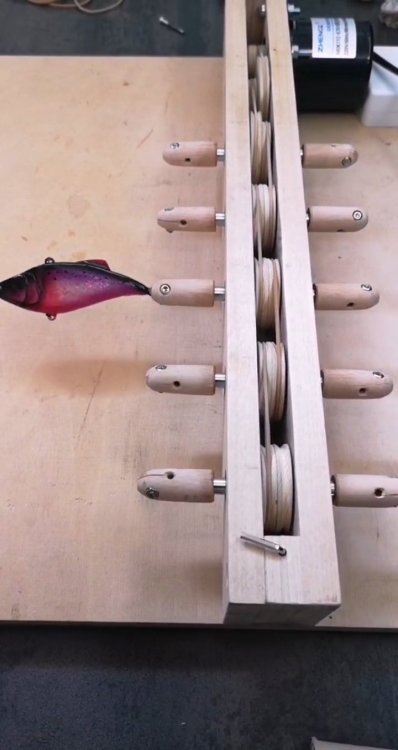
Hi everyone. This is my first post on this site and thought I'd show you my lure drying rack, in case someone is figuring out what kind of rack to build. This has an 220V motor with speed of 50r/min. Speed is reduced to 10r/min with two first pulleys, hence the difference is size. The clamps for the lures, wooden tips on the steel rods, are detachable. Clamps were originally made to the end of the steel rods (visible in the second pic), but this system where clamps are made from wood and are detachable, is way more handy. You can just pull it off, attatch to lure, coat the lure and jab it back on while other lures are rotting in rack. No need for high torgue motor either for this system as this rotates very freely. And lure size doesn't affect this pretty much at all because lures rotate through their longitudinal axis. The axles, made from steel rods or to be more precise, threadless shanks of long bolts where head and threads are cut off, are hanged by ball bearings, rotated via wooden pulleys, run by elastic rubber bands. Rack I had before this was with an discoball motor, the kind of drum model that many of the lure builders have. Very bulky and takes a lot of space. Motor broke and didn't want to make another one, desided that this is way more suitable for me as I can hang this on the wall and keep it rotating. Literally doesn't need space at all. I'll be happy to answer any questions someone might have, great to be on this site with fellow lure builders. Cheers, Jarmo from O'baits
 1 point
 -
This looks like a custom to me. The link provided is a mold maker that produces the most saltwater jig molds that I know of. Here is a link to his website. http://shawncollinscustoms.net The thing that looks custom to me and makes me think it’s a custom jig is the brass eye for the line tie. It is probably a figure 8 connector that attaches to the hook eye. Definitely not part of that hook. If you could get your hands on a jig, you could figure it out pretty quick and get the sizing of the components just by melting the lead off one. Bob Lalonde, on of our members here, does some custom stuff if you wanted a CNC Mold. I’ll link his website here. If you didn’t need a whole bunch of them, a RTV Mold would be doable also. http://www.cncmolds.com/webstore/1 point