Leaderboard


Popular Content
Showing content with the highest reputation since 04/19/2023 in all areas
-
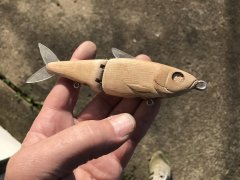
no one mentioned the l;ip slot. if crooked it will death spiral5 points
-
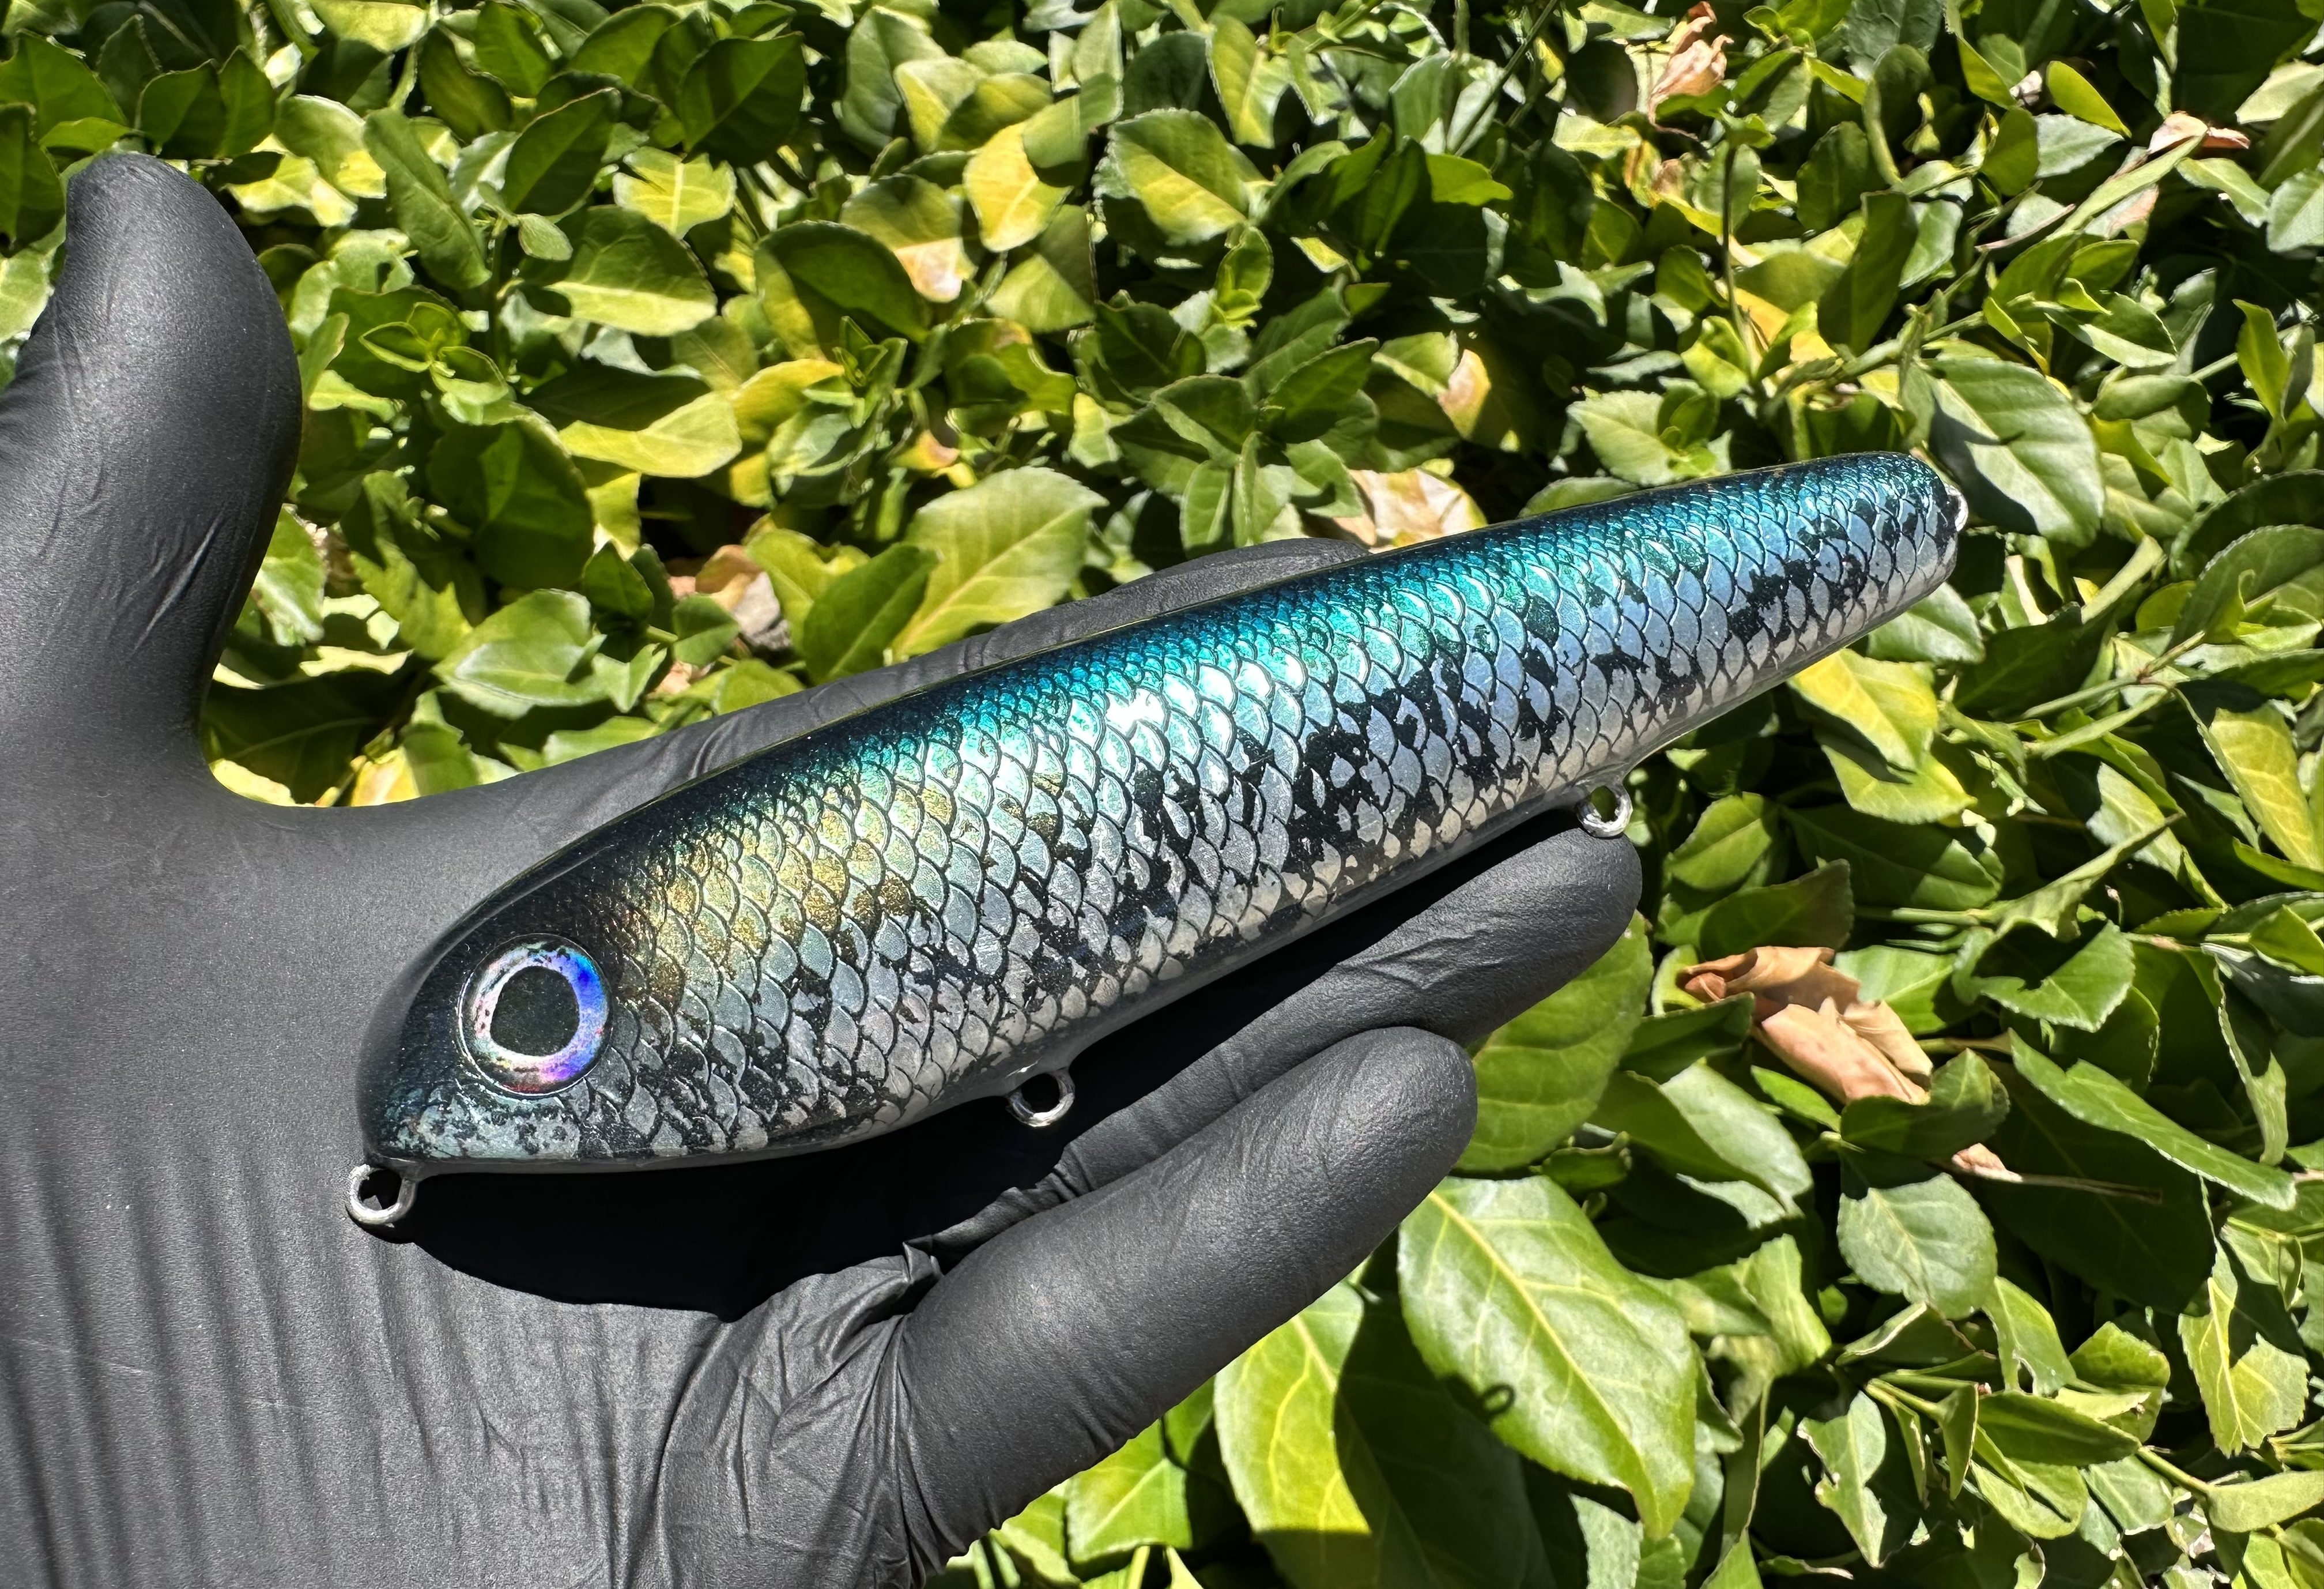
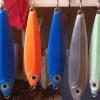
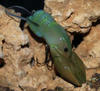
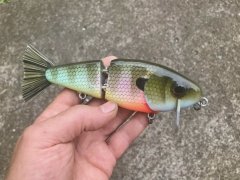
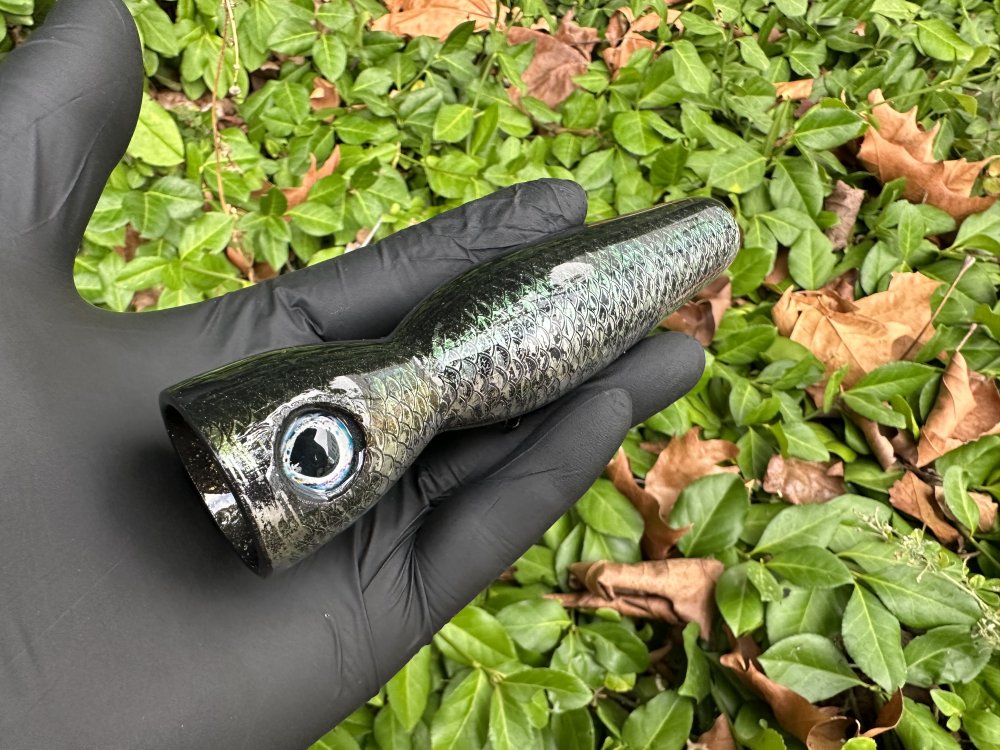
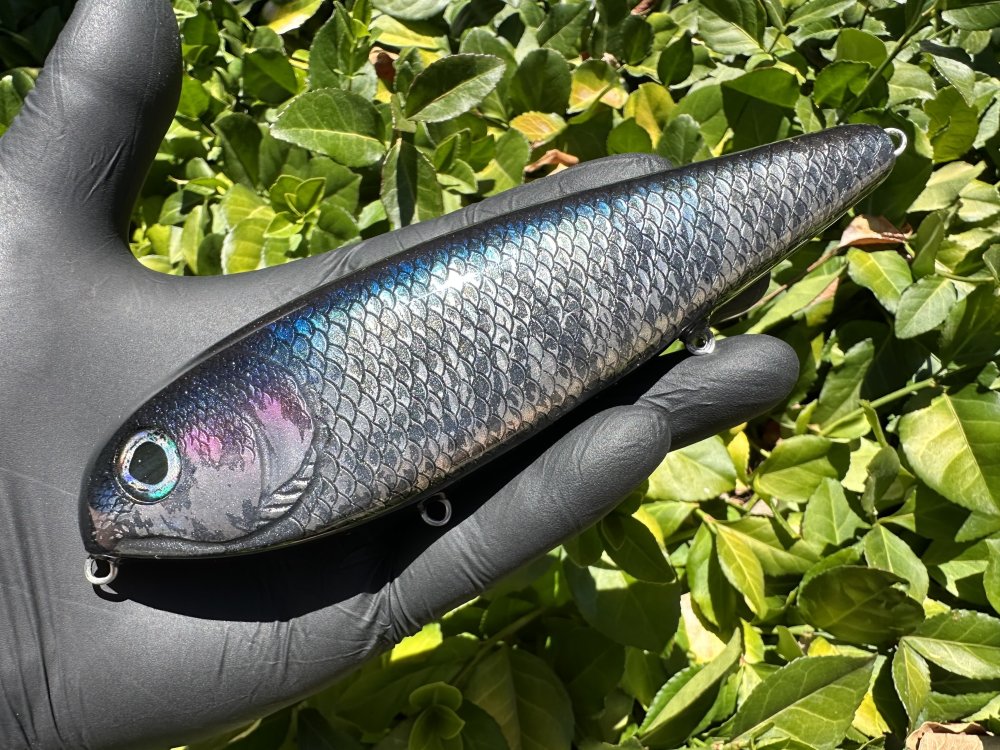
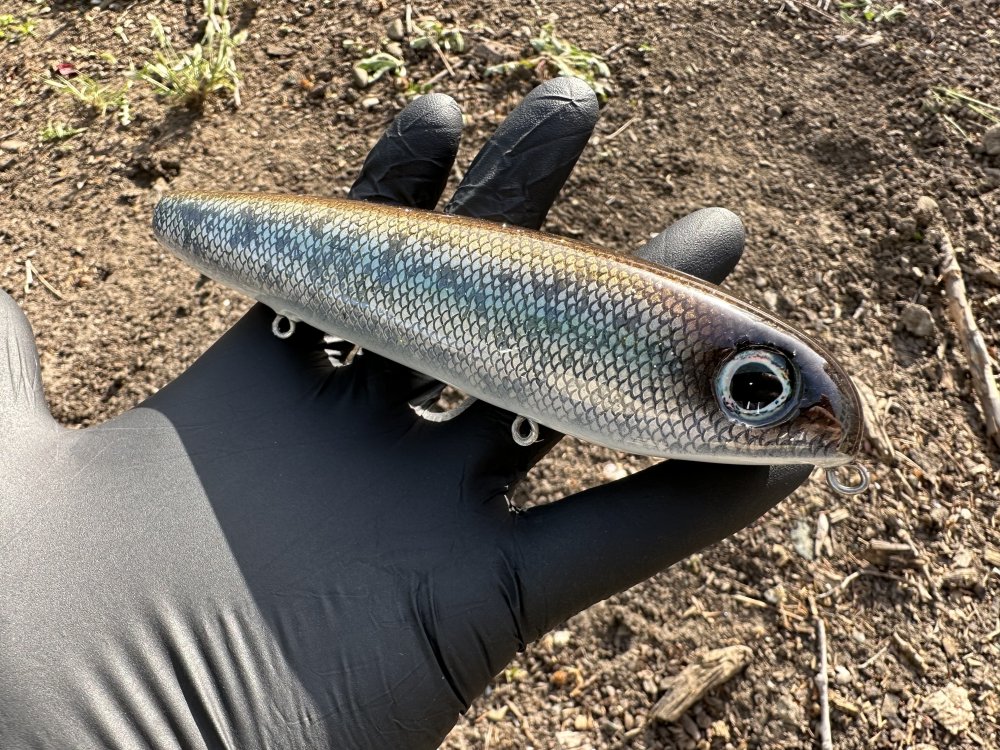
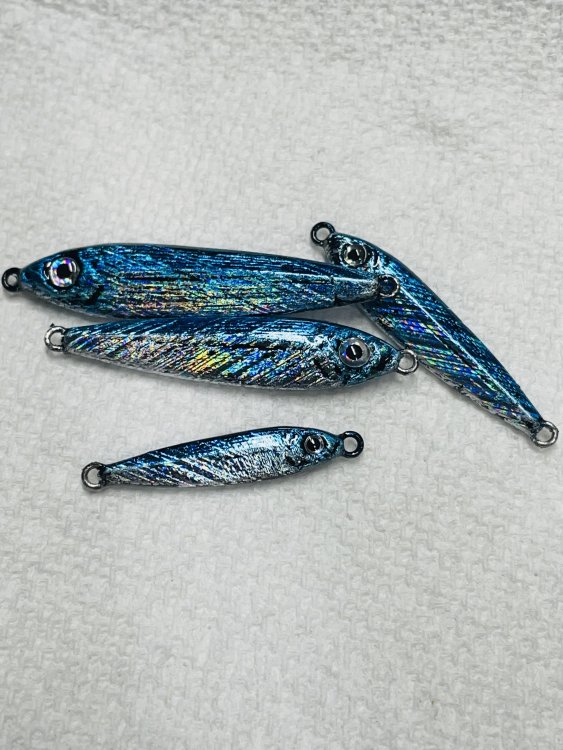
I like working with foil as I can get some really cool effects with it. Here’s some topwaters I did in various paint patterns.

 4 points
 -
Being a fan of the Smalljaw channel on YouTube and enjoying his helpful advice here I was wondering where he had gone. Just saw this video he posted a few minutes ago updating us on what's going on. So here's the link for those who are also missing his great content!4 points
-
Litterally has nothing to do with poor quality machining. The nose (ie the gate) MUST be 50/50 in the mold, which it is, and the part line is lined up as such. A proper fluke (zoom style) the belly extends deeper in the mold than the back does and has a hook slot (which is the issue at hand). The hook slot interrupts the flow of plastic and when injecting too fast causes both colours to mix more in the cavity as was seen. Hence when he slowed down with the injector he saw better results. Also why on many minnow style baits that have a larger belly cavity without a hook slot you are able to get clean laminates fairly effortlessly.4 points
-
When this happen to me with some lipped baits it was not enough weight in the front to point the lip downward.4 points
-
Temp & speeds are pretty crucial when shooting plastics. Heat it to 350 & shoot quick. Like said above heat the injector if it's cold. I mix in colorant & flake most times before heating unless i'm making a totally new color that i haven't figured out the mixture yet. This way i prepare the mix, heat to 350 & inject like a well-oiled machine more or less & seldom have any problems at all. The more you do it the more you'll get your system worked out & the problems pretty much become a non issue.3 points
-
I picked up a cheap meat grinder from harbor freight. It works really good and I think it was around $30.00.3 points
-
Don't ever, EVER lick melted lead.3 points
-
Everything you folks responded with is what I've been doing. Experience I have. Been shooting my own stuff nearly 30 years. This is my first attempt with my dual injector. Up until now I've either use commercially made laminate plates, or made my own from heavy aluminum flashing. Wanted to leave that behind and speed the process up. I think my biggest issue is my plastic cooling too fast. There are those, for lack of a better word, condoms that form over the nozzles. They cool and prevent the plastic from shooting. Too much pressure and I make a mess. Nozzles are hot enough, so then its got to be my plastic temps. Viscosity to me is everything. After I get to temps, no matter what or how I'm injecting, I check viscosity first.And yes, salt or glass beads make a difference. Plastic and additives too. These really had an effect when I first started shooting core shot baits. I guess just as I had a learning curve with core shot baits, there's going to be a learning curve with the dual injectors. Sooner or later I'll get the feel of it.3 points
-
I'll probably go with Bait Plastics. How about y'all?3 points
-
3 points
-
When you start painting plastic blanks, you may want to put some superglue around the hook hanger eyes and line tie eye. Some of the blanks may leak around those spots. Sometimes your paint and clear coat doesn't get in around the eyes to seal those spots. You can buy 30 cheap small arts & crafts paint brushes for $2 at walmart to smear the superglue around those spots. There are several suppliers who make those types of blanks. You can check the pinned post at the top of the hard bait forum. Here are some links https://www.sheltfishingtackle.com/shelts-rap-ko-shad-blanks-p-100.html https://lurebuild.com/ols/products/3-flicker-minnow https://fishheadcustomlures.com/d7-crankbait-chrome/ https://fishheadcustomlures.com/d7-crankbait/ https://backwateroutfitting.com/product/rap-crank-unpainted/ https://www.sugartitcustomlures.com/product-page/basic-5-shad I find the narrow rolls of painting tape to be useful when painting small blanks. 3M makes 1/8" (0.125") and 1/4" (0.25") rolls. https://www.amazon.com/3M-2090-0-125in-60yd-Masking/dp/B007Y7GPQU/ref=sr_1_10?crid=3Q6MY49OQXCYU&keywords=3M+2080+ScotchBlue+Painters+Tape+–+0.125+in.&qid=1702823144&s=industrial&sprefix=3m+2080+scotchblue+painters+tape+0.125+in.%2Cindustrial%2C112&sr=1-10 https://www.amazon.com/2090-ScotchBlue-Painters-Tape-Preparation/dp/B0079NPE6G/ref=sr_1_4?crid=NOB3GQWOLAX0&keywords=3M+2090+ScotchBlue+Painters+Tape+-+0.25+in&qid=1702823395&s=industrial&sprefix=3m+2090+scotchblue+painters+tape+-+0.25+in%2Cindustrial%2C104&sr=1-43 points
-
3 points
-
Been there done that. Just bought 3 tickets for an upcoming concert. Taxes and "convenience Fee" added up to the cost of another ticket. There was nothing convenient about this. Can't print tickets, they don't mail them. I may be old, but at least I got to see the good bands! Cheaply! I can't be sure, but if the shipper is UPS, they charge a fuel surcharge. But I thought it was around 2.50 Maybe that's this charge. Agreed! I know if I have to pay a bit more for something, I automatically add stuff to my cart to get my money's worth. If I don't know in advance And I get to checkout, I just say nope, and buy somewhere else. There's a lot of suppliers nowadays all selling the same things we use.3 points
-
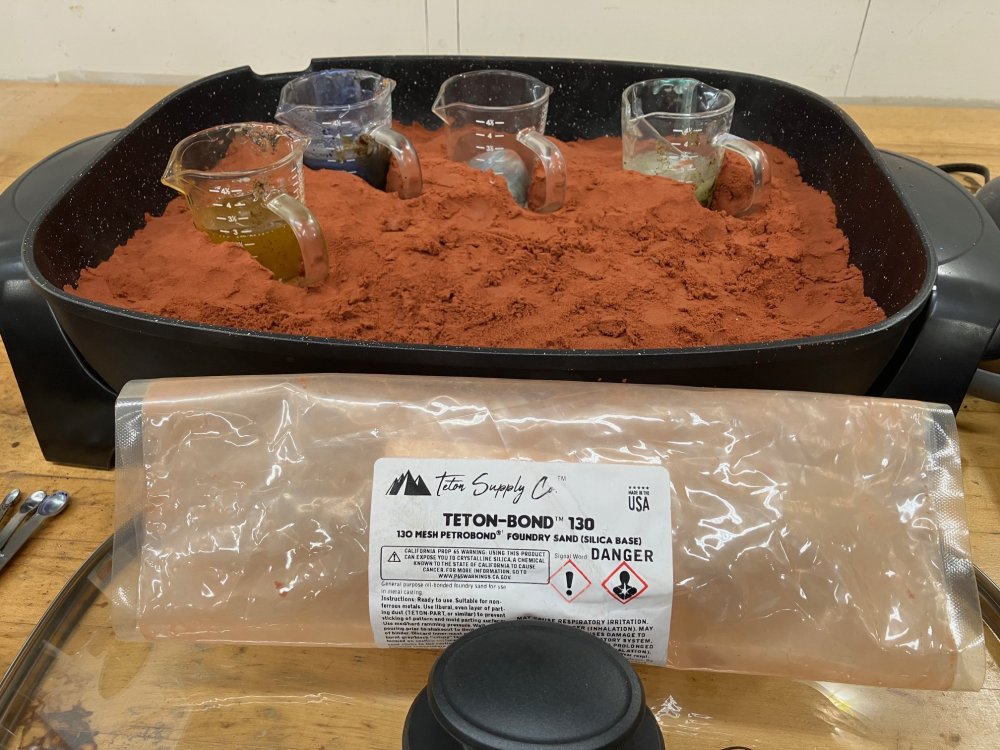
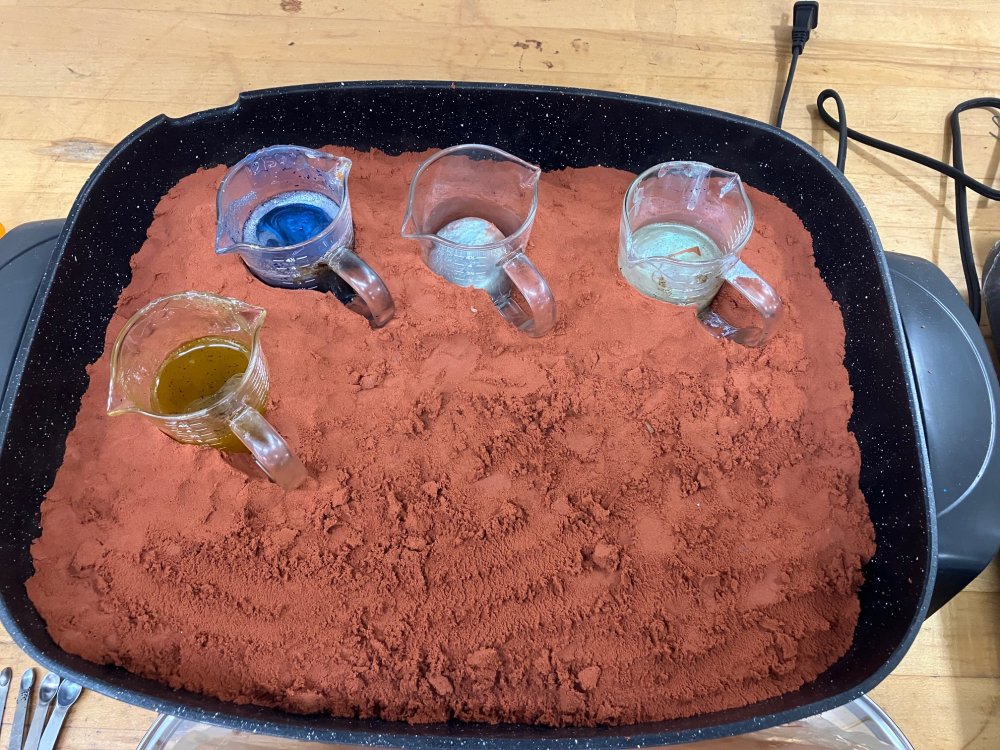
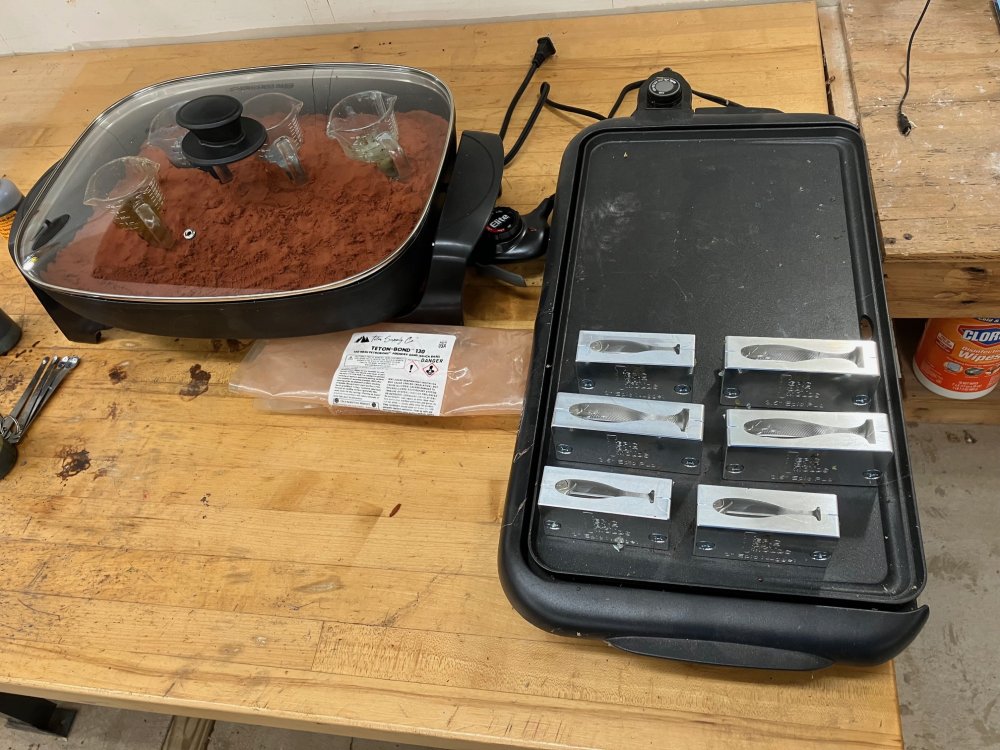
I finally got around to doing this. The borosilicate 4 oz pouring cups work well for 3 & 4 color open pour molds. Wanting to keep the cups warm to extend open time, I molded this hi-heat sandy clay in a griddle with lid. Keeping the molds warm on the flat griddle really helps the colors blend slightly “fuzzy” instead of sharp defined lines. Just getting started; will update after more use.
 3 points
 -
Best way for me is to have bait disassembled, but if you can't/won't do that...I wrap rubber bands in the joint(s).3 points
-
No one doubts that fish use the sense of smell and taste in determining what is or isn't food. But I have never been sold on the marketing sales pitch that fish are "attracted" to a presentation that utilizes a particular scent. After 40 years of angling for bass, my experience tells me that my catch ratios do not go up or down because I use (or do not use) manufactured scent on my baits. What I DO believe is that there are human-made chemicals that will turn fish off - especially those often found on the anglers hands. (Gasoline, sunscreen, etc.) So in my mind, what organic scents sold in bottles (or gel form) may actually accomplish is "Masking" the human chemicals that are transferred to our bait through our handling of them. Having said that, I also understand that the key component for success as an angler is "Confidence". Should someone use scent and it mentally provides them with additional confidence in their presentation, then just that cognitive advantage makes the smelly product valuable to that individual. So far the scientific studies and research have contradicting conclusions and have yet to satisfy the angling community with definitive means of settling this scent debate. However, whether the scent actually works or doesn't, the thing that most of us can agree upon... is that it can't hurt.3 points
-
I build various size baits and a store-bought stencil kit wouldn’t be very useful, if that’s what you’re talking about. I went to an art store and bought a roll of FRISKET, which. Is paper with a peel off plastic backing. After using it awhile, I realized it was best if I didn’t take the adhesive backing off and instead just held it against the lure. Added benefit, you can keep the template and build a library of them. Frisket is easy to cut with a razor knife.3 points
-
While you're waiting for your blanks, use the time to practice painting on some white PVC plumbing pipe. You can learn to paint curved surfaces, blend colors, and control your air and paint ratios and pressures.3 points
-
Have not used the gel to seal a bait did use to seal a few pens I turned when ran out of the regular super glure. It won't be absorbed as readily as the liquid due to viscosity. Personally I find the liquid easier better to coat things and the gel reserved for applications where I need it to stay put (mounting coral frags for example). A finger cot or vinyl glove makes short work of coating a bait. On my lathe I have sealed much larger pieces (bowls) with superglue in no time. Apply in low humidity settings and cure times will slow dramatically. A dehumidifier in a bathroom or walk in closet will let most get down to much drier conditions, even in humid environments. One year we had a small lab space 8 ft x 8 ft approximately that the AC had issues in and had to do some work on some materials that were sensitive to humidity. I could start out in the mid 70% range and get down to near 12% quickly running two run of the mill big box store units.3 points
-
LureWorks Cotton Candy 165 Purple Flake, some green flake, and what looks like a small amount of silver flake. Maybe you can adjust the color to your liking using a tiny bit of the florescent pink as alsworms said. I have a bottle of cotton candy from MF I think from some years back. Used it once. And like the rest of us I have a bunch of colors I've only used once.3 points
-
Saw this thread was revived recently. I now own a few molds from Angling AI. Happy with the product and their customer service. The only problem is I don't know which mold to order next.3 points
-
Easiest way to figure out if it's lack of weight ....put some weight on the front hook and try it.3 points
-
We used to put pennies on the railroad track when we were kids. There was no design but they flattened out pretty good...LOL!!! Anyway, those are really cool and it is a fantastic idea, well done!!!!2 points
-
Several good opinions have been given here. Besure to only make one change at a time so you know what “ fixed your problem. I’d probably start with more lip angle..then maybe a bit wider bill. Good old Elmers rubber cement will hold your bills in place for test swims and you can easily remove the bill and try several styles at one time.When you find the bill you want epoxy it in place2 points
-
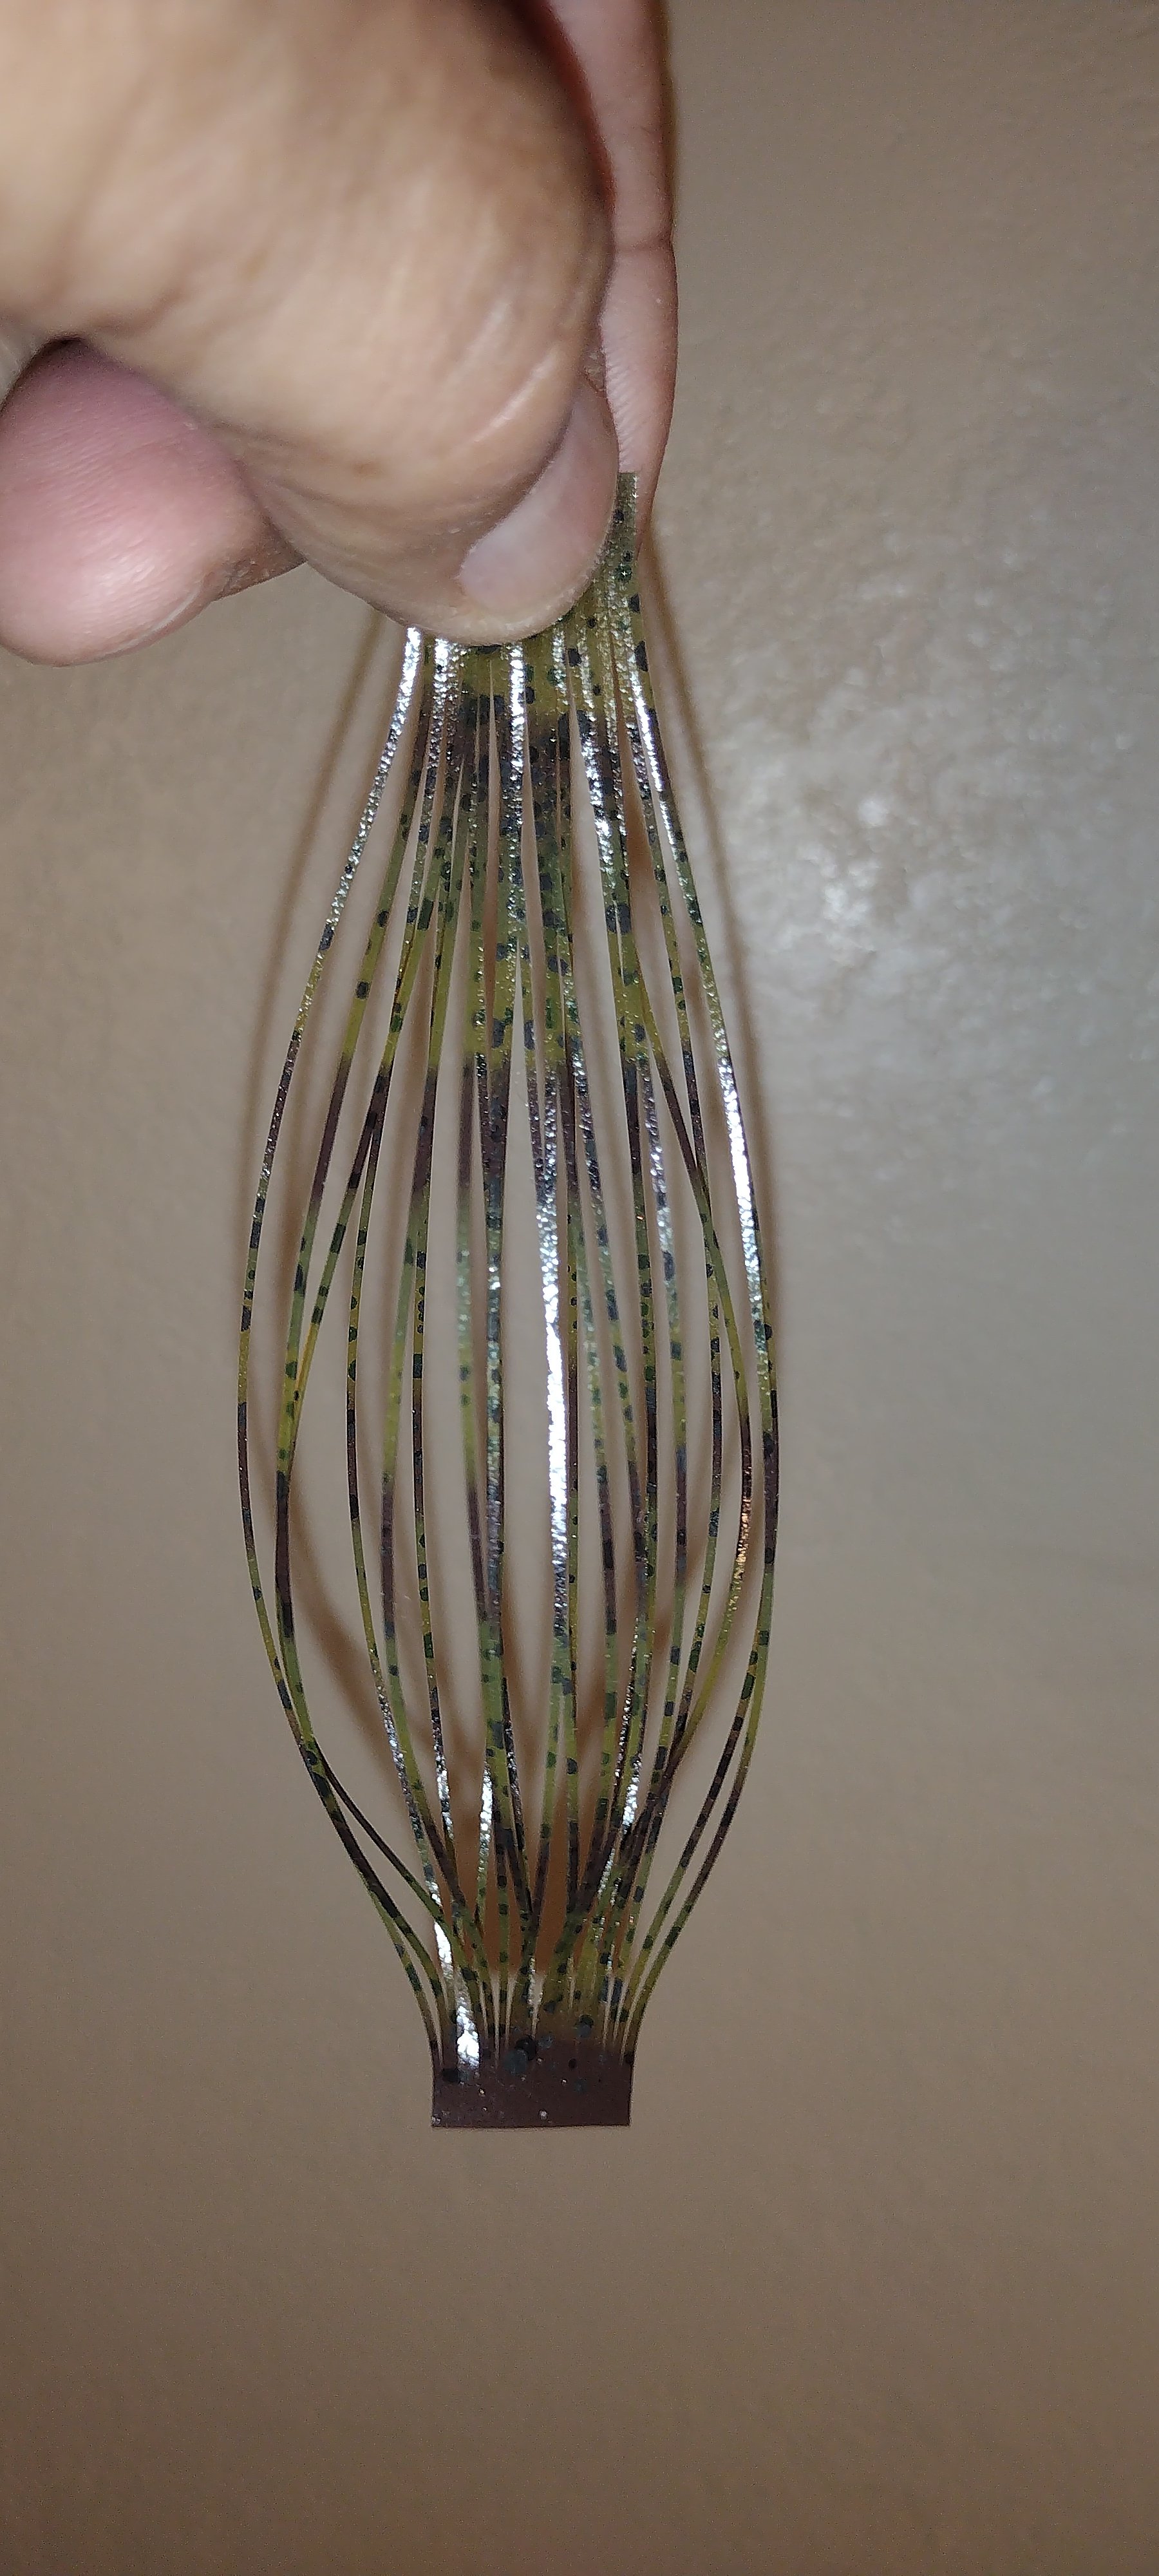
Using a simi sharp board like I uae for my vise I take the closed tabs with each hand in my fingers and run the tab back and fourth a hald dozen time to free up the matted material.
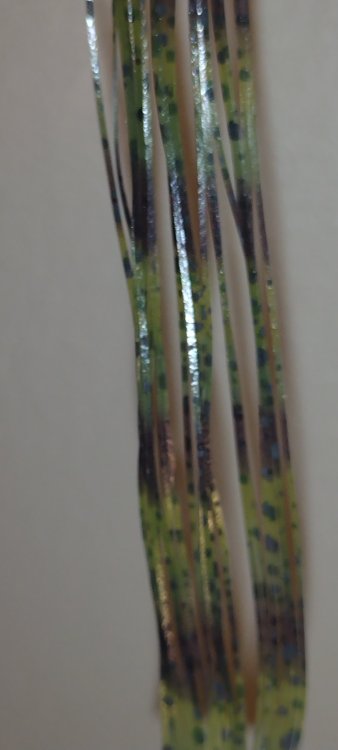
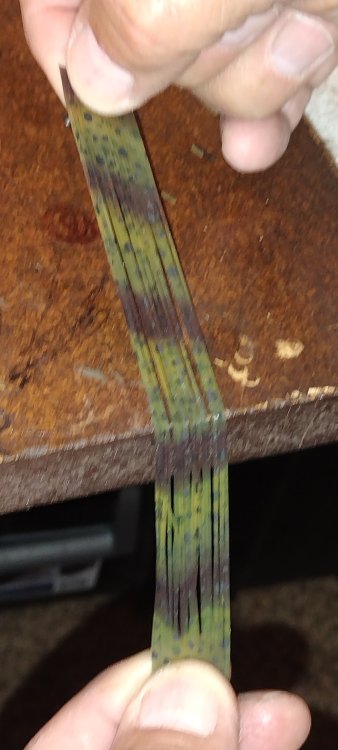
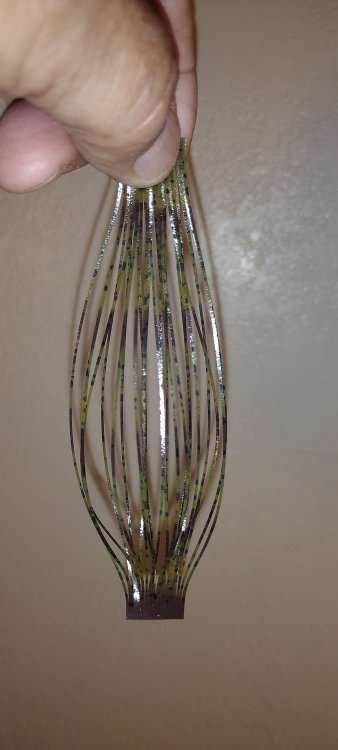 2 points
 -
I have been using a cheap pair of gate cutters from Barlow’s. I’ve cut several thousand sprus off and only sharpened them a few times.2 points
-
One of the old school hollow swimbait techniques (kinda like a BassTrix) was to use a butter knife with the light serrations ground off and the edge rounded over. If they wanted a conventional looking tail they just cut it that way. If they wanted a paddle tail they would split a Colorado blade part way and solder or braze it to the knife. One of the parts suppliers even started selling dipping blades with the tail blade already attached.2 points
-
Here’s what I do Chris. These spacers come in chrome, also. As a matter of fact, I think this one in photo is marketed as a crimp on sleeve.
 2 points
 -
https://store.do-itmolds.com/Safety_bc_11.html2 points
-
I’m not mad or disappointed in what Jeff has done. As we all do sometimes, he’s gone through a hiccup in life. Nothing for me to be mad at him for. I will continue to order when I need something from him. Best wishes to him and hope he gets settled soon.2 points
-
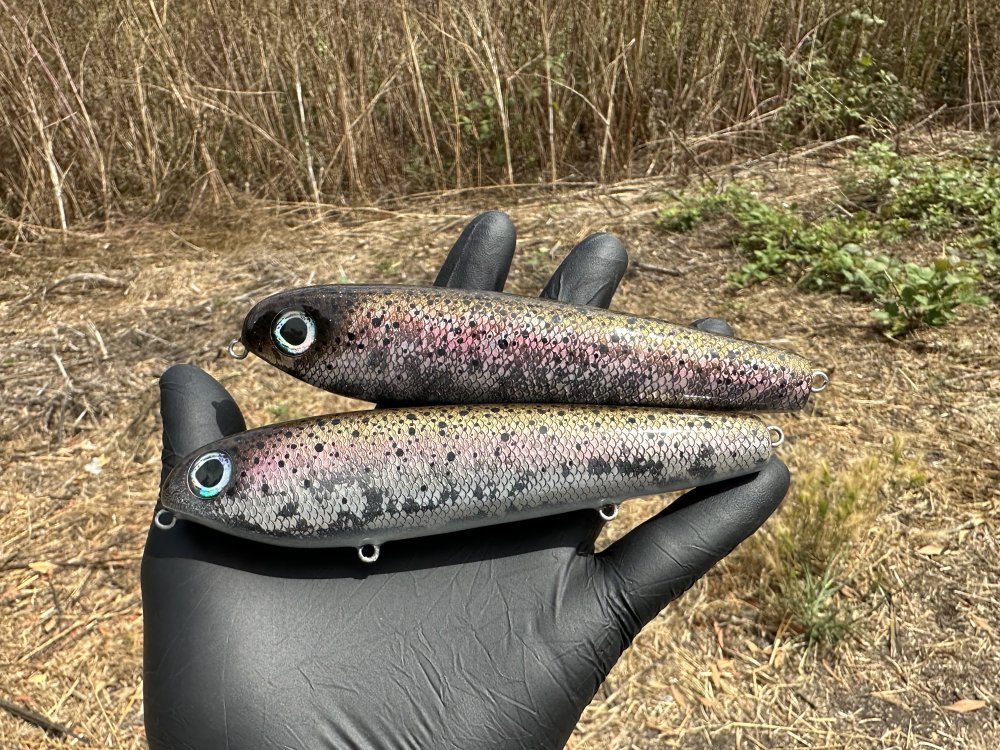
The fluorescent colors I have are from Golden and I think Spectra are thinner than Createx. As far as coverage, make sure you are mixing the fluorescent colors really good before use. Chartreuse and pink are infamous for pigment settling/hard packing. Once throughly mixed build up the color with layers. Spay, heat set, spray again until you get what you’re after. As for painting over holo tape, yes you can. Just go lightly over it. Test out a few blanks with varying amounts of paint and clear coat. This way you can get a feel for how much paint you need. I would also suggest consider spraying alcohol ink over the tape. Very little is needed and it gives the bait a nice look. See attached photo.
 2 points
 -
I have a Jacobs mold & machine mold that i use medium plastisol to make soft plastic salmon eggs in hot pink & chartreuse to use as crappie nibbles. One or two a day is all you use unless you break off. Sure beats paying 6 bucks a jar from them.2 points
-
Not sure if posted but I go through nail files more than anything else. The kind women use on their nails. One set is 80 grit on both sides. One set is 120 one side/240 other side. I like using these over sand paper because the foam in between the grits gives it more structure, kinda like using a block, but with enough pressure curves to the bait. Kind of hard to explain but steal some from your girlfriend/wife and try it. I start with the 80 grit till I like the profile then hit it with a couple passes of the 120 before ending with the 240. Works really good on lathe baits too. Usually get a couple/few baits per file before throwing away.2 points
-
2 points
-
Sooo, since you are the cosumate "insider" would you be willing to volunteer to update his website or do you just want to be the snarkey, pompous ass constantly posting about not having "time" to properly inform your customers of what's happening?2 points
-
Why not just wire tie with two wraps. Faster and easier.2 points
-
Tempering is really a third step in "heat treating." Get up to the correct temperature. Quench. Temper. There can be more to it, but is the sexy and glamorous part. Tempering is the process of reheating to a lower temperature to soften slightly for "toughness." In your case you are softening completely or normalizing the eye of the hook. After the quench a quenchable steel is theoretically as hard as it can be, but brittle. It can shatter. One of the things where people sometimes get into trouble is that different steel alloys have different best practices for heat treating. Any alloy under about .4% carbon is going to be a crap shoot. There are also some metals including some steel alloys that will work harden. That is, if you bend them, beat on them, or press them they will get harder. It makes me wonder when I see for example hooks with flat sides if work hardening isn't part of their process. I do not think that hook making is quite the mysterious arcane alchemy that some people would like you to believe, but knowing exactly how to process a particular hook maker's hook wire is probably going to take some experimentation. You could call or email and ask, but I don't think you would get a very helpful response. Years ago when TJ Stallings with TTI Blakemore (daiichi, tru turn, etc) was still alive he told me the company who made their hooks wouldn't allow them in the production area of the facility period. Not even a glimpse. I am absolutely not an expert or even a knowledgeable apprentice at heat treating. I just learned a lot by watching the blacksmith channels on YouTube for fun.2 points
-
$10 for 50..... You want B size "L" large.... Size "XL" is the full size you see the big brands use.... "L" is perfect for 1/8-1/4 oz and 3/0 hooks. https://www.ebay.com/itm/134257018314?var=4337102176492 points
-
Cut up an empty plastic milk jug. You can get a decent number of stencils out of one jug, and it's basically free if you drink milk.2 points
-
They are rotary blades (45mm). I got a replacement pack of 10 on Amazon.2 points
-
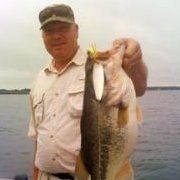
I am 100% sure scents/taste can make a difference. However I make my own. I am sorry I can not give a recipe as I may go commercial on this. It is however a combination of many different substances and I have worked with different smelly baits for years so I have access to a lot of weird stuff. This I have posted earlier, there is a sauce on the soft bait to the left and later in the video on the hard bait to the right: Here there is two identical soft baits, sauce on the right. It seems like it works especially well for the more sceptical fishes.2 points
-
I don’t know how big a area you need to cover but if you brush on a little clear hard as nails finger nail top coat it will take care of that tacky feeling..Nathan2 points
-
All the molds I have or have had do not need excessive clamping pressure. They just need the right amount of clamps in the right areas. Try this and see what you get. Clamp up the mold(s) firmly but don't try squeeze them hard. Shoot your plastic at 320° then try backing the temp down 5-10°. When you find the sweet spot on the temp that the mold doesn’t flash use a sharpie marker and write that temp on the mold. Slow down your injection plunge. If it’s a mold that requires holding pressure to fill appendages or antenna back off on the holding pressure.2 points
-
Im gonna give it a shot. They sell dried shrimp at a local mexican market, im gonna pulverize it into a powder and give it a whirl. I wonder if the fish will like it.2 points
-
I think it's more for the angler than the fish. Some guys swear by the Bait Fuel but it's water based. I do add scent to the baits I sell.2 points
-
www.ispikeit.com/product/623/cotton-candy-1652 points
-
 Work. Of. Art. I think I need it lol. just to umm... Yaknow, to do some prototype testing...2 points
 -
Also want to add that the 0.5 dd is a custom mold that Brian had made so that bait won't be available anywhere else. I haven't compared side by side but I think the squarebill that cedar run offers is different. his is bigger, closer to a 1.0 size https://fishheadcustomlures.com/point-5-dd-crankbait/ https://fishheadcustomlures.com/point-5-squarebill/2 points