basscatcher89
-
Posts
36 -
Joined
-
Last visited
Content Type
Profiles
Articles
TU Classifieds
Glossary
Website Links
Forums
Gallery
Store
Everything posted by basscatcher89
-
 Thank You! it took alot of playing with some stencils to find what I wanted but I finally hit on something that I liked.
 -
 Thank you! I'm pretty new to airbrushing still and this was one of my first that I'm proud of.
 -
Yes xcarve can do it. Only thing that gets rough is those DeWalt routers assuming that's what you got with yours only go down to 18k rpm but just take it slow and you should be ok. I'm using carbides router which goes down to 10k but I've seen folks using the DeWalt routers with no issue. Yes I'm using fusion for design and the cam work. It took awhile to get the hang of it but it's a real powerful software.
-
I've been getting decent life out of mine. I right use 1/4 all the way down to 1/32 size bits. I go pretty conservative with my feeds and speeds they tend to last awhile. 1/8 ball cutter and flat cutter are pretty much my go-to then I work my way down for fine detail. I have cheap cutters for wood cutting then buy coated for doing aluminum. I was skeptical for awhile before trying this. Now I'm glad I made the leap. You don't go as fast as a big mill obviously and you have to get creative in some spots but it works out for playing around in the home shop.
-
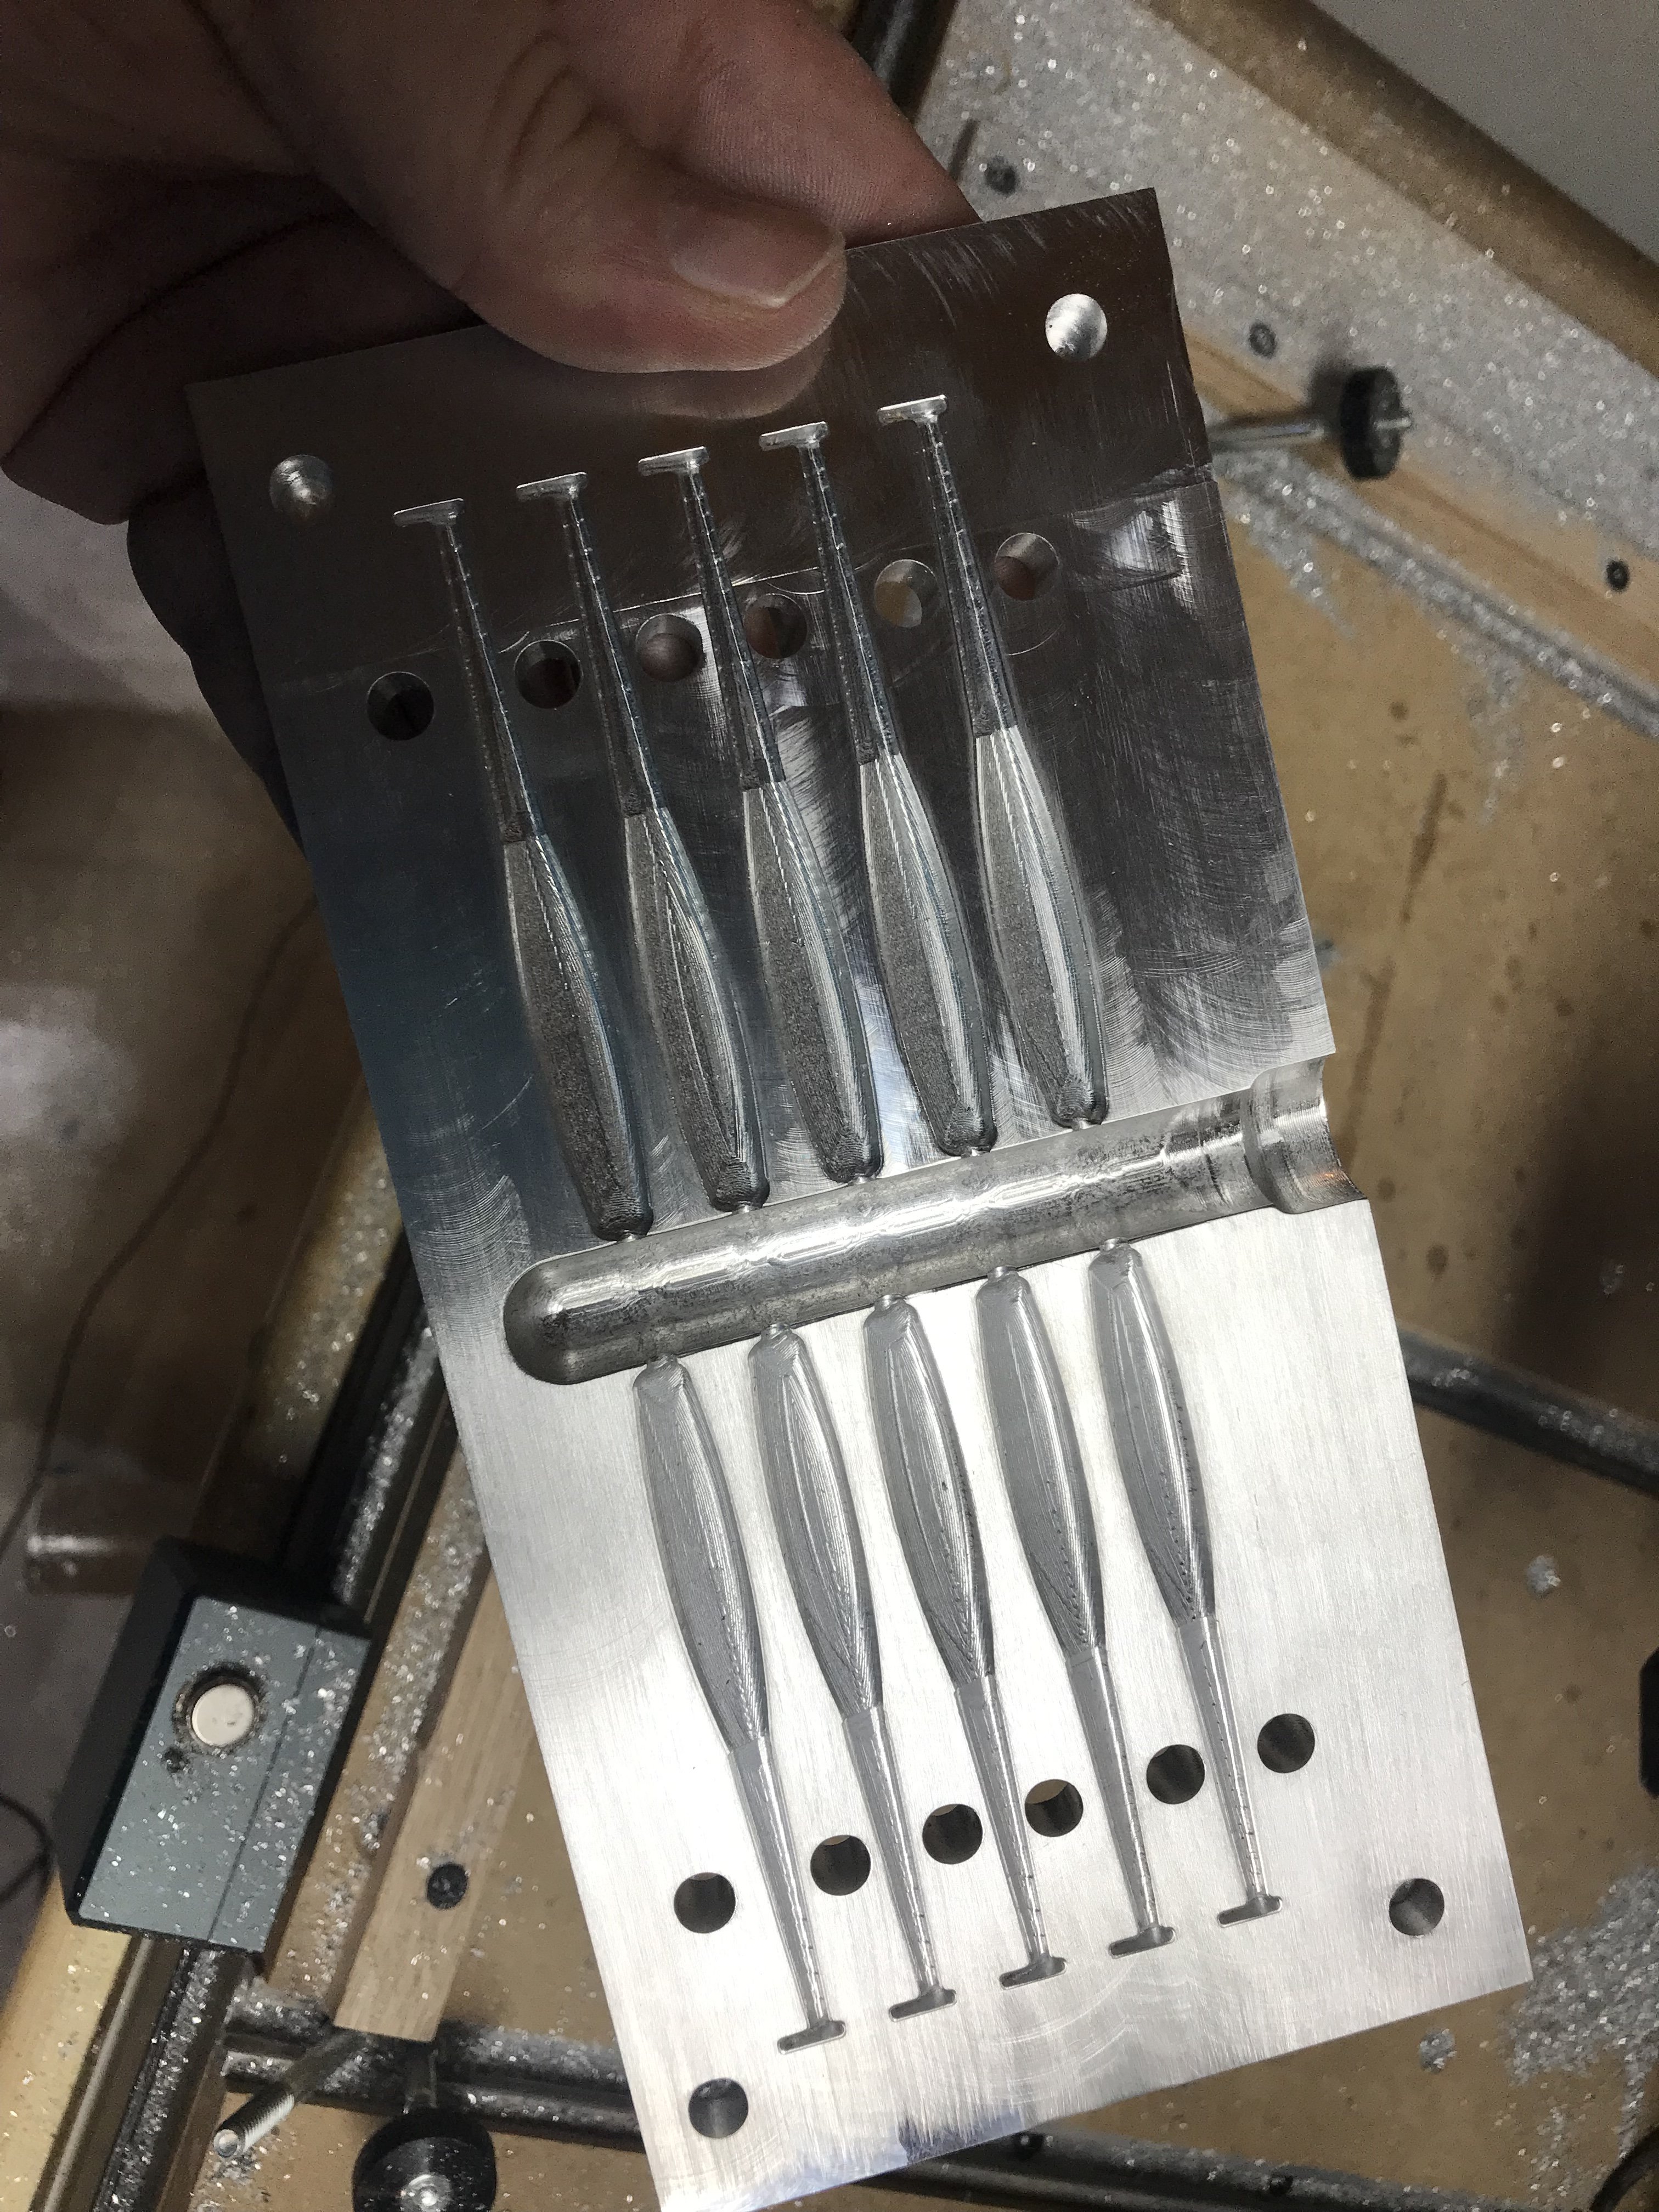
I’m in the middle of cutting this mold on my cnc router. I use the Shapeoko from Carbide which is about 1500 last I looked. The 200 machines may not be rigid enough for aluminum but then again they may work great. I haven’t had to worry much about cooling or chip clearing. I have a compressor with a nozzle near by if I do need to clear something quick. They a fun to play with, I’ve been cutting jig head molds as well.

-
Thanks for the info guys! Think I'll give it a shot. Just looking for some alternatives to devcon 2 ton and get a smoother surface to paint on. Maybe etex or one of the other resins would be a better option.
-
Dang that many huh? Lol Ok maybe I'm heading down a deadend here.
-
Hey guys as the title says are there any current sources for Prop pellets? I've read through the posts from over the last 15 years and saw we use to have some sources on the board but it doesn't look like their around anymore and I can't find anything on ebay. Looking to give it a shot to seal bodies. Was reading on the plastic cup dissolving but sounded like most here said just get pellets and do it right. Thank You!
-
Excellent thank you! Almost a 10 year old thread and great info back then and more now.
-
Not sure if the last post was a real account or not but the fact this thread came up just solved so many problems I had been searching for answers to over the weekend! lol
-
I have an injector from del and it works great. I just got it back in january. It has the screw on tip. Took a little bit to get to me but I wasnt in a hurry anyway.
-
Ok you gave me some places to look. I've been heating to 350 and shooting from there I will try to let it cool off a bit more before I inject and I will back off the preassure on the injector as well. Its a del-mart grub mold so it has the screws built into the mold to hold it closed.
-
My first Injection mold came the other day and I was out in the shop using it for the first time last night. I had a quick question. I noticed when I shot some of the grubs the bodies would have a thin flashing coming off where the mold joins together. I was curious if there is something I am possibly doing to cause this or is it just nature of the beast. Its no big deal cause it usually pulls right off the body but I wasnt sure if there was something I could be doing to avoid that. Thank You
-
oh man thank you!! I got most of that sitting around right now anyway. I will run to fleet tomorrow and see if i can find some blades that fit.
-
What I did was I took a clamp and epoxied a bunch of razor blades together and epoxied it to the clamp so that I could lay the tube on the blades and push it down with the other side of the clamp. Problem was i think i set the blades to cut to finely cause the plastic gets hung up in the blades and breaks. I hit both with the worm oil so I think I just need to space them out more for this. But I am still looking at the pizza cutter style to make things easier
-
I've been trying to figure out how guys were making those. I'm still playing around. Jig Man I may look at that option as well.
-
Had another idea for a tail cutter after I posted this. I'm waiting for some epoxy to dry to give it a shot. Figured anything is worth it at this point LOL
-
Well here was tonights try. These are the survivers so far cause I marred all the others up trying to cut the tail. I tried tonight using razor blades. I took 10 and clamped them together which the bodies alone gave enough separation for hte size strands I would want. I clamped them together and tried to cut em but still had no luck. Back to the drawing board and hopefully I can salvage these.
-
I did just from reading what others have been posting about plastic needing to be more stout for tube making. I've defintiely learned some lessons after doing that one there. I dipped way to many times and I've got some blades coming for making the tails a little better. I'm going to change up the next batch and see what happens.
-
Well here is the first try. This is the only one I cut the tail on before I thought I need to find a better way. Went a little to tough on the hardener so I'll back it down next time. And I just need a bigger cup for dipping longer tubes lol. not pretty but the first never is.
-
Thats a cool mold roger and I like the finished product.
-
well i found some long 3/8 and 1/4 bolts and cut the hex end off flat. Grinder was not available so iI left em flat. Snowed in now so tomorrow ill Be working plastic up and trying em out.
-
Just grabbed some long shoulder bolts gonna hut the hex end off and head to the grinder I'll post what I come up with.