


RayburnGuy
-
Posts
6,136 -
Joined
-
Last visited
-
Days Won
177
Content Type
Profiles
Articles
TU Classifieds
Glossary
Website Links
Forums
Gallery
Store
Posts posted by RayburnGuy
-
-
Cardboard tubes sounds like a good idea to me. You could cut them to any length needed on a bandsaw.
Ben
-
 1
1
-
-
12 hours ago, Kayla said:
Hi Rayburnguy,
I tried your technique but my walls are streaked. What did you apply prior to getting the glue to stick? Please write me as soon as possible
Thank You,
Kayla Worley
kaylaeworley@gmail.com
There are a number of things you can use to get the glitter to stick to the bait. Anything from spray clears to epoxies. Pretty much any of your top coats that are normally used to cover baits. I ended up liking Createx water based clear. It can be applied in a thin coat and dried quickly with a hair dryer or heat gun.After the glitter was applied, and allowed to dry, it was then top coated with either epoxy or Dick Nite.
One suggestion I'd make is to spray into a deep cardboard box. This will keep most of the glitter from flying everywhere and making a mess.
good luck..................Ben
-
1
-
-
There are quite a few videos on YouTube that show how to make molds for pouring belly weights for lures.They can be made out of hardwood or metal. Years ago I just clamped 2 pieces of angle iron back to back and drilled the hole where the faces of the angle iron fitted together.Easy as pie.
Ben
-
1
-
-
On 2/24/2020 at 8:31 AM, mark poulson said:
Hey Ben,
It's good to hear from you.
Mark
Thanks Mark.

-
When going for a crackle look and parts of the bait don't come out like you'd hoped for it's easily remedied. Take a liner brush and remove all but a few of the bristles and just paint the crackle lines onto the bait with the brush.
I can't tell you exactly why the crackle doesn't work in certain areas, but the above method will save some aggravation.
good luck.............Ben
-
1
-
-
This is the only picture I can find. It's not close to the line tie, but can be placed wherever you'd like.
You can also use a larger piece of lead wire if you need more weight. Just drill the appropriate sized hole.
Ben
-
1
-
-
I can't tell you how to do this exactly as the Bagley's were done, but I have weighted diving lips. This was done by using a piece of solid core solder and drilling a hole in the lip just large enough for the solder to fit in snugly. You then fit a short length of solder in the hole and brad it so it flattens out on each side of the lip.
hope this helps..............Ben
-
1
-
-
How long have you been using these gloves and what kind of gloves are they? Is it possible the gloves have seen too much use and have become contaminated with some type of oil or residue?
Ben
-
2
-
-
What Guy said...........After marking the lip slot on your blank before it's shaped just line the lip slot mark up with the top edge of the vice and make the cut using a hand saw. Just make sure to keep the saw blade touching the vice on both sides of the blank.
Ben
-
1
-
-
3 hours ago, mark poulson said:
Did you use a solvent based primer, like a rattle can primer?
Used some rattle can Durachrome once and that's the one and only time I've ever had DN wrinkle. Solvents are notorious for not playing well together.
A lot of the procedures we use to make lures is really nothing more than a "witches brew". We use a lot of things in ways that were never truly intended to be used in the way we do. The thing you have to do is isolate where the problem started and don't do that anymore. That's easier said than done a lot of times, but unless you have a degree in chemistry or can afford to employ a lab full of chem techs then it's the only choice we have.
good luck................Ben
-
1
-
-
After doing the initial cleaning with water I always flush and back flush with acetone. Maybe once a year I will clean with airbrush restorer but have never encountered the kind of crud your talking about. Acetone is your friend.
Ben
-
 1
1
-
-
You don't need a vent for air to escape when filling holes with a syringe. Just make sure that your needle is long enough to reach the bottom of the hole before you start injecting epoxy. That way the hole fills from the bottom and pushes the air out as it fills up.
I use the needles from an inkjet printer ink refill kit. They're about 21/2" to 3" long and will reach the bottom of any hole on the baits that most of use build.
Ben
-
1
-
-
Looks like a gold spoon that has been painted to me. You can get a similar finish by dipping a sponge in paint and then touching the sponge to the spoon. You might also try wadding up a thin piece of plastic (something like a plastic grocery bag like those at the store) and then doing the same process as with the sponge.
Experimentation will go a long way.
good luck...............Ben
-
1
-
-
On 6/5/2019 at 9:08 AM, barrybait said:
I made some rattles using brass tubing they sell in short lengths at Ace Hardware and other hardware stores. It is very thin wall and helps reduce the added weight of the rattle and still have the metal chamber. I learned it here or on another lure tutorial site.
Cut the tubing with a hack saw the length you want the rattle chamber but do not cut all the way through. Now cut the tubing off about one tubing diameter past your first two cuts. Now you have one length of tubing with two cuts that are not quite all the way through. Cut the two end pieces length wise so that you can bend the tubing open and flatten the two end pieces with a hammer or pliers. Fold the flattened end piece over the end of your rattle chamber, put your rattles in, bend the other flattened end and you have your rattle chamber.
I do the same thing with discarded aluminum arrow shafts. The aluminum they use in making arrows is fairly hard and when used with a steel rattle makes a pretty loud rattle. The only thing is that you will have to heat it when bending over the end flap or it will break and overheating it will melt it. It's sort of a fine line with the heat, but once you get the hang of how much heat to use it goes well.
Ben
-
1
-
-
On 6/11/2019 at 8:04 AM, Nathan said:
The perfect top coat only exists where Rainbow farting Unicorns exist ..Nathan
I used to know where that was, but somebody took my trail markers down.
-
 2
2
-
-
I'm like Clemmy in that I don't post much anymore, but still come around occasionally to read the posts and stay in touch with a few friends. It's too easy for someone to get "lost" in the pages of TU and believe that a "Lost and Found" page would be a great idea.
Ben
-
1
-
-
Don't know how it holds up, but it's perfectly clear. Invisible you might say.

-
2
-
-
On 5/24/2019 at 12:01 PM, DoubleT said:
Thank you Ben. That's the info I was looking for. Does the syringe that you are using have the black silicone seal?
Yes.
The syringe I'm using is actually one that came in an ink refill kit for filling ink jet printer cartridges.
-
1
-
-
I don't use screw eyes, but I use 30 minute epoxy applied with a syringe and a large bore needle to install twisted wire ties and hangers. This takes all the guess work out of this process as far as whether or not the joint has a 100% bond between the tie and the wood. It's probably overkill, but this is just one less thing for me to worry about.
As far as cleanup is concerned it's not that complicated. I keep 2 medium sized pill bottles on my workbench filled with DA. One is "dirty" alcohol and one is "clean". By doing a series of fill and purge with each bottle I'm still using the same syringe and needle I've been using for years.
I wouldn't recommend using 5 minute epoxy. It can be done, but you don't have much time to clean the syringe by the time you install and align your hardware
Ben.
-
1
-
-
Epoxy works for me. Fill it just a little proud of the lure and then sand it flush.
-
1
-
-
I agree with Mark. I've tried several of the "home brew" reducers and to me they're more trouble than they're worth. Paint companies are in the business of formulating paints and additives. They try to make the best products possible or they don't stay in the business long.
Ben
p.s. Just remember that reducers are not the same as transparent bases. Reducers are designed to thin the paint and transparent bases are made to alter the opacity.
-
1
-
-
Bloxygen is 100% argon. Argon is used a lot in the welding industry. You can get it at pretty much any welding supply. One drawback is that you will either have to purchase the cylinder in comes in and then pay to have it refilled when necessary or pay rent on the cylinder while it is in your possession. And of course you still pay for it to be refilled even when renting.
One thing to remember is that since argon is heavier than air you don't need to be breathing it. If it gets into your lungs it can be really hard to expel.
Hope this helps.
Ben
-
1
-
-
My bad.

-
1
-
-
Being able to coat 10 baits with epoxy is pretty good. Real good in fact. Denatured alcohol will indeed extend your working time by a little. You'll just have to experiment to tell how much to use. I've thinned epoxy until it was thin enough to spray through an airbrush and it did indeed cure although it took much longer than normal, I wouldn't suggest thinning the epoxy and spraying it with an airbrush for several reasons. The obvious reason would be ruining an airbrush if the epoxy sets up inside. Another is that you can only get thin coats applying it really thin and I believe that when you use too much DA to thin the epoxy it gets brittle when it cures. None of these are good.
The only other epoxy that will give you an extended application time is a decoupage epoxy like Etex. If your able to brush 10 baits with epoxy I would try thinning it with DA just a bit and call that good.
Ben
Ben
-
1
-
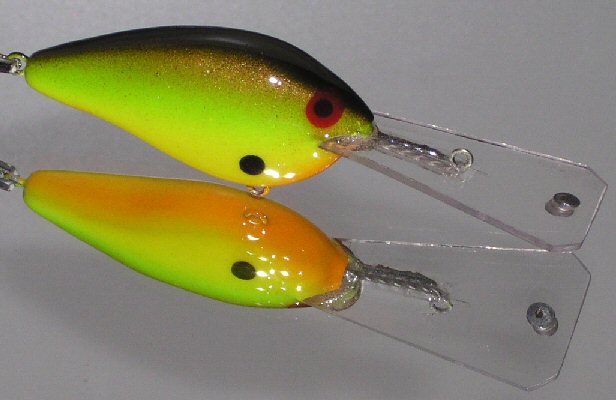
Different Way To Apply Glitter
in Hard Baits
Posted
Kayla,
I really can't make a good suggestion for spraying something as large as a wall. The best recommendation I can make is to go to Youtube and do a search on spraying metal flake. There are multiple videos that show not only how to do something like this, but also the products and equipment you would need to spray large areas.
Ben