


SCAngler
-
Posts
41 -
Joined
-
Last visited
-
Days Won
1
Content Type
Profiles
Articles
TU Classifieds
Glossary
Website Links
Forums
Gallery
Store
Everything posted by SCAngler
-
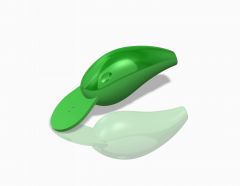
Just wondering if anyone knows where to buy mold alignment pins? Ive been able to find some expensive options in the usual places (Grainger, McMaster, etc.) but they dont look to be the same as what I see on an Angling Ai mold or Epic Bait mold. Anyone know what they're using? This image shows the hardware I'm talking about...these look tapered and seem like simple press fit pins, but I cant seem to locate any on the interweb.... https://anglingai.com/4-1-action-worm-5-cav/
-
+1 for mold max 60. I buy direct from smooth on and it has worked great for prototyping until I’m ready to send files off for an aluminum mold.
-
Thanks for all of the ideas guys. I ran across this spray paint the other day, and though it sprays a bit heavy, it’s not a bad chrome finish. Not perfect, but pretty good. https://www.michaels.com/testors-gloss-enamel-spray/10109550.html?cm_mmc=PLASearch-_-google-_-MICH_Shopping_US_N_Craft+%26+Hobbies_N_Smart_BOPIS_N-_-&Kenshoo_ida=&kpid=go_cmp-9972406265_adg-99939223639_ad-433378147590_pla-981059439317_dev-m_ext-_prd-10109550&gclid=Cj0KCQjwqrb7BRDlARIsACwGad6jmABWySuK-rnY5YrEHpdShEQa6cbvn7I2_laSM0Jv5q8M70_V6jkaAolREALw_wcB 50-50 chrome powder/clear powder will be my next trial.
-
I haven’t but I do plan to give it a try. Id love to see some examples of some jigs other folks have tried using this on.
-
Thanks for the responses guys. I just looked at the kits for chrome plating on a small scale, doesn’t look like it’s worth the effort. I’ll try the powder paint or liquid paint options.
-
Just wondering if anyone knows what type of finish is used on war eagle spinnerbaits to get that shiny, almost chrome, finish. It’s thinner than anything I’ve seen powder dipped. Just wondering if anyone has figured this out.

-
This might be a dumb question, and forgive my lack of research on the subject, but what do companies like Rapala and Strike King use to clear their baits? Doesn't seem all that tough because of the hook rash most of us experience, but they are doing this on a large scale so the method has to be pretty quick and dirty for lack of a better term. Just been pondering this after reading similar threads and it doesn't seem to be mentioned.
-
Well I tried to drown out the high pitched squeal of the router from the video. David Crosby has a similar effect on some people so that's a bit ironic, but I like him. Notice the two steel pins in the work piece. This is a very simple way to key your parts for flipping when cutting both sides of a part. I cut the locations for my ballast weights first, and then flipped the workpiece to cut what your seeing in the video. At the end you'll find a pan over on a few precut and finished lures. This happens to be a topwater design of mine, and the wood is cedar if anyone's wondering. Makes the spare bedroom smell like a hamster cage haha
-
Wow SLT, that's a great place to start if your thinking of undergoing a diy build. Too bad I'm just now finding it!
-
Dave- I'll work on posting a video. Been busy cutting crafts. The things I do for having a CNC in the spare bedroom......
-
Well, I thought I might dig this one out in case anyone still has interest in hobby cnc. In the past 6 months I have designed, built, and started cutting lures with my CNC router. I have ~600.00 in my machine, not including software although there are some quite capable free software options out there. Just wanted to show that if you really want to turn your CAD creations into a wooden lure, nylon mold, polycarbonate bill, etc. you can do it for less than what a lot of folks will tell you. Here's the proof. If you want to get a more detailed list of where I bought my components and what those components are just PM me. Happy building!

-
One solution for generating the complex curves on hooks without true arcs, is to take an image of the hook, insert the image in a sketch in your CAD program, and sketch over the image. When your finished scale the sketch to the correct height(or scale the image first, this has been difficult for me in the past). Measure the Top of the hook to the tangency of the bend. This has worked great for me, and as Bob has mentioned, these hooks have a wide tolerance so you'll need to keep ~0.005" clearance in CAD depending on how your fabricating the mold. The key is to use splines, and only use two or three control points. This will allow for better control over the complex curve without inducing inflection points. Or, import the image into the free program Inkscape and use it to covert the image into a vectorized file. This will import into your CAD program as a DXF or DWG. Then you can use these lines to generate the appropriate arcs. Both methods work, but I like the parametric value of properly dimensioned splines, so I use that. Off topic: It's hard to believe, but I have been very successful in molding shakey heads using Ren shape board. It's a type of polyurethane board which does not have a melting point that can withstand the temperature of melted lead, BUT the heat transfer between the lead and Ren shape doesn't ocurr fast enough to scorch the urethane. One note, I use this material for making less than 500 jig heads. Over 500, buy aluminum. Ren shape just allows me to quickly machine the mold and prototype a pot load of jig heads before I go down the aluminum road. Sorry for diverging there, just thought it might spur some thought.
-
Really cool concept! But I agree with vodkaman, the flow will be slow at the lures current placement in the sketch. One thing I do remember from fluid dynamics, haha, is that cross sectional area will affect the velocity of the fluids. Smaller area will increase the velocity. I just recently tried to design one of these and my biggest hurdle was finding a reasonably priced pump to get the flow rate I needed for a cross sectional area of 12". To produce velocities of up to 4 ft/s(~2.75 mph), I needed a ~190 CFM pump! (F****** huge pump) so maybe start with 4 or 5 square inch area... Goodluck! Let us know how it turns out!!
-
^^ my company has a store on shapeways. Great site easy to use, yet alittle pricey. But you pay for ease of use. Also, I agree with the CAD level of difficulty. Not an easy thing to do, I do this for a living as well as for fun at home. Let me know if anyone needs help with creating this data. I actually like doing CAD and i wouldn't mind answering questions pertaining to it. I'm alittle too busy to do extra CAD work but never hurts to ask. Also, if you have an idea/sketch/image/prototype you can go to a design firm and have them quote how much it would cost to create the CAD for you. Not cheap, I do this for a living, but a simple CAD model will cost ~$1000-$3000....minimum On shapeways you can hire designers for a reasonable price and they can create the CAD model as well. But their abilities might be limited as it's not easy to model a fish when you've only been modeling consumer products. Just my two cents....
-
I can help anyone out with printing as well...Pm me if you want more details. As far as companies go google rapid prototyping for the closest company near you, if your on the east coast check out laser reproductions. Just down the road from me and I use them at work daily, awesome at what they do.
-
For the at home , deep pocket enthusiast, check these out. I have a friend who operates his daily with great success, but not without a lot of learning time. Also, don't forget a CAD file turned into NC file must be present before you can cut molds. http://www.carving-cnc.com
-
Check out the afinia h series...hint hint
-
I did a quick experiment one time to determine what I thought was the best viscosity/cure time and it worked pretty well. Just set up 3 or 4 cups and measure how much premixed epoxy and alcohol you pit in each one. Start with a small amount of alcohol and end with a substantially larger a mouth. If you were to graph these findings you could pretty easily predict what ratio will give you the viscosity/cure time your looking for. Sounds like a lot of work BUT the effects of inconsistent sealing coats will change the action of your baits. I spent along time trying to figure out why 2 out of 10 swim baits I made were swimming differently and this was the reason. Dipped versus brushed on is another cause if inconsistent weight which ultimately changes the CG. I guess what I picked on was no matter what you choose stay consistent. Just my learnings from the school of hard knocks
-
So, 3d printers typically print in abs plastic with many colors to choose from. At work, I use the printers for prototyping mechanisms and form factor models when we need it quickly. It also prototypes fishing lures quite well. There are a couple problems with it though. I print the parts as I'd they were to be injection molded parts and glue the two halves together. Inherently this is hollow. But! I have to seal the model to make it watertight. This is done by dipping the model in acetone using a process I have developed here at work. When I generate the cad file I can place the lead ballast weight in the part apply material properties and immediately tell where my center of buoyancy and center of gravity are. Then if moving these critical points is necessary I can do so methodically with in a couple minutes plus about 2 hours to print the updated prototype. Really cool technology and I think as it becomes more affordable lure designers will have them in their homes, I know I will!
-
 Creo 2 formerly Pro Engineer
 -
Just got around to printing the swimbait from my previous post, and now I am tweaking the ballast location and line tie location to get it to swim correctly. Almost there! Now I need to find someone to do some paint jobs! PS- Can I upload videos to my post? I have a .mov file of this bait swimming as well I just didnt know how to upload it.
-
![IMG 2095[1]](https://www.tackleunderground.com/community/media/gallery/category_8/sml_gallery_36909_8_134081.jpg) Bluegill swimbait 3d printed. No fins just yet, still have to make the mold for them.
Bluegill swimbait 3d printed. No fins just yet, still have to make the mold for them. -
Dave - Thats some awesome stuff! You mention that you have customers, do you do this on a consultant level or do you manufacture/sell your baits? I'm beginning to get to a point where I could see selling my baits once I get them tweaked and tested (<1 year), and seems like youve gone through alot of the obstacles I'm about to come upon. If it would be ok, I'd like to PM you and ask you a few questions. Once again, these are some great looking baits! Since it seems like CAD isnt the dominant means of prototpying lures on here, lets mix it up alittle bit. Does anyone have any pictures of their full line of lures(CAD or Physical image)? Example: Shallow Crank, Deep Crank, Topwater, Craw , Frog, Lipless crank, and so on? I thought this would be interesting to see since this is the approach I'm taking right now, trying to fill out a "line" of products. Just a thought to give everyone a place to showcase their Brand!
-
A-Mac thats great! Have fun with it! If I see enough of a demand for CAD modeling practice help Im thinking about doing a tutorial on model feature organization/design intent. Not sure how much experience you have with CAD programs but I'm always willing to help! Its one thing to build a model that looks the way you want it to, but its a completly different story to build that model with the robustness required when you start tweaking dimensions and dont want to go back and rebuild half the model. I use these platforms for a living and I'm still learning these techniques so its not an overnight deal, but for me it beats carving a model by hand(even though I hail to the guys on here that do). One cool feature you should check out is to import a JPEG of a crawdad, shad, bluegill, etc. and use that image as an underlay to create your sketches for buidling the surface model. Takes a little bit of the artistry learning curve out of it, because its all about the ratios between the physical features of the animal to make it look "real".
-
Heres a couple new projects, I'll post the prototype images soon. That swimbait is enormous, now I have to go buy gear to throw it! Ohio bass havent even seen blugill lures to this scale so a reaction strike might be an understatment haha

