


Chuck Young
-
Posts
906 -
Joined
-
Last visited
-
Days Won
45
Content Type
Profiles
Articles
TU Classifieds
Glossary
Website Links
Forums
Gallery
Store
Posts posted by Chuck Young
-
-
I hope it is not too late to see a picture of this lure. If you have trouble posting it, just let me know. I will walk you through it.
-
Definitely not. It is too thick and could affect the action. Just put a thin coat where the paint ends to seal it. If you don't, water could get under your paint. That would not be good.
-
there is a free program available called GIMP. It is an editing program similar to Photo Shop but it is FREE
 free is good
Thanks, Dinger Baits, for the tip on the Gimp2. Tried it out to make 3-d fish eyes from internet pics. There was a bit of a learning curve, but I have never used a publishing program before. Now I have several files of different fishes eyes all set to print in 7 different sizes. I will print them on decal paper stick them to holographic foil, topcoat them, cut them, and coat them with Solarez uv. There are a lot of steps involved in setting up a file. So if you are like me, you will want to write them down. FREE is my favorite price too!
-
I agree with Bob. Plus I have a bit of a problem with a 24 hour dry time. How is the out-gassing? While it may work well on a rod which is above water, I question its durability under water.
-
I caught a bass the other day on bubble gum. I released it unharmed, but it just floated away motionless under a pink floating sphere. I am still trying to figure out what happened ...

-
Have you tried turbo blades? a four bladed plasitc blade inside counter rotates inside a hollow metal blade? Just a suggestion.
http://www.barlowstackle.com/4-Wing-Plastic-Buzz-Blade--P759C112.aspx
http://www.barlowstackle.com/Turbo-Buzz-Blades--P756C112.aspx
-
 1
1
-
-
I am sure all of us who started this hobby / obsession have found ourselves using new methods and new tools to see where they would take us. Instead of carving out a lure with a piece of flint, we use saws, knives, chisels, sanders, molds, injection of plastics, etc. Who knows where this 3d printing will lead to. It could be a great tool. It may become a whole new class of lures in this forum. It could have severe limitations. I am looking forward to seeing where this branch will lead. I am also sure that flies will still be tied with feathers, lures will be carved out of wood, plastic blanks will be custom painted, and jigs and wire baits will continue to be poured. My point is that just about everything we do routinely now were once new technology.
-
1
-
-
This is how I make my stencils as a paired set that closes up over the bait like a clamshell. Also note in the pictures the medium binder covers I use. It is just a box with a pegboard top and a vacuum accessory attached. First I fold a piece of plain paper and place the fold between the rows of holes. Center the lure over peg holes and trace the lure blank. Cut through both sides of the paper, unfold, and trce to foamboard.This is the material that is like a foam sandwich in cardboard bread. As seen in the pictures this makes matching mirror images of the bait in foam board. The baits are then placed in the holes, the vacuum turned on, and the sheet heated with a heat gun untill it forms to the blank. The end result can then be folded in half over the bait, entirely enveloping it. It cant get out of alignment. Sometimes you have to add additional layers of foam some popsicle sticks, etc to get the lure to lay on the seam. But once you have it dialed in, save the foamboard and use it again and again.
Enjoy, Chuck


-
4
-
-
Check out and bookmark mikeLMB44 on ebay. I can't even express how fantastic it is to do business with him.
-
The money for LPC and politicians has to come from somewhere. There is no reason why their research shows such skewed data - at least 17x the lead contamination and mortality of other reports. It sounds like a noble cause - "save the loons". The main causes for Loon decline have always been: 1) Human encroachment on habitat, 2) acid and mercury pollution.
IMHO I offer more effective measures to reestablish loon populations:
1)All members of the loon protection society donate their lakeshore properties as wildlife habitat in perpetuity. Monies collected from donors should be used exclusively to purchase additional habitat.
2) All politicians voting for Proposition 89 and similar bans should be required to give up their lakeshore properties as wildlife habitat in perpetuity . Donations (bribes) given to them by sponsors of these bills should be used exclusively to purchase additional habitat.
3) Any business contributing to acid or mercury pollution (including the much touted tungsten sinker / jig manufacturers) should be taxed at 20% of their annual profits. All the proceeds from these taxes are to be applied exclusively to puchasing lakeshore property as wildlife habitat in perpetuity.
4) Outlaw all lakeshore habitation in perpetuity. All lands to be kept as wildlife habitat in perpetuity.
5) give the country back to native Americans. There were plenty of Loons (the bird kind) then.
These steps would make a real impact on loon populations. But no one will ever make these suggestions - let alone make them stick.
If It is always a small price to pay - as long as someone else is paying it. Right now it has been determined that we will be the only ones paying it.
-
2
-
-
I have read about this sonic welding. Believe it or not, it is stronger than glue. Just try tearing apart that clam-shell packaging. In the same way metal that is welded is stronger than metal that is soldered.
-
NH governor Maggie Hassan signed the bill into law in 2013. I am unclear when the changes were made to include 1/2 oz to one ounce and jigs over an inch long. It happened over the last winter with no warning to sportmen until after the 2016 season began. I placed several calls to NH fish and game asking:
How are they planning on enforcing it? Will they bring lead test kits to the field? Will they make the same test kits available to the sportsmen, or will we have to but a 3m lead test kit for $137 that will do 25 jigs? Will they be scraping or cutting custom made , painted, or epoxied jigs. to determine lead content? I was told that conservation officers would be using "wide discretion" in their enforcement. "They have no guidelines in place." "If a jig seems too heavy you will probably get a $250 dollar fine and possibly lose your license for a year." "You should probably just throw them all away and start over."
My impression from these conversations left me feeling that I was going to have to prove that my already confiscated jigs were not lead. And I have no idea how to pull that off. All of us are trying to figure ways to pour non lead jigs that are just as dense and hence will perform just as well. It pains me to think that here in NH you could accomplish that feat and still get hooked. I have no confidence in NH fish and Game - the way this was sprung on us. If you are planning a fishing trip here, my advice would be to cancel it.
-
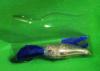
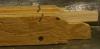
I noticed that line tie in the mouth. It looks cool. All it needs is a catchy name - like tongue tied.
-
Foam is mostly air anyway. Doesn't suprise me that both would swell when full of hot air. Insert political joke here.
-
1
-
-
Some of the resins you mentioned were not made with the idea of thin transparent coats that will be impact resistant. Some might work acceptably. Some have already been tried and proven. Clarity is a huge issue. The clear-coat can really make your paint job POP - or not. Not very long ago a new resin came to our attention - Art Resin. It is clearer by a fraction. But that fraction made a lot of tu members switch. I'm not saying you should use it. D2t and E-tex are probably better choices for you. My point is clarity. After all the effort put into learning and perfecting your hobby, when you make something really nice you want it to look its best and last. It would be a shame to ruin it with the last step.
-
I wish we could add pictures here or can we? Tell me how if we can. Thanks!
When you are ready to post click "more reply options" You will then be able to choose any file in your pictures folder. click "choose file". Find the picture in your pictures folder. Click on it. Then click attach this file at the bottom of the post. "Add repl"y publishes the post with the picture. Posted an adorable picture of my grand daughter Trinny just to make sure. If the picture file is too big to post, compress it.

-
I think a lot of the difficulties guys are having with stencils is that they use material that is too stiff and hard to cut. Milk bottles, clear plastic, etc. I hit upon FRISKET material that artists use for making stencils and it makes life a lot easier. It's a fairly soft plastic sheeting with a peel-off paper backing. You can buy it with varying degrees of tack for the adhesive that holds on the paper backing. Many art supply sites and stores carry it and it comes in a roll about a foot wide for around $10. I've used one roll for the past 10 years, so it makes a lot of bass lure stencils. When I began using it, I peeled off the backing and stuck the stencil onto the lure. That can be a problem since the stencil adhesive can lift fresh acrylic paint if you aren't lucky. Then I hit on a better solution. Just cut the stencil and use it with the paper backing still attached. Hold it against the lure with a finger while you paint. It's soft enough to bend to conform to the shape of the lure. This solves the lifting problem and also makes the stencil reversible, which is nice since you always want the opposite side of the lure to look the same. And as an added benefit, the stencil becomes re-usable. Over the years, I've saved the stencils I cut and now have a "library" of them to pick from. The frisket is easy to cut accurately with an Xacto knife.
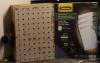
I use a similar material. Clear binder cover sheets - medium weight - available at office supply stores. I get mine at Staples sku # 7751152043. It is about $15 for 25 sheets and has no adhesive on it. You can vacuform it wit h a heat gun. The sheets are thin, flexible, can be cut easily, and are plenty durable (as long as you don't step on them).
-
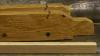
A table saw may be a little too coarse and break the wood. A band saw seems to be the best tool. If the blade wanders too much, cut a slot in a piece of plywood and clamp it down. Make your cut with the plywood in place. Cutting the lip slot before carving the block makes it easier to get it consistent and square. For balsa blocks a simple jig can be made by laminating 3 pieces of wood. The center piece rests against the top of the block. The two side pieces establish the slot (lip) angle and depth. The saw is three hack saw blades glued together.
If you are buying blanks preformed, there are some nice jigs in the archives. Use the search function and choose "forums" not "this topic" which is default.
-
1
-
-
The black may give a stronger silhouette when bass are still in deeper water and looking up. Maybe the red flake sends out a sunfish vibe and the purple a bluegill vibe. Both of these inhabit the shallows during the bass spawn. I can't say why, but black with chart works for me in almost all water conditions. I think the black leaves a great silhouette from below and the chart is highly visible from all other angles. As for the bubble gum - I believe that more and more bass are giving up chewing tobacco. The anti chaw adds seem to be having good effect. I remember when rubber worms were first being made in colors. My reaction was "who on earth is going to catch fish on a purple worm!"
-
1
-
-
Blue head, white stars for eyes, red and white stripes behind gill lines - maybe like a daredevil.
-
1
-
-
It is clear from their site that they are well funded and have an agenda. Live feeds of nesting loons and all. Couple of politicians in their back pocket. They have a list of businesses that donate to their cause. It is a list that I will avoid doing business with at any cost.
-
A search turned up nothing for me. I am considering branching out to jig, chatter and SB. No lead, so I am leaning toward a 40/60 bismuth tin alloy that is about 75% the density of lead. What is the best flux to use? Hawn, - if you are out there - I would love to hear from the undisputed master of all things non-lead.
-
D2t is one epoxy you can get away with turning by hand. It's so thick it takes time to sag. Moisture cure urethane (MCU) is probably too much of an investment if you are just painting a few or just painting once in a while. With that you can dip the lure and let it run off, dabbing the eye occasionally. Dakota lake tackle has a video on each. And don't worry about those battle scars - plenty of real fish have a few also!
-
1
-
-
Wonderful! Have a great time. My dad served in the pacific in WW2 and in Korea. Those guys payed a high price.


Gill Stencils
in Hard Baits
Posted · Edited by Chuck Young
If anyone wants to make their own stencils, but doesn't have a vacuform machine, check mine out in homebrew section. A nice stencil material is on there as well.
Does anybody know how to spell "vacuform", cause I'm stumped?!