Brick Steel
-
Posts
83 -
Joined
-
Last visited
-
Days Won
1
Content Type
Profiles
Articles
TU Classifieds
Glossary
Website Links
Forums
Gallery
Store
Everything posted by Brick Steel
-
I’ve sanded lures but found that to be damaging. What’s worked best for me is to wrap the lure in paper towels that I’ve soaked in denatured alcohol. I then wrap that tightly with aluminum foil to prevent the alcohol from evaporating. This usually removes or loosens the paint enough to wipe it off. It usually takes two to three repetitions to get all of the paint off.
-
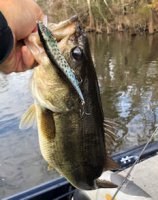
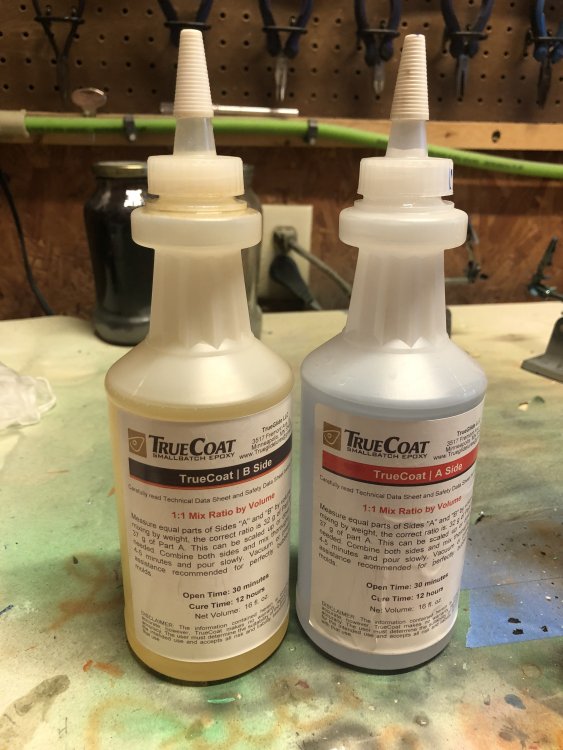
Two things. First I’ve used D2T and BSI 30 minute epoxies with some success but found that TrueCoat works better and is more durable. It was specifically designed for baits. TrueCoat tends to have a longer working time. I have found the others to be just over five minutes, where TrueCoat is at least ten. Also TrueCoat is a little thinner and gets less bubbles. Only issue I have with it is that it comes in fairly large bottles. With the others, I could eyeball a 50/50 ratio in the bottom of a mixing cup. With TrueCoat I have to used small graduated mixing cups to ensure a 50/50 mix. Secondly, on all 30 minute epoxies, I think they have to be turned until they are well set up and I don’t see that can be done practically by hand. I’ve attached photos of TrueCoat and my rotisserie based turner.
-
 Those gills are phenomenal! Very nice paint job.
 -
I’ve been finishing baits for three years and have used both BSI and D2T. It has been surprising to me that I have rarely had any problems with bubbles, fish eyes or excessive cure times, particularly considering how many people do. Recently I have concluded that my lack of issues is because I live in Florida and don’t experience cold temperatures. From what I’ve noticed, there seem to be more epoxy issues in Northern areas. So I agree with LHL that temperature is very significant.
-
I have had the same issue with my Iwata Eclipse and Exx1976 is correct. When I have had this problem, I pull the trigger button out, clean it and put a drop of lubricant on the lower part of the shaft and re-insert it. The trick is getting it lined up properly when reinserting. The lower part (below the hinge) has to go straight down into the shaft (?).
-
 I use a 6 gallon compressor instead of an air brush compressor. I use a good regulator (with a water trap) that allows me to regulate 0-30 psi (I set up two so I can work two airbrushes , although I rarely have). The attached photo is my regulator setup. The compressor is in a separate closet in my garage so I don't have to listen to it when I'm painting. It is plumbed to my painting area through the green hose. This has worked well for me.
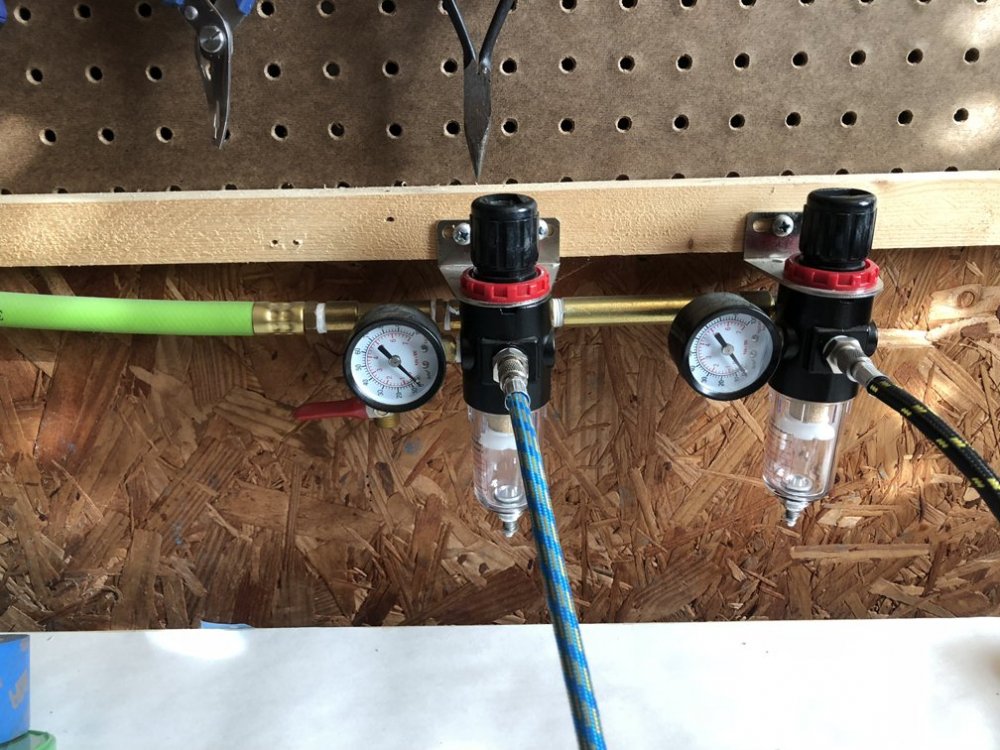
- 36 replies
-
- 1
-

-
- crankbaits
- airbrush
- (and 11 more)
-
By the way, the fuzziness of some of the lettering is due to my airbrush technique - or lack of. But I'm slowly getting better.
-
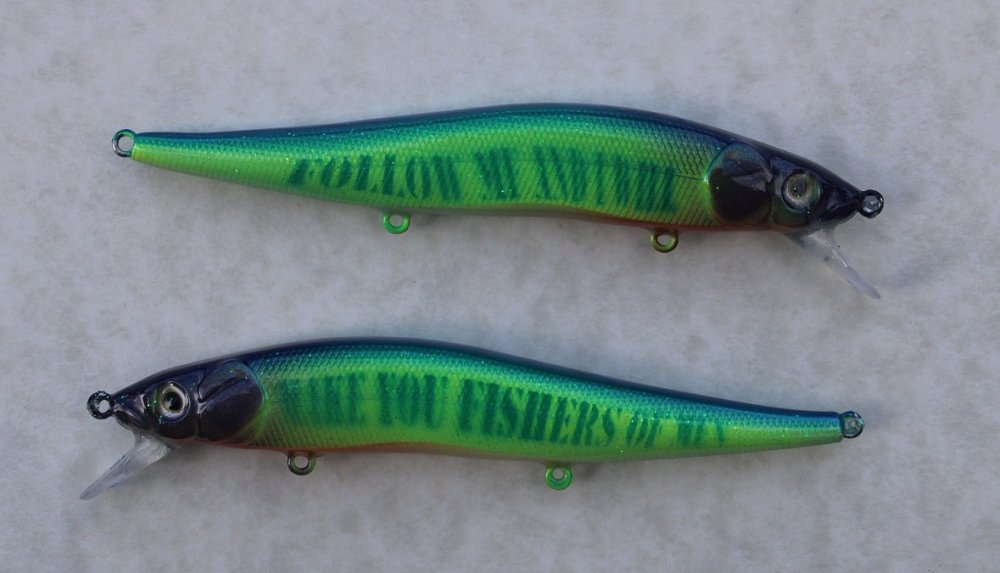
It does well, although there is a learning curve. I used the Cameo 4 to cut the stencils that I used to do the lettering on the five inch jerk baits in the attached photo. I made eight baits using these templates. Btw, I didn't expect the fish to respond to the message, but I made the baits as gifts for our elders and ministers. I have used the Cameo to cut stencils for other patterns, but these were by far the most intricate.
-
I use a Silhouette Cameo 4 to cut out vinyl stencils. I imagine it would work on stick on vinyl as well.
-
0B6792ED-7A9F-4C90-84E6-6B64D0A32B7F.jpeg
Brick Steel commented on 420Fishing's gallery image in Hard Baits
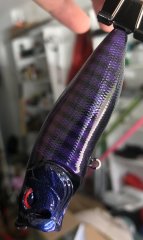
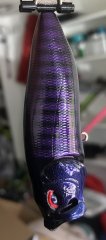 My fifth bait did not look this good. Well done. I love the colors. I'd call it Purple Haze, but that's just me.
 -
3F39757F-BAA4-4E0B-A5A1-274C207DAF81.jpeg
Brick Steel commented on 420Fishing's gallery image in Hard Baits
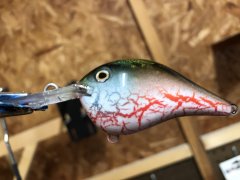
 Beautiful bait!
 -
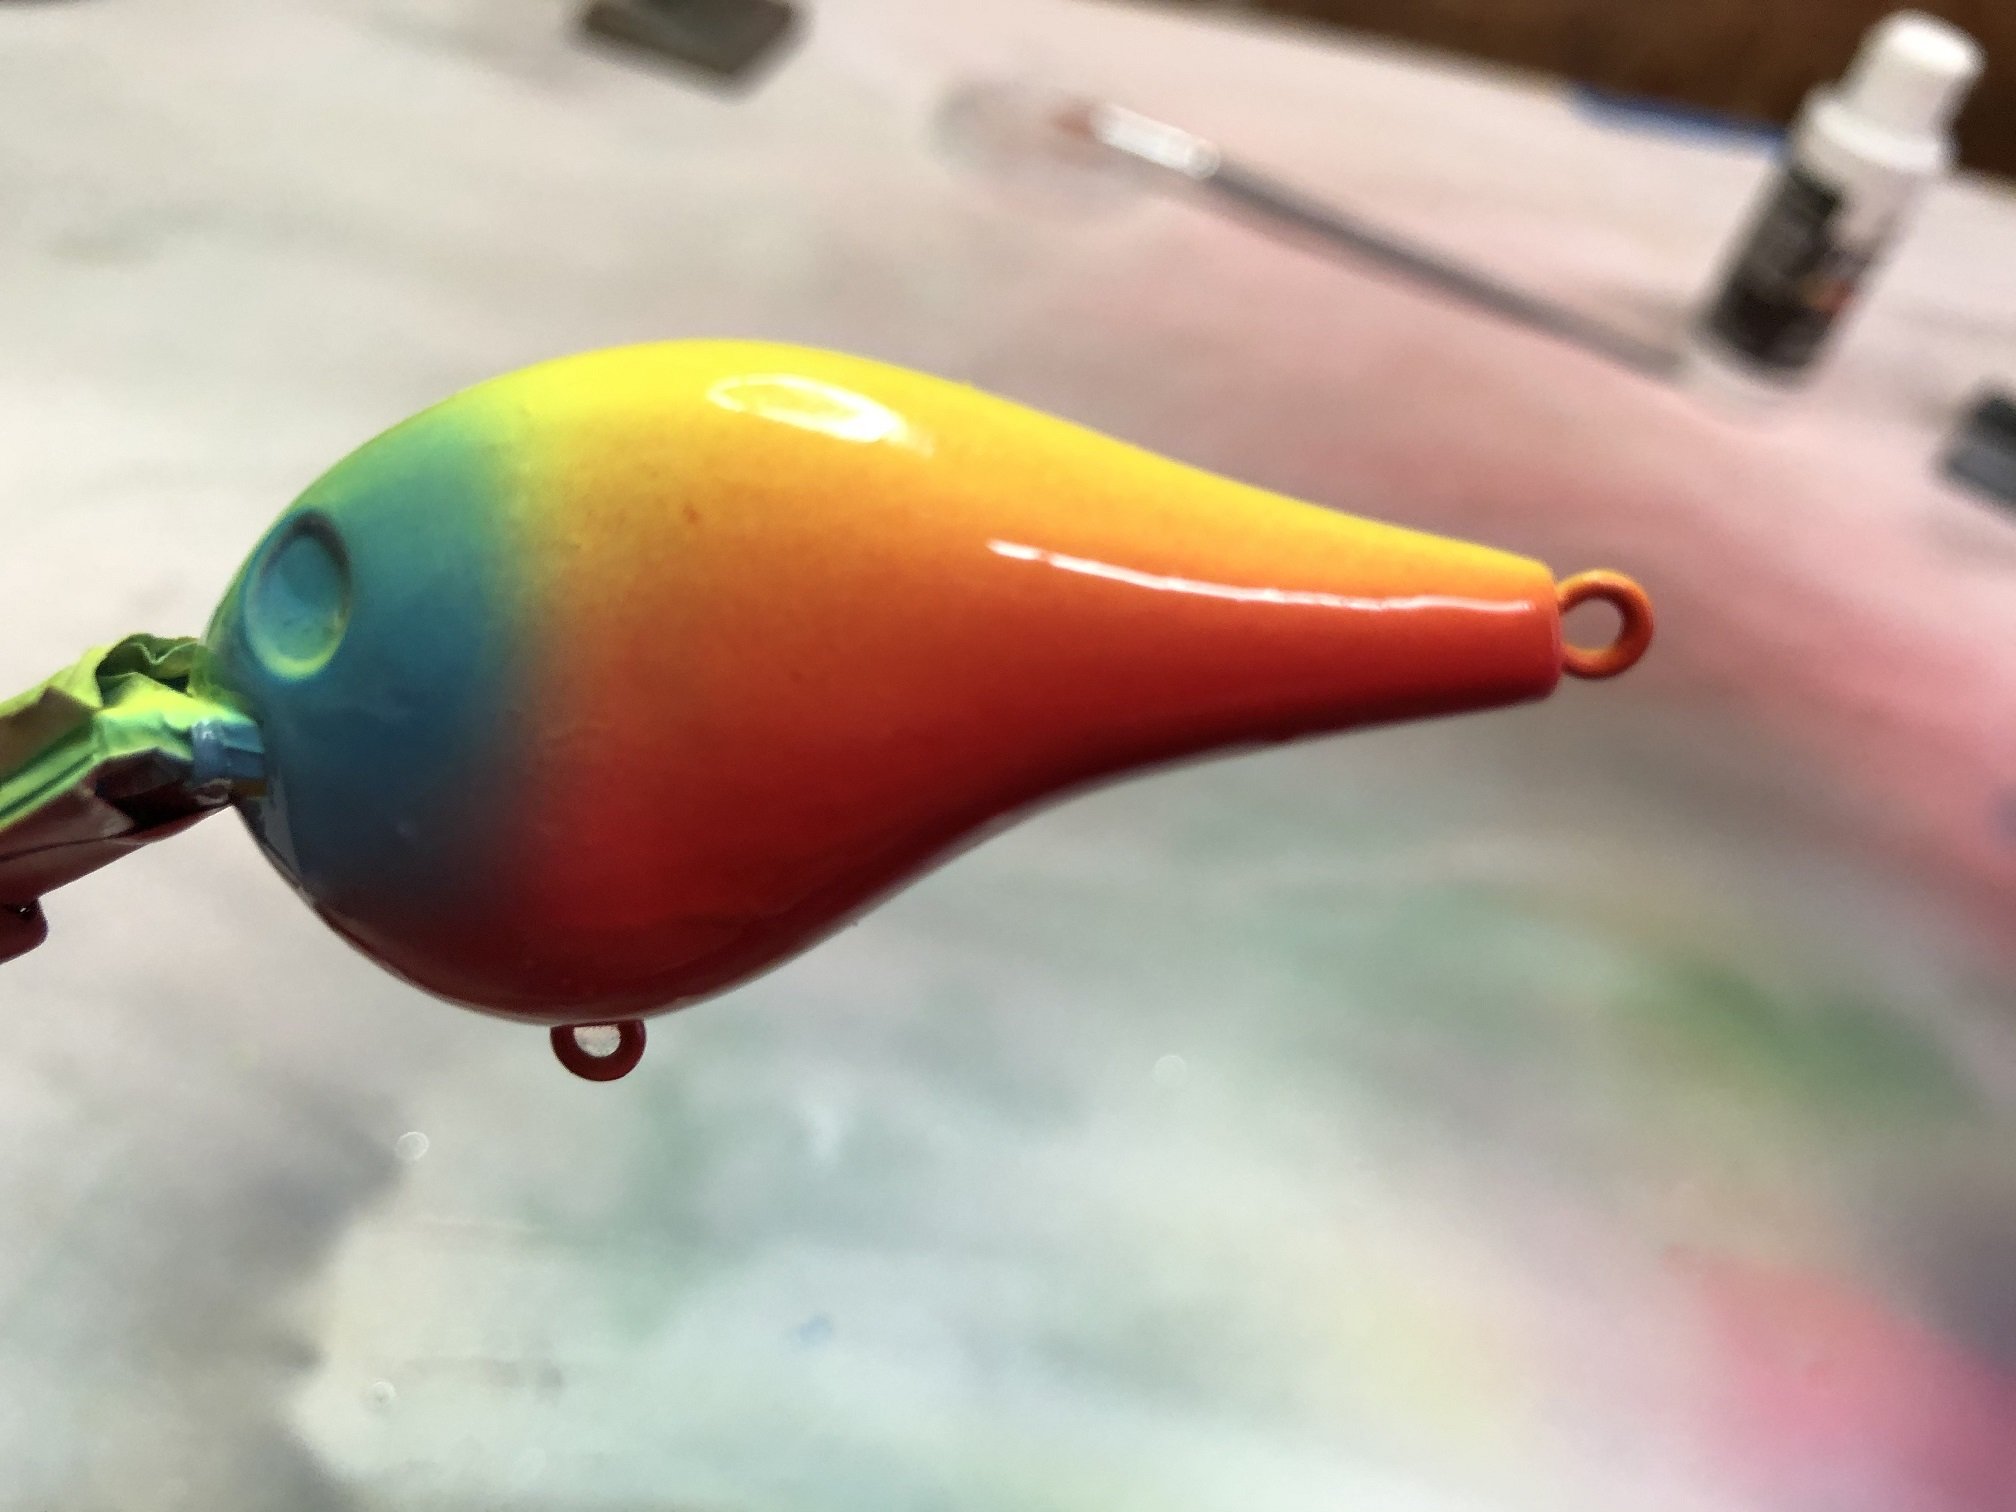
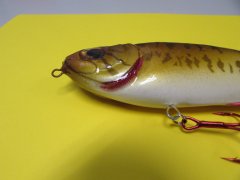
I have been finishing Predator Pop Max Srs and really like the way them. The Predator site says, “Please take extra care when clear coating around the gill slots in the mouth so you do not plug them.” for good reason. I’ve been using 30 minute epoxy top coat and have had some issue with the slits getting epoxy in them and clogging. (I think dipping in KBS would probably be just as bad). Any suggestions for how to keep the top coat out of the gill slits? I have been wondering if there is something that could be put in the gill slits after painting but before top coating, that won't react with either the paint or the epoxy and that then could be removed once the epoxy cures. Would wax work? Could it be gently melted out after epoxy cures? Any thoughts on this would be appreciated.
-
Crackle is an old topic on this forum, but I have just started experimenting with using crackle to get a veiny (as in varicose vein) look on some baits. It seems that the crackle works well on a smooth surface and not so well on baits with molded in scales and other features. I've attached two images. One before applying crackle (red, yellow and light blue) and one of the finished product. I am not thrilled with the way the back (top) turned out. It has very little crackling. I realized that the back was a little rough from sanding and not as smooth as the sides and am wondering if that could be the issue?


-
 Experimenting with trying to get a 'veiny' look using crackle
 -
-
-
I made the mistake of mixing some Hobby Lobby extra fine glitter in transparent base and trying to spray it thru an Iwata Eclipse airbrush. Yikes! I ruined a nozzle. I’ve returned to just mixing the glitter in epoxy top coat, mixing well, brushing it on and turning the lures on a turner. The only problem I’ve had with this method is when I’ve used too much glitter and it resulted in little bumps in the finish. As long as I don’t use too much, it comes out pretty nice
-
My setup is very similar to AZ Fisher’s. I cut a blank in half which prevents over wrapping and (for me) eliminates scratching. For a bait that I didn’t want to cut in half, I made a cardboard cut out, half the bait thickness, to set the bait in while vacuum forming. This was pretty successful in forming stencils that didn’t scratch. It’s funny because none of this is very ‘pretty’ but it works
-
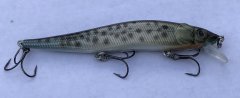
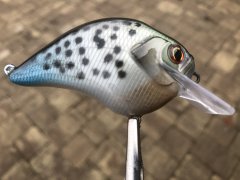 The first step was to make stencils, for the spots and Gil plates. I’ve seen several discussions on tackle underground on how to do that. Basically I’ve made a vacuum forming tool by cutting numerous holes in the top of a six inch diameter can. I also cut a hole in the side and sealed a small shop vac wand into that hole. To make a stencil, I lay a bait blank half (I’ve cut some in half along the seam) on the can top (with the holes). I place a piece of craft plastic sheet over it, turn on my shop vac and then heat the plastic from above with my heat gun. The vacuum draws the softened plastic around the bait body. Then I draw the pattern on each stencil (one for each side), with a sharpie and cut out the stencil with my Dremel tool. After cutting I sand, (particularly the inside of) each stencil so as not to mar the paint layers that will go on prior to using the stencils. Prior to painting, I use masking tape to cover the lip on the blank. As far as painting, I airbrush the following: White base all over Pearl white all over Transparent blue lightly on sides and back at tail only Trans green lightly on the face Silver lightly on the sides and back enough to soften the blue and green Gold Very lightly misted on sides and back to get a light champagne color Using a gill plate stencil transparent black lightly just at back Using the spots stencils, transparent black misted on sides Then transparent black down very center of back A little Orange just on throat I apply 6 mm stick on eyes do a top coat of 30 minute epoxy making sure to put the bait on a lure Turner for 6-8 hours All of the techniques I used were based on things I’ve read on tackle underground. The color scheme I made up from looking at crappie I’d caught and a fish field guide.
 -
 Wow. That stinks. Our bass numbers took a hit from Hurricane Michael, but seem to be rebounding. I mostly fish the Apalachicola River system and I think that bait would do well on the lower end.
 -
My attempt at a crappie pattern
-
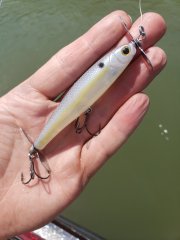
 I don't think I've seen a jerk bait in a crappie pattern, however I fish a lake that has some nice crappie and some bass that like jerk baits, so I did this. I hope it works.
 -
-
 really nice paint job!
 -
I like fishing this type prop bait. My favorite is the Cotton Cordell Boy Howdy and this is the closest blank that I've found. I've gotten some with the props already on and some off. The ones with the props off are easier to paint. I like your pattern. It looks like it will catch fish.