BrunZ320
-
Posts
7 -
Joined
-
Last visited
BrunZ320's Achievements
")
Newbie (1/14)
1
Reputation
-
Thank you for the reply ! It’s good to know the clear coat cleans out like the normal paint does and won’t damage the airbrush. I was planning on spraying this between details and at the end, then still using an epoxy to finish up. I will move forward with giving it a try.
-
I was wanting to try spraying a thin clear on my baits before epoxy and between some finer details to not mess up the the under coats. Does anyone have experience using Createx 5620 clear coat ? I couldn’t find much on this stuff at all. Also , I am worried about this gumming up my good airbrushes if I spray it. Any feedback on how it sprays, and how it cleans up would be appreciated. I thought about getting a cheap airbrush with a larger needle for this to not risk my good ones.
-
I love using the flicker shads, but I haven’t found any blanks available. For an average of 3$ per factory bait with all hooks and hardware, you might be better off buying factory ones in bulk sales and just repainting them for something custom. Normally , I pay around $1.50-$3.00 for a random blank without any hardware from most sites. Just remove the existing hardware, paint your base coat over the factory paint, then you can make them how you want, and add a final clear coat. I started repainting factory baits in the beginning, and they turned out great . I repainted a bunch of older jsr bodies and use them all the time without any issues.
-
 BrunZ320 changed their profile photo
 -
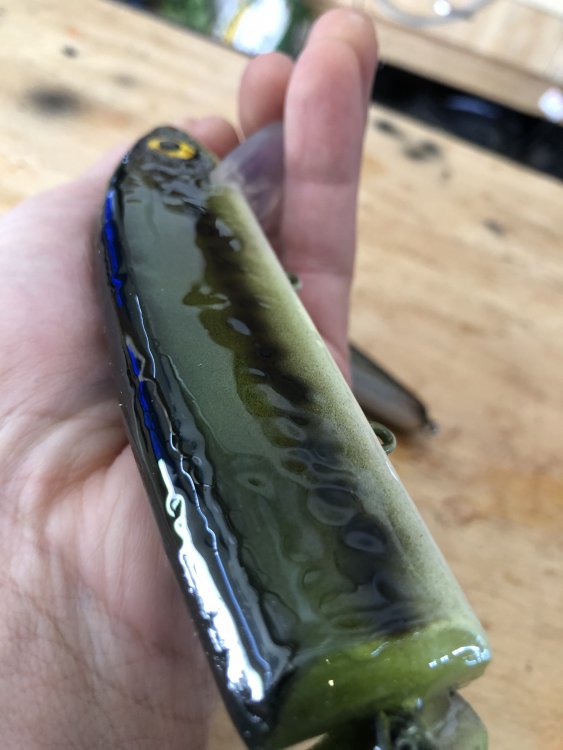
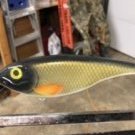
After the second coat with true coat epoxy indoors, the large musky jerk bait and both smaller plastic jerks look perfect. Maybe it was the environment in the garage that ended up causing most of my issues , even with with it heated. I also used a thicker coat and spread it out faster this round. I will try to go back to the plastic musky jointed crank baits again next to see if being inside the house with two coats is the ticket on those too. This time I also used no heat at all on the true coat and had great results. The true coat epoxy cures from the bottom up and is supposed to help push bubbles out while curing. I was very happy after this second coat and have no bubbles or waves at all . Darker photo of the end result, but you can still see the nice clear shine on it!!

-
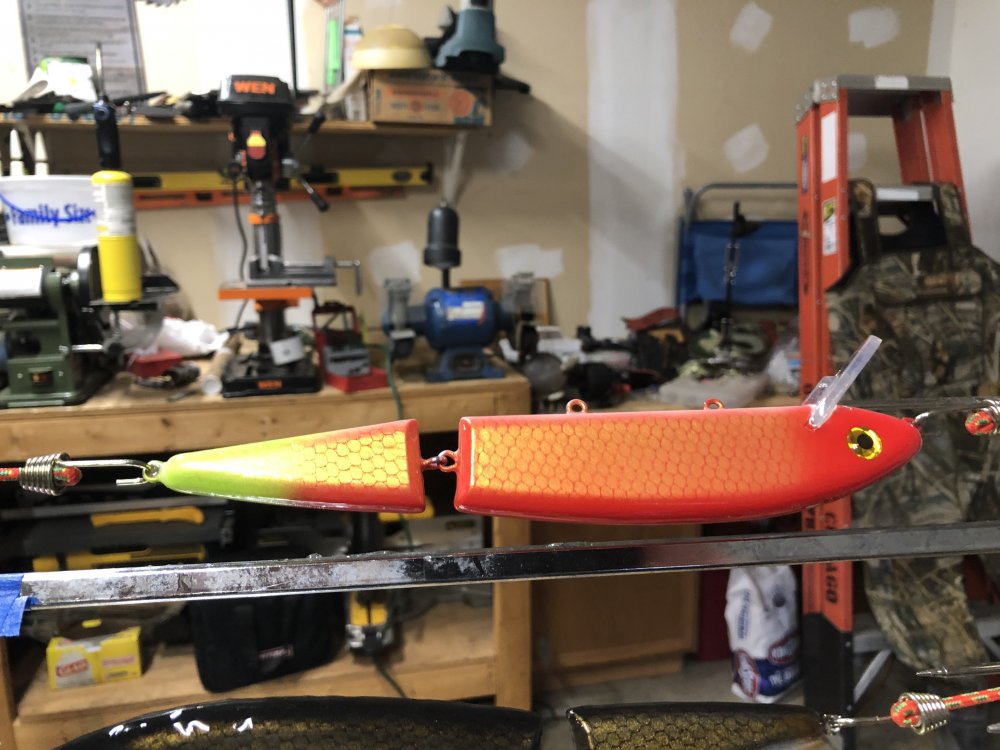
Thank you for all the input so far. So I brought my drying rack inside yesterday and did a batch of 2 small Plastic jerk baits and one large wooden musky jerk bait. I used true coat to cover these ones. After an overnight cure, the small jerks look perfect, and one side of the musky jerk had pitting. I applied one more coat today, and I have the musky bait on the turner. I am hoping the second coat turns out perfect. I do two coat minimum on the musky baits. Still hit me hard to see the pitting on the large jerk after last night. I might be forced to spend the money and move to uv alumilite cure if this problem doesn’t stop. I still don’t understand why all of my smaller baits look good and the big ones are hit and miss, or take multiple coats to get right.
-
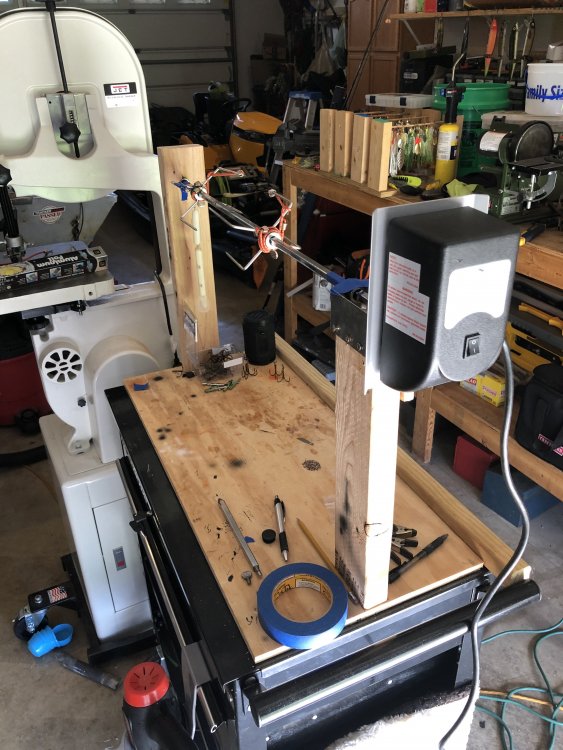
Thank you for the reply. I had a typo on the original post and meant Midwest in Indiana. My next move was trying to bring the drying rack indoors in an area with an incandescent bulb near the rack and see if that helps. The house is at 70 and the garage is around 65, but I’m sure with less dust inside. I’ve heard a lot of good about the uv cures, and I am planning on going that route to save time and hassle in the future, but with all of the epoxy that I bought to try different products, I want to get it right and get my money’s worth!! I also feel like the epoxy is best for the musky lures do to the thickness. I was fine with curing all of the spinnerbaits, smaller crank baits ,and jerk bait lures I was doing before until I went onto the musky lures. It seems the larger the bait the harder it is for a good epoxy cure on my end.
-
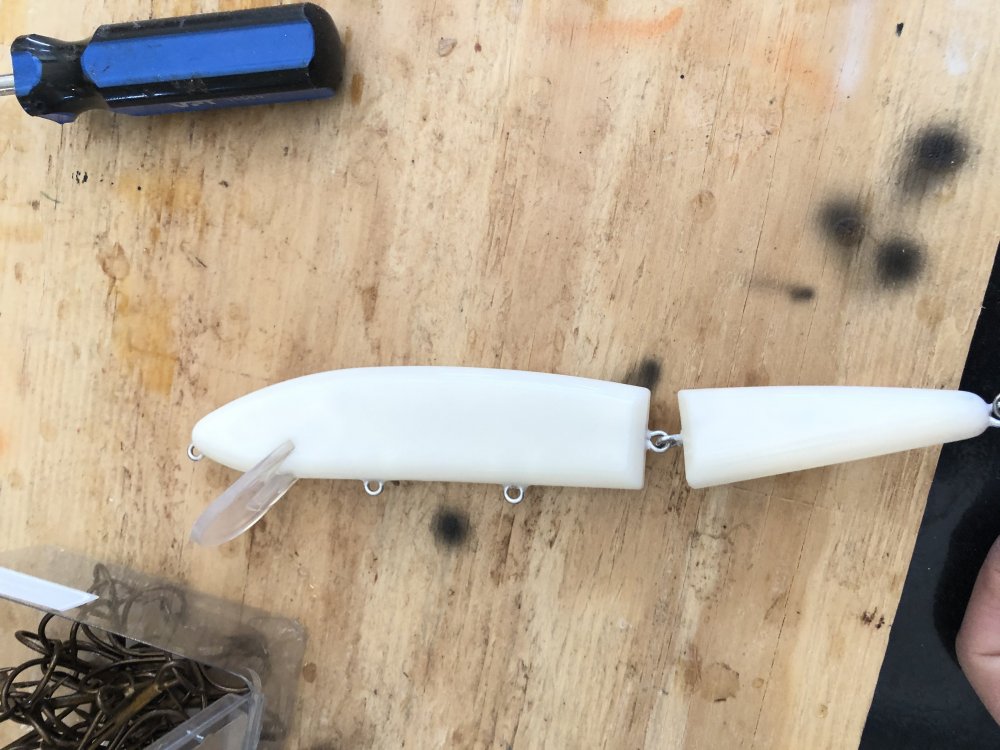
I have been painting/making my own spinnerbaits and plastic/wooden baits for the last few years with airbrush and createx paints. I haven’t had many issues at all with epoxies until now. I made a cheap fast lure turner with a grill rotisserie set up, and I turn lures to dry overnight in my heated garage. I live in the northwest, and the current temps out are 55-60 degrees with around 50% humidity. I keep the garage heated between 65-70 any time I am painting or clear coating my lures. I purchased extra large jointed musky crankbaits from barlows tackle. Every single one of these baits have had epoxy issues on the turner. I have used devcon2ton 30 minute, flex coat gel, East coast resin, and true coat to coat my lures. I had success with d2ton on smaller lures not on a turner. I also had success with east coast resin on a musky bait in a turner, but it took 3 or 4 coats to even out. Most large baits I make are taking multiple coats to get looking nice on the turner, when I had very little issues without a turner and devcon2ton on small baits. I am going to try some smaller baits again to see if I have the same success as before. All of my bigger baits seem to have some minor issues with waves or pitting, and it is getting discouraging. I also wipe down my plastic baits with alcohol before painting them and do not touch any part of the baits before epoxy. I am hoping to get more experienced help on this topic. Here are my questions: 1. These jointed musky baits are made of a different plastic than the others. Could this be the reason I am having all these sudden issues? I have heard of spraying createx clear coat Over the paint before epoxy, and this is supposed to help trap impurities that affect the epoxy?? I ordered some of this and will try, but I am also worried about spraying this clear coat through my nice air brushes and having cleaning/clogging issues. Any advice on this? These Musky baits have been the primary issue, but I had some issues on a large wooden jerk bait also recently that took numerous coats to fix 2. I was worried that vibrations from my rotisserie motor traveling down the turning rod may be causing the waves in the final cure. I have installed rubber grommets on all the fastening screws for the motor to help this morning. I still feel light vibration when I touch the turning rod. Could this cause issues? Advice? I posted a few pics of set up/ baits with waves on finish. This site has been a great help in starting out, and this is my first actual post.