Search the Community
Showing results for tags 'hard bait'.
Found 25 results
-
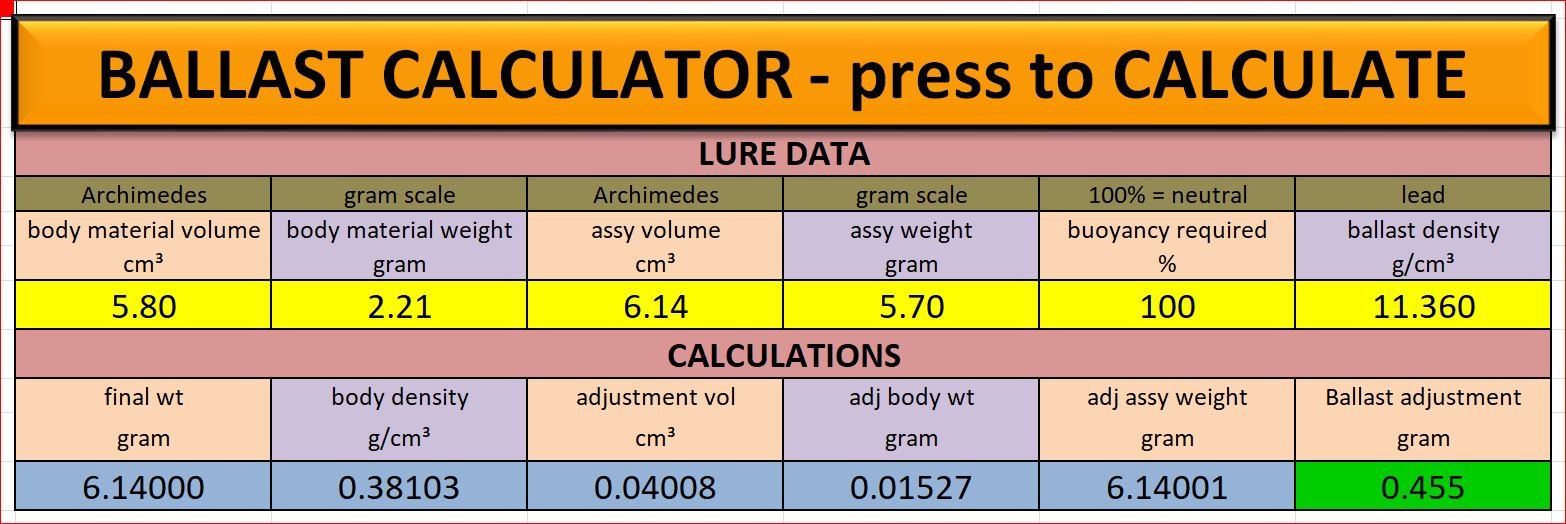
I have done a lot of work on ballast calculators in the past. I have never offered them up for use by TU members because I considered them complicated and clumsy. This one however, I consider to be very slick and versatile. You can enter data from a first prototype and it will calculate how much ballast you need to add or subtract to achieve the buoyancy that you desire, be it slow sink, neutral or float. Boxes 1 and 2 are merely to collect data on the body material in order to obtain the material density. Boxes 3 and 4 are measured from a completed lure with hardware, hooks and topcoat. Box 5 is your desired buoyancy, 100% = neutral buoyancy. Box 6 is the density of the ballast. This can be changed if not using lead. The calculation takes into account the body material removed or added to make room for the ballast. PM your email to me if you would like to try this spreadsheet. Dave

-
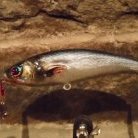
.jpg.611662fe249ed08d857bc2d596344ea8.jpg) Roach pattern lateral rattle jerk bait
Roach pattern lateral rattle jerk bait -
-
-
© Copyright ©2019 - Chad G Ardoff
-
© Copyright ©2019 - Chad G Ardoff
-
© Copyright ©2019 - Chad G Ardoff
-
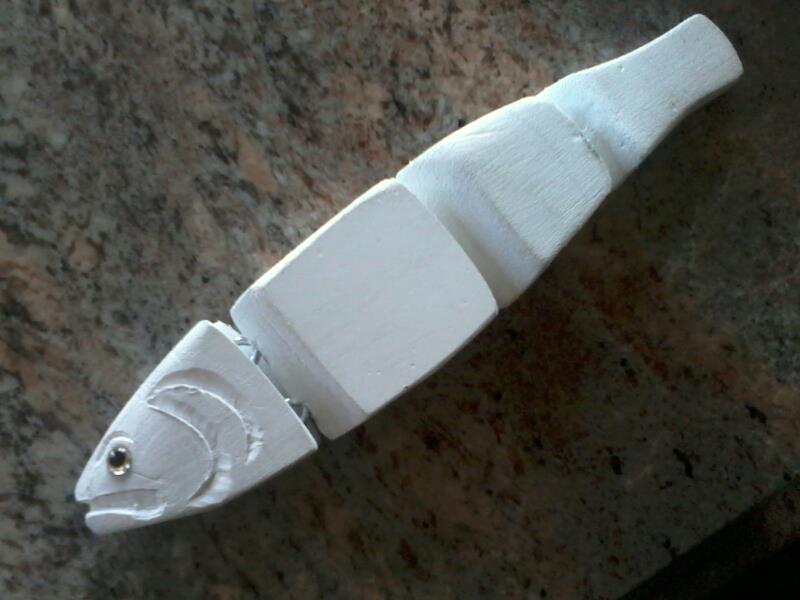
 Made of Pine. Made my own eyes.
© Copyright © 2019 Chad G. Ardoff. All Rights Reserved.
-
Hi everyone, Before I began I must say I searched the forums for a solution to the issue I am having and found one post that had a good suggestion that I followed but I am still plagued by this issue. I am a beginner at this but have gotten pretty good at balancing and airbrushing but for the life of me I cannot figure out what I am doing wrong when applying epoxy. After the epoxy application my baits end up with parts of the bait with too much epoxy, parts with none, parts that have fish eyed, etc. After browsing the forums tonight and finding what I thought to be my problem I painted a big glide bait I made and made sure that my hands were gloved (non-powdered) at all times. I never touched the bait with an ungloved hand. I put the bait on the drier, started the motor, then applied a thin coat of epoxy to the entire bait. I stood over the bait for an hour, gently brushing over every single fish eye and spot that formed and then, when I was satisfied, walked away. A couple of hours later I came back to find the epoxy had once again began to cure unevenly and I nearly lost my mind. Hours and hours of work learning to carve, balance, airbrush, and every time the epoxy stage drags me through the mud. I have no idea what I am doing wrong. Of the four baits I have completed to this point only one has come out semi-acceptable. I just don't get it. I watched hours of bait makers on YouTube and did hours and hours of research online and got pretty good pretty fast at each stage of the process but when it comes to applying epoxy I just have no idea what my problem is. The one thing I have not tried yet that I did see suggested in the forums is to apply an aerosol based clear coat before applying epoxy. I don't know why this would be necessary as none of the bait makers I have been watching for months do this. Attached are some pics of a couple of the baits I have made thus far that, although they look good in the pictures, had epoxy topcoats that did not turn out well. Any suggestions would be greatly appreciated....... Thank you all!
-
Hey community, I saw a guy fishing in video with some home made wax lures, I am assuming paraffin. Well any way has someone ever tried that. I want to know if it will be durable with a coating of epoxy, when it is built like a wooden body lure with wires in the inside. The way it would work I am assuming is with wires internally built that take all the fish's tugging so the wax body does not break. If you have tried this before can you tell me your experience with it. Thank you in advance. (Plastisol Formula will be posted later today.)
-
Any one here have info on unpainted swimbait blanks? 1 or 2 joints.
-
 Cedar swimmer dyed with bright blue aniline dye. Through wire construction with free moving glass marbles in the cavity. This was a learning project. The first one I made was rougher-this one was made a bit differently. The next should be better finished. I used the aniline dye because painting would have been a bear, and I liked the idea of the wood grain showing through. The next one will be red-hopefully red will not be influenced as much by the cedar's natural red coloring.
 -
Hey everybody, this is my first post here on TU, and I hope i'm not regurgitating past topics here but... I just cast my first resin glide bait, a 8.5" rainbow trout. My first casting was as a single-piece, but I decided to lay the molds out flat and try it in two pieces. The reason for this was to try and cut weight by hollowing out the front and rear sections when it had cured (which I did), then epoxy everything together. The result is still 7.5 ounces, as pictured. So, my question is: Is it possible to cut this weight of something like this down to, say, 4.5 or 5 ounces? Is there a technique/resin type that can help cut the weight down? I'm using a two-piece silicone mold based upon a hand carved wood trout design I made. Any suggestions would be much appreciated!
-
I am trying to get into carving my hard body lures from wood by hand. I was wondering what tools any of you would recommend as a must have for that job. So far i have been using a sharp knife and a dremel engraver for fine detail. It works but I want to know how to make things more productive with better tools.
-
Hi ! I've been making wooden fishing lure for a couple years now and I've been using 2 part epoxy (nu lustre 55) .I bought quite a lot of plastic crankbait I got a deal on and I was hoping to paint but they have really sharp edges, curves, and detail that just aren't working with epoxy, I was just wondering if any of you use a thin clear coat that you just have to dip the lure ? I've heard of KBS diamond finish ? could I just dip it or would I have to mix it with something and then brush it ? Thanks
-
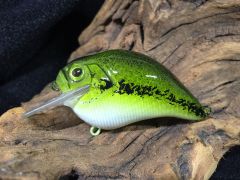 Baby Bass pattern on a Megabass S-Crank. Lure blank available at www.dingerbaits.com
© Lure Me In Custom Painted Crankbaits
-
![20150324 090347[1]](https://www.tackleunderground.com/community/media/gallery/category_8/sml_gallery_44587_8_535161.jpg) ABT Glide Bait I foiled and painted. I used "cheap" kitchen type foil attached with Solarez UV cure resin using MEKP for curing agent. This bait has a distinctive and fairly deep scale pattern in the mold. All Createx paints. Used opaque white to cover the seams, then transparent paints for body and back. Opaque black for spots and pearlized white for belly. Seems the overspray of the white covered the foil more than I wanted but it comes through in outside light better. One of my first attempts with foil. Barry
ABT Glide Bait I foiled and painted. I used "cheap" kitchen type foil attached with Solarez UV cure resin using MEKP for curing agent. This bait has a distinctive and fairly deep scale pattern in the mold. All Createx paints. Used opaque white to cover the seams, then transparent paints for body and back. Opaque black for spots and pearlized white for belly. Seems the overspray of the white covered the foil more than I wanted but it comes through in outside light better. One of my first attempts with foil. Barry -
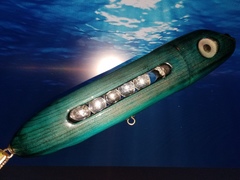
 New barfish swimbait I'm working on with zerovoc uv epoxy coating!
© gail ratcliff
-
 This wood wake bait is about 6 inch, carved from Basswood, Lexan tail and bill. Createx Paints, D2T topcoat. Walks and wakes nicely. Also, in the back 3/4 of the front part, installed a homemade rattle of brass tubing and ball bearing.
 -
 This is my Hard Buzz Clear Fire hybrid. This bait sinks or buzzes the surface depending on where their biting in the water column. You can hit several levels of depth with the same cast. Lots of flash above and below. Molded thru wire and 4 dips of GST concrete sealer.
© Stash Baits
-
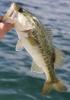
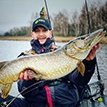
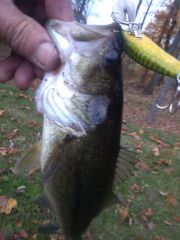 14 casts produced 2 bass this evening with the same lure. Yeah, I know, they are pretty small bass, but hey, it is the first two with my new lure design...... :-)
 -
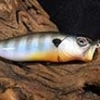
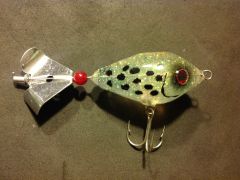
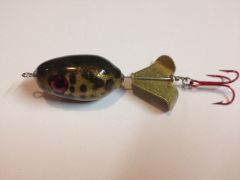 Technically a hybrid I guess, but they are a lot of fun to fish.
 -
Does anyone have a link to a good crank bait cookbook/patterns? I have seen the one pinned on top but I remember seeing one on this site or on another site that had a lot of patterns. Thanks for any info
-
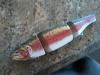
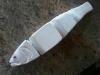
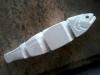
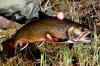
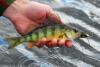
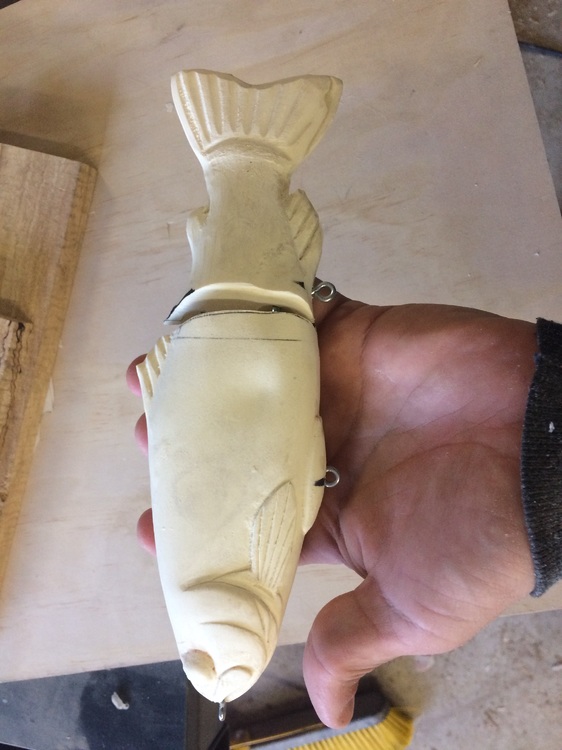
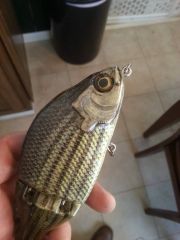
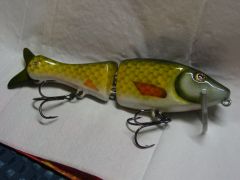
Hey everyone, I'm working on my swimbaits and can't decide on which fish pattern I should do next. I've already done my rainbow trouts a couple times now and want to try something new and challenging. The fish I'm thinking of; Native Cutthroat Trout, Brook Trout, Yellow Perch, Largemouth Bass. I put a picture of my rainbow trout so you can see my style of painting. Also a picture of my new swimbait that is needing the paint job. I'm leaning towards painting a cutthroat trout but still like those other fish patterns. Let me know guys, thanks.