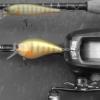
Buckhorn79 Posted January 31, 2014 Report Share Posted January 31, 2014 Just curious what's you guys best way of removing paint from wiggle warts. I have read about using acetone but seen guys said it melted the baits a lil bit. Any help would be much appreciated thanks guys. Tight lines! Quote Link to comment Share on other sites More sharing options...
Cougarftd Posted January 31, 2014 Report Share Posted January 31, 2014 scotch-brite pad or sandpaper Quote Link to comment Share on other sites More sharing options...
BobP Posted January 31, 2014 Report Share Posted January 31, 2014 If it's a floating lure and your new pattern is a solid color, I just scuff up the existing paint and refinish because the extra weight will have negligible effect on the lure. If you want to get adventuresome, you can burn it off with a propane torch - this takes skill not to ruin the lure. I don't like using solvents because they are very messy and they will cloud the lip if you get any on there (I always do). If you need to end up with a clear plastic body to paint a translucent pattern like ghost craw, the best method is sandpaper, maybe a little shaving/scraping with a very sharp knife - and patience. Quote Link to comment Share on other sites More sharing options...
Buckhorn79 Posted January 31, 2014 Author Report Share Posted January 31, 2014 Thanks guys. BonP can you get a nice clear bill without much scratches with sandpaper on say a wiggle wart? Quote Link to comment Share on other sites More sharing options...
bassguy Posted February 1, 2014 Report Share Posted February 1, 2014 (edited) If I'm not mistaken, some of the guys say you can dip the bill in acetone to clean it up. Oh, quickly I might add. Jerry Edited February 1, 2014 by bassguy Quote Link to comment Share on other sites More sharing options...
BobP Posted February 1, 2014 Report Share Posted February 1, 2014 Well, if you never hit the bill with the sandpaper, no problem. Also, if you use a clearcoat that adheres well to plastic, you can coat the bill or any other part of the lure and any scratches disappear. Any clearcoat you'd care to name will make scratches disappear - but some will adhere and look better than others. In my experience, epoxy does not look good on bills and when it yellows, it shows up very quickly. The best clearcoat for plastic lips I've found is Dick Nite S81 moisture cured urethane. It will not adhere well to polycarbonate (aka Lexan) however. Solarez UV cured polyester also makes scratches disappear though I haven't used it enough to comment on its adhesion properties. Quote Link to comment Share on other sites More sharing options...
woodieb8 Posted February 1, 2014 Report Share Posted February 1, 2014 as stated just paint over the existing paint.. if the lures hook rashed shoot white primer as small surface fill. Quote Link to comment Share on other sites More sharing options...
rhersh Posted February 1, 2014 Report Share Posted February 1, 2014 (edited) On the warts that I have done,I sand them with sand paper, I have also got impatient and scraped with a sharp knife but I always seem to get small gouges no matter how careful I try to be. The finer the paper the better. Most wart bills Seem to be painted so I repainted those because I don't seem to be able make them look good after sanding paint from them. To clear up a cloudy bill I have used acitone on a Q-tip with good luck. Royce Edited February 1, 2014 by rhersh Quote Link to comment Share on other sites More sharing options...
swimjig50 Posted February 1, 2014 Report Share Posted February 1, 2014 Shoot them with a soda blaster. Takes the paint clean off without damaging the bait. I have only seen it done with plastic baits though. Quote Link to comment Share on other sites More sharing options...
gunnie3035 Posted February 2, 2014 Report Share Posted February 2, 2014 You can coat a scratched up lip with Etex and then immediately wipe off with a clean cloth. This will fill in the scratches and not give the ugly epoxy look. Quote Link to comment Share on other sites More sharing options...
BobP Posted February 4, 2014 Report Share Posted February 4, 2014 Great idea Gunnie. If you brush epoxy on a lip and let it cure, it is amazing how crappy it looks. You thought epoxy levels out excellently well but what you get is a coating that really shows lots of unevenness. Plus any yellowing will really show on a clear lip. IMO, we should probably stipulate that clearcoating a lip is mostly to appeal to the fisherman and not the fish. It fills in scratches and makes them disappear. If left un-coated, water performs the same function when the lure is fished. Quote Link to comment Share on other sites More sharing options...
sonoman Posted February 4, 2014 Report Share Posted February 4, 2014 leaving them in brake fluid will definately soften most finishes so that all you need to do is wash it off....just experiment with the time it takes. good luck Quote Link to comment Share on other sites More sharing options...
Musky Glenn Posted February 4, 2014 Report Share Posted February 4, 2014 I scrape them with a knife blade. Hard on knife blades. Musky Glenn Quote Link to comment Share on other sites More sharing options...
mark poulson Posted February 4, 2014 Report Share Posted February 4, 2014 I scrape them with a knife blade. Hard on knife blades. Musky Glenn Me, too. Quote Link to comment Share on other sites More sharing options...
MstormC Posted February 4, 2014 Report Share Posted February 4, 2014 (edited) Me, too. me three, except I use a heat gun first to make the paint bubble.....careful or you will have a flaming wiggle wart if you're not paying attention. Edited February 4, 2014 by MstormC 1 Quote Link to comment Share on other sites More sharing options...
Buckhorn79 Posted February 6, 2014 Author Report Share Posted February 6, 2014 Great info guys! Thanks for the help! I'm wondering if the soda blaster would take a painted bill to a clear bill? Definitely gonna try it. Tight lines Quote Link to comment Share on other sites More sharing options...
mark poulson Posted February 6, 2014 Report Share Posted February 6, 2014 Thanks guys. BonP can you get a nice clear bill without much scratches with sandpaper on say a wiggle wart? Bob said it all early on in this thread. If you mask the bill with blue painter's tape before you sand, you shouldn't scratch it. Some older cranks with painted bills aren't made from clear plastic. I think that was to eliminate a base coat in the painting process, so you won't be able to get them down to clear. Quote Link to comment Share on other sites More sharing options...
RayburnGuy Posted February 6, 2014 Report Share Posted February 6, 2014 In the time I've been doing this I don't think I've come across a single bait that had a painted lip where the plastic was clear under the paint. Even on baits of the same type some of the plastic is colored. It must be the cost of clear plastic versus colored plastic.Can't think of any other reason for it. Ben Quote Link to comment Share on other sites More sharing options...
barrybait Posted February 6, 2014 Report Share Posted February 6, 2014 I use a knife if I have to for a very hard top coat but if the top coat is thin I have had good success with steel wool. Steel wool works all the curves nicely and if you are just going to scuff up the other top coat it is really good. After I'm done, I crank up the pressure on the airbrush just to blow all the small pieces off the bench so it doesn't wind up in your coatings. I had a jerkbait ko on the bench, the one with the magnet inside to hold the weight transfer steelies and it collected a steel wool beard at the magnet. Quote Link to comment Share on other sites More sharing options...
sherm6413 Posted February 9, 2014 Report Share Posted February 9, 2014 harbor freight sells a spot blaster, mini sandblaster with built on tank, that works real well using corn starch to blast with. just my .02 cents Quote Link to comment Share on other sites More sharing options...
mark poulson Posted February 10, 2014 Report Share Posted February 10, 2014 harbor freight sells a spot blaster, mini sandblaster with built on tank, that works real well using corn starch to blast with. just my .02 cents Do you use some kind of a blast cage and respirator to limit the spread of the dust when you blast? Quote Link to comment Share on other sites More sharing options...
Arkie Posted February 11, 2014 Report Share Posted February 11, 2014 Saw this thread last week and started to reply , but got busy. I have been a member here since '06, but only visit seasonally - I paint November - February. Having done this for over 10 years, I have developed a clientele that is probably 90% Wiggle Warts. As a result, I have become very familiar with the wart...most of my business is re-creating pre-Rapala warts with hard-to-find original patterns and any other craw scheme you can imagine. I said all of that to get to this,my process for preparing warts for paint (I have found it to be the best way to revitalize the bait): I start with a blasting process - table-top model blast cabinet with 80 grit white (all supplies at Tractor Supply). Compressor runs @ 80 psi. NOTE 1: unless you have a large capacity reserve, compressor will run continuously to do the job. IMPORTANT: purchase a shop vac that can be dedicated to the system, and set-up with an air regulator to properly eliminate blow-by/waste (a simple in-line PVC "T" will allow enough fresh air mix to prevent negative cabinet pressure). NOTE 2: add an external desk lamp that can be placed on the lid (the internal light is less than sufficient). With practice, you will soon get the feel for quick and even stripping of the entire bait, including the bill - even on clear baits. Next, I inspect the bait for burs, hook gouges, uneven mold lines, etc., and smooth out with homemade emery board (Popsicle stick with 2 different grits of paper rubber cemented to it). Next, I seal the bait with acetone. Grasp bait by line tie with hemostats and dip into a glass jar filled with acetone. 1 - 2 seconds is all that is needed. Flash the acetone with low psi compressed air to prevent running, which will leave a powdery residue. This can be wiped away later, but a little practice will make for a shiny blank. If thoroughly flashed, you can place the bait aside in a pie tin or on aluminum foil. One little bonus to this slick finish, is that paint is easily removed if you need to mock one up, or just simply make a mistake. Now, paint your favorite scheme and clear. As for clearing bills, when you do so many "solid bill" molds, you have to paint and clear the bill. So, years ago, I quit masking the clear bodies, and learned how to paint the natural transition - much like the originals - and clear-coat the clear billed baits as well. I think it makes for a nicer finished paint job. By the way, I am a D2T guy - always have been. I believe it is the overall best for look, function and durability. Sorry for the long post, but thought that sharing might help someone out, I know I have found more than my share of bits and pieces from all the great guys here over the years. 1 Quote Link to comment Share on other sites More sharing options...
rhersh Posted February 11, 2014 Report Share Posted February 11, 2014 Thank's Arkie for the post. I have considered investing in a soda blaster but didn't want to not knowing if it would not damage the baits. A very useful post. Again Thanks Quote Link to comment Share on other sites More sharing options...
Buckhorn79 Posted February 11, 2014 Author Report Share Posted February 11, 2014 For sure arkie thanks a ton! This is exactly the info I was looking for! That's what is so great about this site, nice ppl who are willing to share there thoughts and ideas with fellow lure makers! AWESOME and thanks again. Tight lines! Quote Link to comment Share on other sites More sharing options...
Hughesy Posted February 11, 2014 Report Share Posted February 11, 2014 (edited) Great reply Arkie! We use almost the same process. One thing I might add is on pre rapala warts, the paint is easly removed by wiping it with a rag or paper towel that is wet with lacquer thinner. Use ruber gloves. You may have to wipe it several times to get all of the paint off. Use a Qtip wet with lacquer thinner around the hook eyes. Hold on to the bill and wipe the body until its clear. Let it dry for a while. Then hold on to the body and clear out the bill. Edited February 11, 2014 by Hughesy Quote Link to comment Share on other sites More sharing options...