thundercat Posted March 28, 2015 Report Share Posted March 28, 2015 Try this link for thin foil, they have holographics as well and the correct adhesive. It is the same thing that is used in the nail salon business. http://www.dollarnailart.com/cat_pages/foils.html Quote Link to comment Share on other sites More sharing options...
RayburnGuy Posted March 28, 2015 Report Share Posted March 28, 2015 Try this link for thin foil, they have holographics as well and the correct adhesive. It is the same thing that is used in the nail salon business. http://www.dollarnailart.com/cat_pages/foils.html They have some great looking foils, but the widest I saw was only 1 inch which might be OK for small baits, but not so much on bigger ones. Ben Quote Link to comment Share on other sites More sharing options...
thundercat Posted March 28, 2015 Report Share Posted March 28, 2015 (edited) Try this link for thin foil, they have holographics as well and the correct adhesive. It is the same thing that is used in the nail salon business. http://www.dollarnailart.com/cat_pages/foils.html I just foiled four baits, you can run the one inch wide verticle and match it up on the next inch, pretty simple, and once painted cannot tell. I also use stampee foil with same glue. Not sure how to add a picture to the post or I can show you the ones I just finished in holographic swirl gold and silver. Edited March 28, 2015 by thundercat 1 Quote Link to comment Share on other sites More sharing options...
RayburnGuy Posted March 28, 2015 Report Share Posted March 28, 2015 Your right. I can't see where you matched it up with the next piece. Nice job. Ben 1 Quote Link to comment Share on other sites More sharing options...
mark poulson Posted March 28, 2015 Report Share Posted March 28, 2015 Beautiful! Quote Link to comment Share on other sites More sharing options...
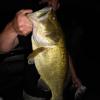
thundercat Posted March 30, 2015 Report Share Posted March 30, 2015 (edited) Foiled a few 110's today for the same pattern a smallmouth guide requested. They turned out good. These are unpainted, should have his two painted up to match the others soon. Edited March 30, 2015 by thundercat 1 Quote Link to comment Share on other sites More sharing options...
JBlaze Posted March 30, 2015 Report Share Posted March 30, 2015 Foiled a few 110's today for the same pattern a smallmouth guide requested. They turned out good. These are unpainted, should have his two painted up to match the others soon. image.jpg Those are awesome looking! John Quote Link to comment Share on other sites More sharing options...
andy1976 Posted March 30, 2015 Report Share Posted March 30, 2015 I am impressed thundercat. Nice job on those. Quote Link to comment Share on other sites More sharing options...
FrogAddict Posted April 9, 2015 Report Share Posted April 9, 2015 Thundercat, Those are stinking awesome! Mark, I like the belly,back, sides idea. I'm going to try that. I still get frustrated trying to hide my seams with paint. I seem to over spray too much with my .5 mm brush. Quote Link to comment Share on other sites More sharing options...
CrankyMike Posted April 14, 2015 Report Share Posted April 14, 2015 I've foiled a lot of wide-body square-bills, and also a lot of flat-body round-bills. On all of them, I've used the least expensive kitchen foil I can find. I want a foil that is both very thin - the cheaper foil is usually thinner than the name brand foil - and I want a foil that is VERY shiny. Sometimes the less expensive foil lacks the "shine" I want. If so, I try another brand. To cut the foil, I pull a suitable length from the roll, and cut a strip about 2 1/2 inches wide. Then, I fold the strip lengthwise, so I end up with a doubled strip that is about 1 1/4" wide (this applies to a bait that is about 1" tall). I then cut the strip into lengths that are a little longer than what I need for each bait to be foiled. I usually build baits a dozen at a time - sometimes more, and sometimes less, but usually 12. I trace my foil pattern onto one of the foil pieces and place that on top of a stack of 5 more of the doubled foil pieces. Then, using scissors I cut out 6 doubled foils. Since they're folded, I have one shiny left side and one shiny right side. If I'm foiling 12 baits I repeat the previous few steps so I end up with a total of 24 pieces of foil. Trying to cut more than 6 sets at a time usually results in the foil skewing away from the scissor edge, or the foil tearing. Now, it's time to apply the foil to the bait. My balsa baits have been sealed with D2T prior to foiling. For adhesive, I use Liquid Nails Projects. The one I use comes in a squeeze tube, not a cartridge (available from Lowes). First, using my finger, I apply an even coat of the adhesive to one side of the bait and hang the bait by the line tie. I apply the adhesive to only one side of all of the baits I want to foil, up to about 12 at a time. I then start applying the foil to the one side of each bait that has adhesive. The adhesive will not harden and will remain soft for quite a while. This is important because you want to be able to emboss the scale pattern into the foil. That's why I use this particular adhesive. It provides a soft surface for whatever knurling tool you choose to use. Like other members, I also use the handle of ratchet. I cut the handle off of a cheap ratchet that I found lying in the street. It turned out to be a Pittsburgh brand, which is sold at Harbor Freight. It is a really great knurling tool with sharp edges to the knurl. You really can't get a great looking scale pattern with a rounded-edge knurl. Anyway, the Liquid Nails Projects adhesive is water-soluble until it fully cures. I apply the foil with my finger and then use a wooden dowel, about 1/4 inch in diameter, to burnish the edges of the foil. Any adhesive that squeezes out from the edges of the foil can be removed with a slightly damp cloth. Once I get one side of each bait foiled I start over with the other side and apply the adhesive, then the foil. It is important to make sure you don't have excess adhesive on the shiny foil. The size of the foil is determined by the paint pattern. If you have a very thin paint stripe on top or bottom, you need a taller foil. A wider paint pattern means you can use a shorter foil. A taller foil means that you simply have to take more time burnishing the edges. Get as many of the wrinkles as flat as possible. Aluminum foil is soft and will thin out with the burnishing, leaving a fairly smooth edge. Now, it's time to emboss the scale pattern. Simply roll the handle onto the foil. The soft adhesive will allow the pattern to be easily transferred to the foil. You really don't want to deform a balsa bait during this step. And, by using this adhesive, you can also more easily foil a plastic bait. If you've ever tried to foil a plastic bait, you quickly learn that it is very difficult to get the scale pattern to be embossed into the foil. Same for a balsa bait that has been sealed with with epoxy or CA. The trick is the burnishing along the edges of the foil. Just about anything with a round edge will work. I just happen to prefer the 1/4" wooden dowel. I actually tapered the end of the dowel I use. It has a softly-rounded tip. As long as you don't leave a really "proud" ridge of foil, the later coats of epoxy and paint will hide the edges. After embossing, check for adhesive that might have squeezed out from under the foil. Wipe it away with your damp cloth. After foiling I apply a coat of D2T epoxy, before painting. You need to apply this coat thick enough to fill in the "scales" in the foil, especially if you are painting over the foil with maybe a translucent color. Then, you don't have to worry about the paint filling in the scales. If you are not painting over the foil you'll have a nice start to a very smooth finish. Tying to emboss the foil before applying it to the bait is a losing battle. If you're doing that because you can't emboss the scale pattern into the foil after you've applied the foil, you need to use a softer adhesive and emboss the foil on the bait. If you have questions you can PM me. I can also explain how you can build an embossing tool using a small section of the knurled ratchet handle. 2 Quote Link to comment Share on other sites More sharing options...
mark poulson Posted April 14, 2015 Report Share Posted April 14, 2015 CrankyMike, That is a great write up! Thanks for taking the time to share your foiling process, and your thought process, too. Quote Link to comment Share on other sites More sharing options...
Hurley Posted April 14, 2015 Author Report Share Posted April 14, 2015 Thanks for your tips. They align with my own trial and errors. I am seeing that with foil I need to use three coats of d2t instead of two. Although, It does look like I need to work on my d2t application because I am getting a milky hue in areas. Quote Link to comment Share on other sites More sharing options...
CrankyMike Posted April 14, 2015 Report Share Posted April 14, 2015 Hurley, like so many others have previously posted, working with D2T should be a simple process if you follow a few guidelines: 1. Measure both parts accurately. 50/50 is absolutely best. 2. Whenever possible, avoid adding alcohol or lacquer thinner. Yes, some people do that with great results, but you are better off wasting epoxy that is starting to cure rather than thinning it and trying to stretch out what you have left. Some people get away with 20% alcohol, and others use 10%, but I would think that they have also made sure that they follow ALL the other guidelines. 3. Make sure it is stirred. Stir it, and then stir it again, just to be sure. 4. Make sure it's warm enough where you are working. It needs to be around 70 degrees in your work area. You can get good results if it's a couple of degrees cooler, but try to work in one place with the correct temperature. 5. Don't overwork the epoxy once you apply it to the bait. It self-levels. The lines and high places will disappear as it settles and cures. Don't touch it in any way once it's been applied. 6. Store the epoxy in an area where the temperature is consistent. I store mine in a dark cabinet, in a room inside the house, where the temperature stays fairly constant. 7. If you have bubbles in the finish after you apply it, a lot of guys will use a heat gun or hair dryer to raise those bubble to the surface. I simply use my breath to do the same thing. Just place the bait close to your mouth - don't touch it, of course - and exhale on the finish. That's a trick that the guys who use Envirotex know and use. It works for D2T, as well. 8. Once you get a batch that cures to a cloudy finish, and you are absolutely sure that you've done everything right, it's probably time to dispose of your DT2 and get a fresh set of bottles. When stored correctly, it lasts a really long time. The problem is that you don't know how it was stored prior to your purchase. It could have sat in an unheated, freezing warehouse in the northern US during the winter, or it could have been in a hot, non-temperature controlled warehouse in Florida or Southern California. Either case would shorten the life of the epoxy. 9. Another cause of a cloudy finish can sometime be that an earlier sealing coat, or paint, wasn't completely cured before the next coat. This also happens when you start using different materials for earlier coats. You can get a chemical reaction between the various sealers and paints. If they are properly cured there is less of a chance of that occurring. 10. In reality, epoxy is a very forgiving adhesive. You can measure it incorrectly and it will still cure. You can apply in the cold or heat and it will cure. It can be old and it will cure. However, it you start violating too many of the rules, your results will vary. Eliminate the variables and your results will be fine. Regarding the number of coats of D2T, 3 would be better with foil. Coat 1 seals the bare balsa. Coat 2 goes over the foil. And, coat 3 goes over the paint. For added durability, another, 4th coat could also be applied. I always try to understand how my buyers will be using their baits. If they habitually fish a lot a rock, I will absolutely put on a 4th coat. It really doesn't add much weight to the bait, and the specific gravity of epoxy is just slightly higher than that of water, so it's fairly buoyant. But, I build baits that only run 3-feet deep anyway... 1 Quote Link to comment Share on other sites More sharing options...
barrybait Posted April 15, 2015 Report Share Posted April 15, 2015 I tried attaching foil with Solarez with the MEKP curing agent added and it turned out real nice. Then after I cleaned up all the edges, I covered the entire bait with D2T prior to painting. I like to do this because if I mess up the painting work I can clean it up and start over without damaging the foil. The D2T clouded up and ruined the foil work anyway. I think it was because the D2T reacted with the Solarez. Thanks CrazyMike for your write-up. Confirms my suspicions. I really should do a test and prove it though. Quote Link to comment Share on other sites More sharing options...
mark poulson Posted April 15, 2015 Report Share Posted April 15, 2015 I use Brite Bak foil, and the adhesive on the foil itself lets me do a tool-handle scale after it's in place. I dip three times in AC1315 for a top coat. It hides the seams really well. Quote Link to comment Share on other sites More sharing options...
CrankyMike Posted April 16, 2015 Report Share Posted April 16, 2015 Hurley, I wanted to follow up with you on your "milky" epoxy issue... There are a few, very specific things that can cause that milky look. None should have anything to do with your application technique. First, make sure you are measuring the two parts correctly. And, make sure you are getting them thoroughly mixed. If you are doing that correctly, then the milky look can occur when you have too much moisture in the air, and/or the temperature is too low. If the humidity is 60%, or higher, you risk getting a milky finish. If the temperature is too low, the chemical reaction between the two parts cannot occur correctly and you'll get either a milky finish, or maybe a finish that never hardens or only hardens in spots. Some basements are really damp and that moist air can affect your finish. Same thing if you are working out in your garage and it has been raining recently. The milky finish can be over-coated IF you sand away the spots that are not clear. I would wait about 3 days before I attempted to sand it, just to be sure it is fully cured. Better yet, if you notice that your finish is turning cloudy after it has been applied, and not yet hardened, try applying a little heat to the finish to see if you can get the moisture out. Try a hair dryer first. If that doesn't quite get it, then try a heat gun. Start with a lower heat and gradually work up to a higher temperature. You don't want too much heat because that will only accelerate the curing rate and you may trap the moisture inside the finish. And, make sure you have the lids or caps on tightly when storing your epoxy. You don't want moisture getting into the containers. Like I mentioned previously, store it in the house, in a dark, dry location. And, one final idea. If you are using acrylic paint, and you don't "heat set" it before you apply your epoxy (or wait a day for the paint to thoroughly dry), you might get a cloudy epoxy finish because the moisture from the paint is trying to escape. If you apply the epoxy before the paint is really dry you could run into trouble. 1 Quote Link to comment Share on other sites More sharing options...
Hurley Posted April 16, 2015 Author Report Share Posted April 16, 2015 I have never had any issues in using D2T up until that point. Although the baits turned out great I was still pretty disappointed. I came to the conclusion that I had a syringe go bad before I finished it. It was opened for 2-3 weeks and I figured something was up. I never really put much thought into the damp air. It could be possible. Quote Link to comment Share on other sites More sharing options...