Leaderboard


Popular Content
Showing content with the highest reputation on 04/23/2022 in all areas
-
 Hcsb Guadalupe Glide1 point
 -
Band saw for speed, scroll saw for precision. That's the simple version. Personally I've always preferred a band saw, but either will do very nicely. If you're using a scroll saw, I strongly advise using a sharp blade and swapping when it starts to dull. You'll also go through more blades if you're cutting thicker materials on a scroll saw. Lexan/polycarbonate is certainly possible to cut on a scroll saw, and so is garolite/Micarta. You can also just use tin snips to rough out your bills and then smooth the edges by hand or with a dremel. Personal preference; I usually did it this way because I had limited time available on my brother's scroll saw.1 point
-
I built a small vacuum table/box out of one of the plastic shoebox storage containers and a 1 gal shop vac. I put my small scale on top of the vac table while on and squirt/squeeze the MB's into a small cup on the scale and any excess migrant MB's are sucked into the vac. I'll also place the cup with resin on the vac table and stir in the MB's over that and it's almost eliminated any airbourne MB's. The scale on the vac table is surprisingly accurate if placed consistantly in the center.1 point
-
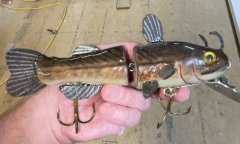
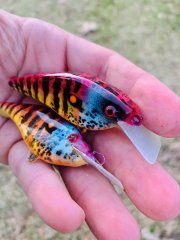
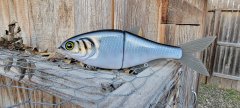
 This is based off the blackstripe topminnow, which is very common around here. Carved from basswood with fins made from paintbrush bristles. This is my first attempt at bristle fins, and also one of the first lures I've done with carved gills and pectoral fins.1 point
 -
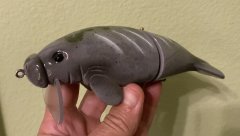
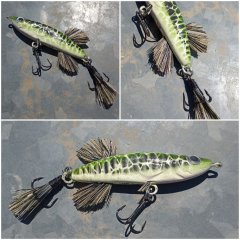
This gel is just on the outside of the bait. I think some of the additives used might be destroyed by the high heat of the plastisol.1 point
-
1 point
-
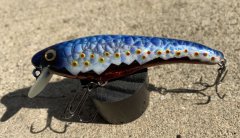
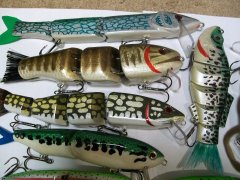 There is a rattle can rainbow trout clipped at the bottom this pic. It is also in pic 2 at the top. What I do is: 1. paint+primer flat white base coat on whole bait 2. pearl mist on belly with belly directly facing nozzle. Sometimes I skip this and keep the white bottom for stained water. 3. You can use a fine mesh here for scales if you want. Metallic silver or Shimmer Metallic silver (Krylon) with back(top) of the lure facing nozzle at slight angle so the paint hits the shoulder and fades down the sides. Give a good dry time here. 4. Use low adhesion masking tape to mark a stripe area down each side of the bait. Spray a few light passes in pink. I found a can of ‘English rose’ color that makes a good rainbow trout stripe. Here you can also do something like paint the stripe purple, keep tape on and let dry, apply mesh, and hit same are with pink so you get purple and pink in the stripe. 5. Spray the back of the bait with a green with the center of the back directly facing the nozzle. The top will get hit and fade onto the shoulder. I have used army green, camo green, dark olive, forest green. 6. Dot with black or purple Sharpie. Or hand dot with small brush. I have used small cans of Rustoleum here because I have a bunch of them. 7. Optional- you can do another light pass of the green on the back here to blend in the shoulder dots a touch. 8. Optional- hit the sides with a quick light pass of Krylon Glitter blast in gold or silver. Keep the nozzle a bit further away from the bait. Only looking for a light dusting here. I do a practice spray away from the bait to gauge the spray flow so I don’t cover the paint job in glitter. I have done a bunch of rainbow trout baits. I sometimes change the colors a bit depending on what I have and what is on sale. It is easy but there is some drying time in between steps. You can use a hair dryer to speed this up if you keep the coats light.1 point
 -
1 point