


Mags
-
Posts
229 -
Joined
-
Last visited
-
Days Won
1
Content Type
Profiles
Articles
TU Classifieds
Glossary
Website Links
Forums
Gallery
Store
Posts posted by Mags
-
-
I've heard of guys using the Do-it mold screwlock shakey head minus the hook. Screw into the head of the worm. Should work.
-
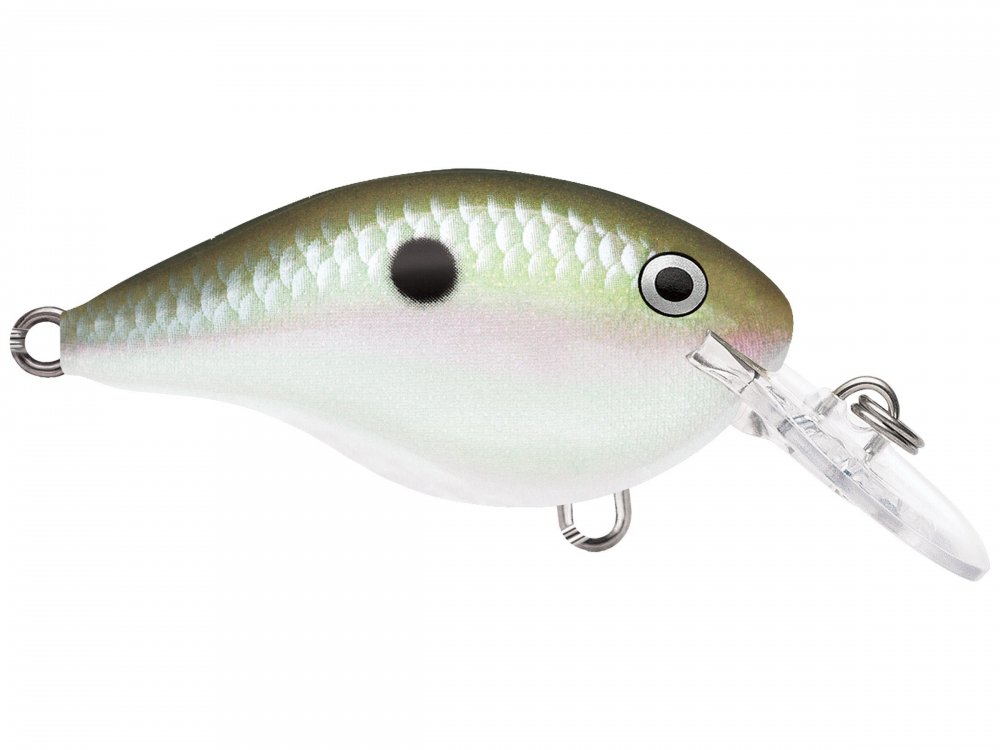
Anyone have a color (paint brand and color) they can recommend to get a green like the Rapala Green Gizzard Shad. It's a metallic green. A new Rapala color.
-
100% tin worked. 15 grams. Close enough. Thanks for all the help.
-
Check ebay. I bought some .029 wire there and bent my own forms with a little blue bender tool. Easy to do with the tool.
Just realized you wanted twisted, so that tool won't work for that. It's an R bend. I have never seen pre-made forms in this light of wire.
-
 1
1
-
-
I have some tin on the way. $25 for one pound on Amazon.
-
Yes, the vertical eye is the wire I have bent that is attached to the spinnerbait hook and blade, and the horizontal eye is a hook eye Imakatsu has in the head they run the wire through. My mold left the impression of the hook eye, but it is now lead. I have no idea where they got a hook like that, unless it is a piece of a hook with an eye they put in the mold to run the wire through. I could melt the bait and see, but I'd have to get another master. I have a friend that is a well known jig maker and he does a grass jig with a salmon hook (the best grass jig ever in my opinion) and a piece of a hook for the eye, but I've never seen exactly how he does it.
-
It is hard for me to tell what they used as far as lead hardness as the original has what I am guessing is a plated finish. Like a chrome plating. Never had any luck with a do-it-yourself chrome. I am not going to remove it, as I still want to fish this bait, and didn't when I made the mold. Gut feeling is it does seems harder than lead.
Thanks for your help. I am going to order some tin ingots and give it a try with that. I will post up a final when I get one done. I cleared the 3/4 ounce heads last night with about 50 crankbaits I had on the rack and they look pretty good. I will have to see how they swim. When right this head has a super hunting action you won't get with an original chatterbait, but as posted earlier they are super hard to find unless you want to pay $30 or more each. Right now you can't find any at a reasonable price from a reputable seller.
I have used silicone for molds in the past, but it is pretty expensive and I can't say I have had really good luck getting them to pour very well. As with many things when you don't have a mentor, or formal training, trial and error is what you have to do. I am going to try a different silicone than I have used in the past. In the past I have used Smooth On Max Mold 60. It is kind of a pain to work with and has a really obnoxious smell. I really am driven to get clean castings as well as accurate reproductions as the price for a lot of these baits is absolutely ridiculous and I like to throw baits in the nasty stuff with no fear of losing them. I also just like making one of a kind stuff, which has kept me going during the pandemic. Durhams is a cheap material, but there are limits as to what quality you can get, at least in my experience.
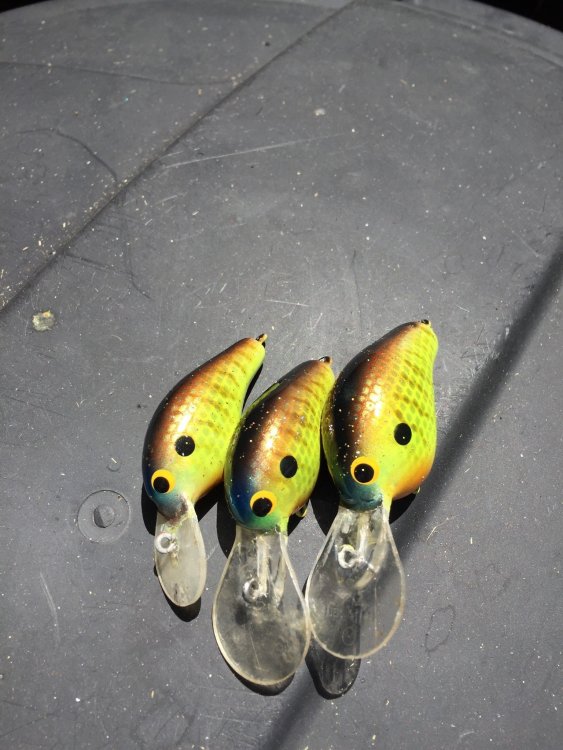
Here are a few very old Bagleys I repainted, that I had already painted 15 years ago and didn't like. Just pulled the tape from the bills. They came out pretty good. Gonna fish them this fall when the fish get back on the bank.
Off to service a transmission. Real work.
-
Wonder if I would get a more exact replica with a high temp silicone. And, use some tin mixed in with the lead.
The Japanese bait manufacturers make some interesting stuff. This is one that really works well if you can find them.
-
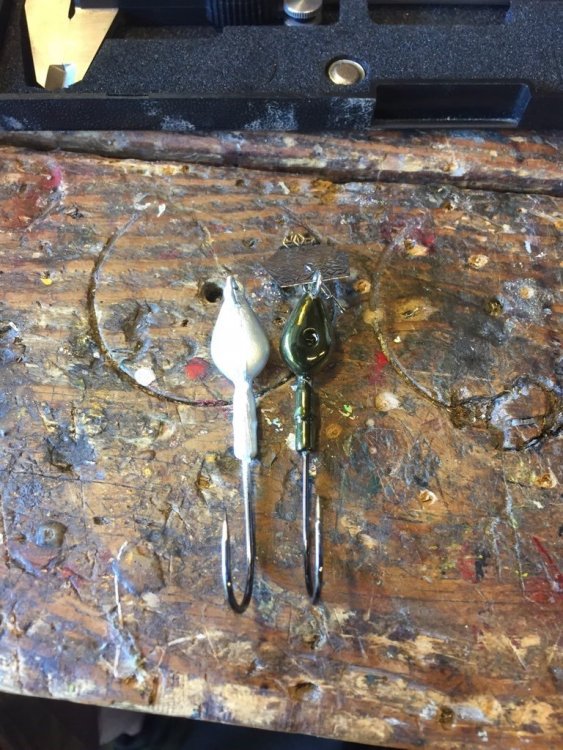
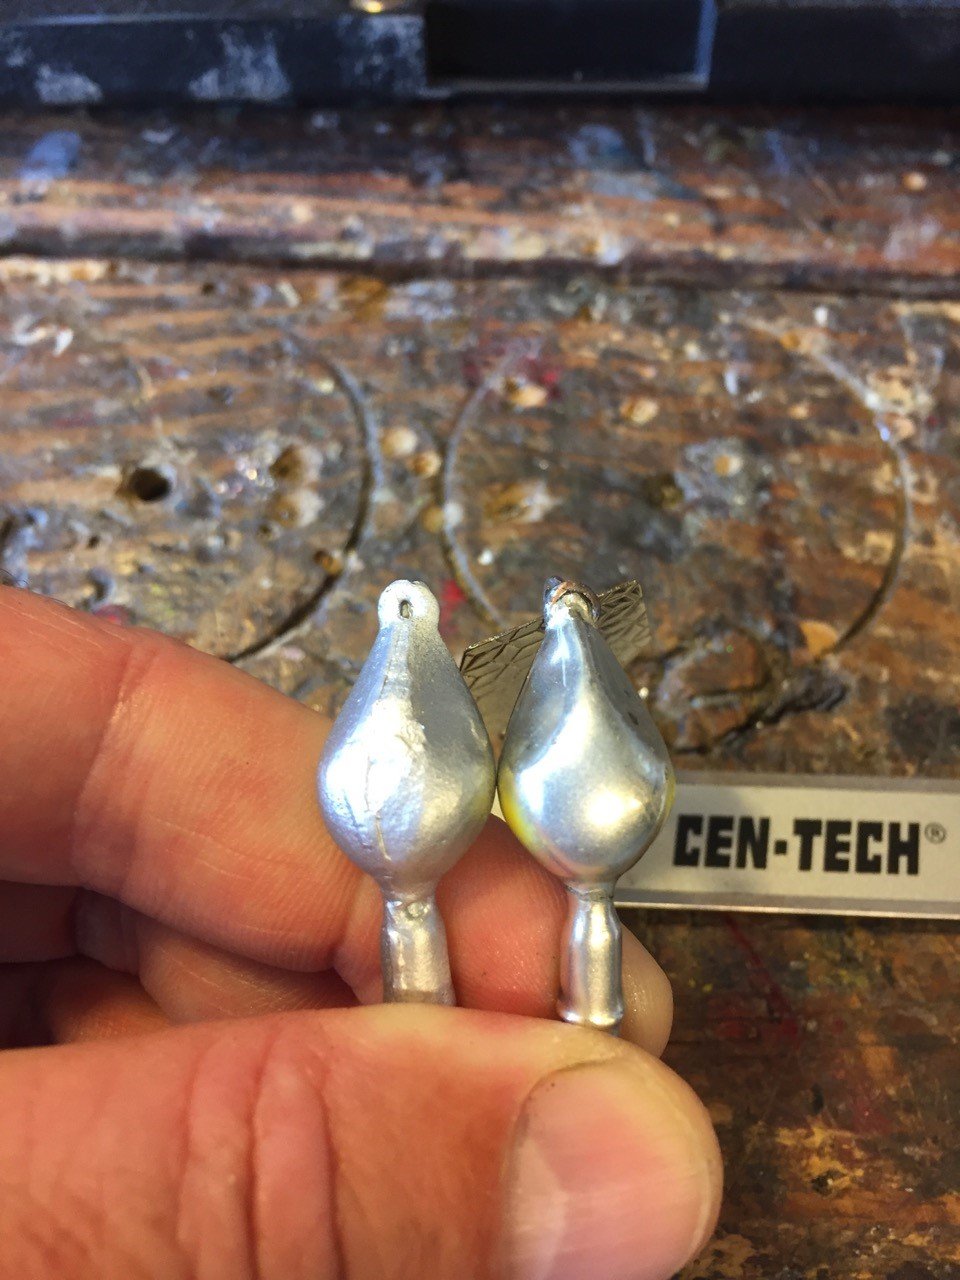
Another view from the other side of the replica (left) and original. The hole is where they must use a weedguard for another bait, as this one doesn't come with a weedguard. Also the wire for the blade on the original comes through the eye of a hook. You can see that in the photo up top. I used a 5/0 Mustad black nickel spinnerbait hook and brought the blade wire to the front through the nose. The lead filled the area where the hook eye was in the original, so it appears as if I have a hook eye in there also, but it is just lead. I have no idea if their hook comes all the way the front our how it is configured. If it does, it is a custom hook. The 5/0 Mustad is exactly the same bend as the original.
-
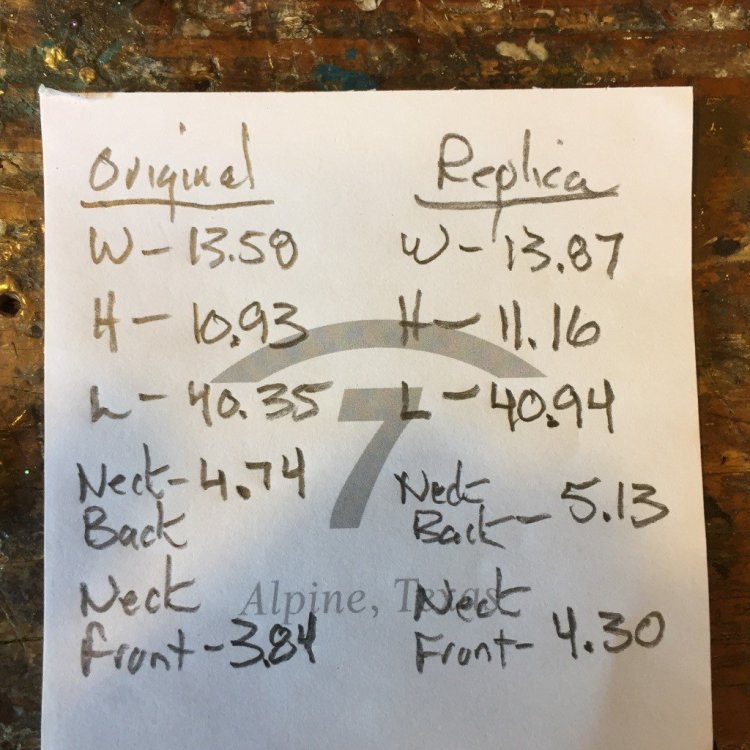
Here are the measurements in mm. The replica is definitely larger dimensionally, but I wouldn't think enough to increase the weight by 9 grams. The neck is the where the throat meets the head (where skirt is tied) and where it meets the hook.
-
I found tin for sale on ebay. I wouldn't need a lot as I am not going to be making a lot of these. Any ideas on what ratio tin to lead I should try? I have never used anything but lead.
Here is the original and replica side-by-side. There is less than 1 mm difference in height, width and length.

-
I made a Durhams Water Putty mold of an Imakatsu Mogulla Moth Monster chatterbait. These baits are hard to find and expensive, but a chatterbait that really hunts and it catches them. I haven't seen any 1/2 ounce for sale in a while. I have one in my possession, so used it as my master. The original was 13 grams (about 1/2 ounce). The mold and castings came out as good as can be expected for a water putty mold. However the replica is 22 grams (about 3/4 ounce), considerably heavier than the original. No biggie as I can use a 3/4 ounce version, but for shallow stuff a 1/2 ounce is what I would like. I expected the replica to be a little heavier, but not 1/4 ounce heavier than the original. Measuring it with a digital caliper outside height and width dimensions are close (within a few mm), but the replica is definitely bigger. I am using soft lead. A few questions for those that do spin casting or one of a kind moulding. My question is did the manufacturer use some type of other material mixed with their lead (e.g., tin), and that is why it considerably lighter, or is it just inherent that the replica will be bigger? Is this type of increase in size expected in all molding materials? Can I expect a closer dimensional reproduction with a silicon mold? Believe I heard with silicone spin cast molds one could expect a 20% increase, and the master needed to be smaller than what the replica is intended to be.
I have my doubts as to creating a really good master of this bait with sculpey, so maybe get a 1/4 ounce original to make 1/2 ounce replicas? I really enjoy molding my creations or making expensive/hard to find baits for myself and friends, but clearly I have a lot to learn to get really clean and accurate reproductions.
Can anyone please share their experience/wisdom?
-
Did this spinnerbait ever come out? I see the Hank Parker spinnerbait from Manns on Tackle Warehouse, but not sure if it is the same bladesandbaits designed bait. https://www.tacklewarehouse.com/Manns_Hank_Parker_Classic_Colorado_Indiana_Spinnerbait/descpage-MCL.html
-
-
I can't find the crimps to hold the clevis anywhere. The ones from Barlows I bought are spinnerbait spacers. They are too big for the Arig wire. I can make them work by criming one side, but it looks like .... If anyone has a source for crimps please post it.
-
Wondering the best way to do this. On the last rounded baits I made I cut these with the wood still flat with a hobby band saw thinking that this would give me an exactly square cut. Unfortunately every one was off. Played with the table alignment and still couldn't get it right. Do I have drift in the blade, misaligned blade, or what? Saw on YouTube that Stanford Lures uses a table saw and a jig to cut his lip slots (ceadr lures), but since I am using the micarta lips I would think the lip slot from this type of blade would be to wide.
-
Thanks. You are a great source of info which is much appreciated.
Mags
-
Can this hook (410-413) be sustituted? I was thinking a Mustad 91768 would work or is there another Mustad hook that could be used? I will modify the mold with a dremel. I want to put a bigger hook in the Do-It bulletnose jig for umbrella rigs.
-
I have tried both and I always clear over the foil with epoxy, paint my colors, then clear with auto clear. Without the epoxy the foil is pretty vulnerable to being nicked. I guess you could spray multiple coats of auto clear and get the same protection, but I have never done that. On my non-foiled baits I just use the auto clear.
-
Mags,
They probably didn't put them on the site yet. But they do have them as I know that for a fact. Just call them up. here are the part #s:
.020 Spring Keeper..........MSTK975-008 SCREW......... $30/1000
.024 Spring Keeper..........MSTK975-239 SCREW......... $30/1000
LARGE..........MSTK975-403 HITCH HIKER SCREW LOCK WITH CENTER PIN......... $50/1000
SMALL..........MSTK975-404 HITCH HIKER SCREW LOCK WITH CENTER PIN......... $50/1000
Thanks. That is an excellent price!
-
Excellent info. Thanks for sharing. I don't see these on the Shortys site?
-
Amen!
-
I have had trouble spraying the metal flake from Paint with Pearl with a medium tip. The flake clogs the brush. I have no problem sprying the ghost pearls, which are smaller. I am mixing the bigger flakes with Tamiya clear. It seems like the flake all sinks to the bottom and doesn't suspend and then it clogs the brush. Anyone have any tips for spraying the bigger flake?
-
I would love to see it.


Rapala Green Gizzard
in Hard Baits
Posted
Thanks for the replies.
Here is how I ended up painting it. Platinum metallic createx auto air base, Tamiya chrome silver scales using small mesh on the shoulders, Tamiya olive green hard on the back and fading into the Tamiya silver, Createx Wicked fastback green lightly sprayed over the Tamiya on the back and light on the green fade for the metallic. Used Tamiya clear yellow on the chest, bringing it up a little onto the sides. It looks good enough and will be a nice finesse color. Easy to paint. Close to a foiled bait I use already, but I don't have to foil. Probably add a little silver holo flake in the clear.
When I get them cleared I'll post a few pics. Probably next week.