

Travis
-
Posts
1,763 -
Joined
-
Last visited
-
Days Won
90
Content Type
Profiles
Articles
TU Classifieds
Glossary
Website Links
Forums
Gallery
Store
Everything posted by Travis
-
I always preferred polyurethane foams over resins and micro balloons. Typically 16 lb density but did do quite a few baits with lower density material.
-
Looking pretty good. I haven't printed any additional lures but been designing odds and ends. Sure gets easier the more you mess with the software but still find myself watching a videos too often.
-
Not sure who makes them but I think you are failing to appreciate the shear volume of product Wal Mart and similar stores move. Not many companies that aren't going to cut a deal to get that contract as simply they will never see those sells through mom and pop stores. Even large companies will meet the price to get into the stores (becoming less important however).
-
Forgot to put index features in the first half of a mold
Travis replied to aulrich's topic in Hard Baits
Never really had issues with lego method either... except for different application. You can take an aluminum mold for soft plastic bait and build your lego wall around the mold and leave around 1/4 to 1/2 inch gap. Heat hot plastic and pour over to make a soft plastic mold of the aluminum mold. You can then pour plaster of paris or Durhams into the soft plastic mold and make a copy of the aluminum mold. I have had hot plastic leak through the lego mold box twice over the years. -
Forgot to put index features in the first half of a mold
Travis replied to aulrich's topic in Hard Baits
What is the mold made of? POP, Durhams, etc... you can carefully drill rounded indentions into the perimeter face. Nothing vertical just create 1/2 circles and the mold halves will easily mate without issues. Often a mold will register with no alignment pens depending on how you make them. If RTV I would make the equivalent of a cork borer. Take a piece of hollow metal tubing and place in your drill press. Take a file and ease the edge to sharpen it. Then you can carefully remove a circular plug from the mold and insert pins. Can also just cut wedges from the perimeter of the finished half and then mold the second half. -
How much do you have? You may be essentially burning money depending on the piece if you are making lures. I would advise against cutting it until you know what you have.
-
Once you loosen the knob should be able to push the drop foot down to the table if needed. If it isn't raising and lowering it is frozen in place and you need to free it. Should be no need to add a 3/4 pine table to it. Don't bend the fingers... use larger pieces of wood or make a few waste blocks and use double sided sticky tape.
-
https://manualsbrain.com/en/manuals/1249775/?page=9 Drop foot lock knob. Should easily unscrew slid the drop foot to the table and the lock in place. Could be frozen if sat for a long time and need a little penetrating oil then knock any rush off.
-
I would be surprised it can't be adjusted. What model scroll saw? I would not glue anything across the gap.
-
Completely useful.. as very clear what was being described. Just adding what I believe is the correct term for future use. I had to replace mine once and had to looked it up as I was calling it a "foot".
-
As mentioned tighten position the drop foot (two finger metal thing) onto the wood to help hold it down. You should also make sure and have the proper tension on the blade and have to don't feed to fast. If everything set properly it doesn't take force to push the wood or hold it down. Any time "force" is used STOP this is how wood workers get into trouble on bandsaws, table saws, etc... I don't scroll saw much but I always find to to be just gently guiding the piece into the blade, it just flows.
-
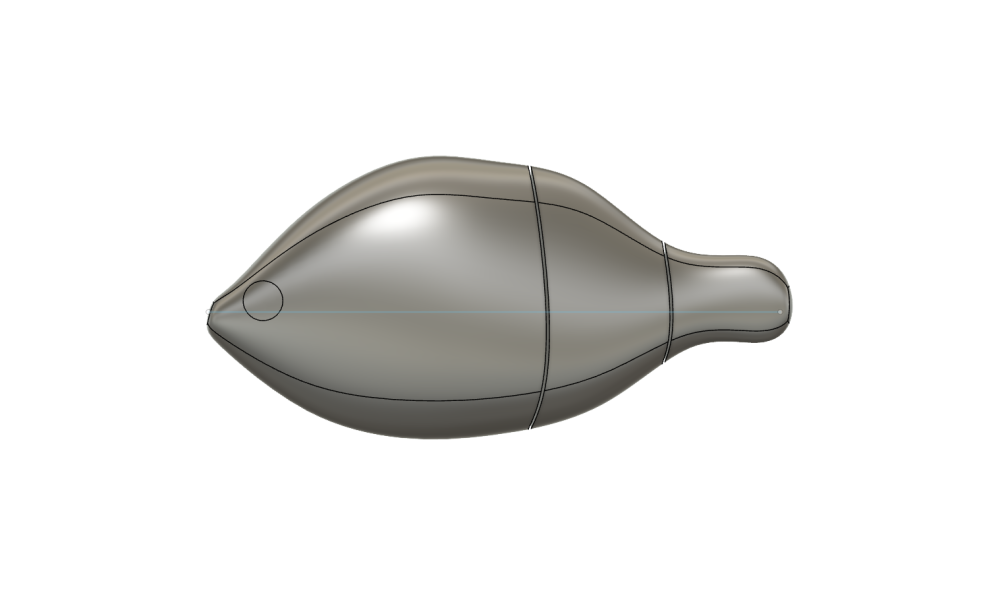
Few years ago I designed a few items for my workshop and other hobbies and used lofting but very basic things for the workshop and other hobbies. It was ridiculously slow as would search for video and watch to see what task I was wanting to accomplish. Most videos I can't stand to watch based on their delivery. I have been using the image with pipes method also as easy to get a lure shape but as you mentioned leaves a lot to be desired. The small bluegill swimbait to move forward with. I have printed it and will print a few more derivations to mess with then go ahead and mold. Mainly need to look at the joint and segment length. I have one with simple extruded details also that I can just correct with bondo to get the smooth contours where applicable. That said much more enjoyable for me to just carve a bait.
-
I wished there was a legit book for it use. Instead stuck piecing together You tube videos on various subjects and trial and error.
-
Will you mold these eventually or just print lures to fish? I have been messing around with a few designs but need to find out more about the stupid software. Things I want to do I can't.
-
Definitely can use scroll saw to make lures just don't think the pin or pin less blade set up is all that critical in many decisions. Use whatever one is comfortable with. I like scroll saws and bought my first one 20 plus years ago and have used some high dollar ones (grandfather was big into fretwork) and with how I process blanks they don't compare to a bandsaw. Pin or pin less. I will often start with a basswood timber. I will rip it to the desired stock thickness on my table saw then trace out the lure patterns on the boards. I am not concerned with a smooth finish or accuracy. I just need to get close to the line. I will cut out dozens of blanks then go over to the sander and quickly touch up the blank. I can knock out a lot more blanks on the bandsaw and then sand on the oscillating belt sander compared to doing the same with my scroll saw (pin less).
-
Well to be fair a little practice will make quick work of cutting out blanks with hand tools. I have a 12" bow saw I made from the Gramercy tool kit and a Knew Concepts Coping saw and can quickly and accurately cut out with either. Now that said I will walk over to one of the bandsaws in my shop ever single time to cut out cranks.
-
I follow the typical routine described in most fish carving books as pretty standard in the few books I have. One doesn't have to go crazy but a Bob Berry book about all one would need. I have several others and James Fliger's details how to do pencil scales pretty good. I think if I were to really add scales often then would burn them most likely. Ed Walicki's site was the one I used to look at buying stuff from but available various places.
-
Scroll saw will be fine to use, especially at your price point. I use mine mainly for Christmas ornaments and little figurines. A #5 to 7 blade is likely going to fit your bill (14-12 tooth). As pointed out can be slow but not frustratingly slow.
-
Keep it simple... mix and apply no real need to thin. Acetone, lacquer thinner, then IPA are the typical recommendations for thinning product. I have used them all at one time or another but prefer acetone (evaporates readily). About the only time I thin is to seal plaster of paris lure molds. I don't thin for top coat applications. Many organic solvents will work. Denatured can be all over the place with composition. Most big box stuff will be a mixture of 30-60% ethanol then 30-60% methanol (weight percent). Klean strip is usually 60 % MeOH. It can also have methyl isobutyl ketone, acetone, isopropyl alcohol, ethyl acetate, acetic acid, heptane, ....... and is often the reason why guys see different issues at times.
-
That is how I would approach it. Just a good solid topcoat.
-
I find thicker coats more prone to chipping and cracking. Epoxies are hit and miss with yellowing. I have baits 15 years that got stashed indoors in my fishing cabinet and never used that have yellowed and then others that are just fine.
-
I am not a big fan of thicker epoxy coats. With a balsa bait I would be more inclined to just seal the bait with superglue then paint and topcoat as usual. I never will complain about having to remake lures because of catching fish. Lures aren't meant to last forever.
-
No need to thin... mix slow and well to reduce introduction of air bubbles. Typically you have 8 to 12 minutes working time. If doing a large lure I may thin but just dropwise until I get the consistency I want. I mix once a consistent product is observed and get a flowing decreased viscosity product, for me probably about 45 seconds. I typically coat 2 to 3 bass lures at a time. I have always found epoxy to be rather forgiving and as long as you are close enough, no issues with cure. BSI claims you have about 10% error in ratio and see no issues and to avoid excess hardener as increases brittleness and decreases strength. Prewarm bottles to get a better mix.. quick zap in the microwave 10 seconds or so. Ideally room temperatures should be at > 70 °F.
-
Small Topwaters: Weight, Body Shape, Line Tie, Oh My!
Travis replied to RiverSmallieGuy's topic in Hard Baits
You just need to take your design and make a half/dozen of them and weight differently. The more weight you get in the back the less glide you get. I like to get the weight as far back and as low as possible for zippy action for creek smallies. The bigger the water the more likely I am to use a wider/slower walking bait and start to shift the weight to the belly. In many of the smallie creeks I am fishing the fish are naturally stacked up in the "deeper" water after riffles. They aren't shy about getting to a lure as they are just trying to out compete the others in the pool. No need to give them a look at the bait. The classic wooden sammie style is still hard to beat in my opinion (might want to search blackjack, wooden sammie). -
Small Topwaters: Weight, Body Shape, Line Tie, Oh My!
Travis replied to RiverSmallieGuy's topic in Hard Baits
I like to use balsa and weight the tail heavily. Near vertical presentation. They will cast a long way and don't travel much when working the bait. Caught 1000's of smallies in the local creek on them. During college caught a lot of gar on a 7 ft ultralight set up. Used nylon rope lures that the frayed portion tangled in the gar's teeth and targeted them in the pools in a shallow river near the campus.


