sdsaw
-
Posts
206 -
Joined
-
Last visited
Content Type
Profiles
Articles
TU Classifieds
Glossary
Website Links
Forums
Gallery
Store
Everything posted by sdsaw
-
Just a thought. Maybe you can find a hook that you can cut to use the eye and bend the cut end so it holds in the lead?
-
Thank you cadman. Good hearing from you! I did this earlier this year and since have seen several post with this issue. Most of the replies would say that harder lead is required, powder coat to make it tighter or super glue it. To me, the problem is obvious what is wrong with the smaller sizes of this mold. Maybe do-it will see this and change the base area of their future molds
-
I see this issue come up often. I have this mold and the first time pouring the 1/16 oz. I saw that there are issues with the hook being loose on some of the jig heads that I was pouring. It appears that on the 2 smallest sizes, there is not enough lead surrounding the hook shank just past the bend of the hook So, the hook will sometimes rotate in the head due to the lack of support What I did was create a short collar at the base of the head to help keep the hook from rocking back and forth. I used a ball endmill, and made this mod in a mill, but this should be able to be accomplished with a dremel and the proper bit. With this mod. there is adequate material to support the hook where it exists the back of the head to keep it from rocking side to side The ball diameter is 1/8" and it sticks up 1/16" The z-man material is so soft that pushing the bait tight against the head is not a problem I hope this helps some of you.
-
Thank you Jeff Hahn! These pictures are a big help!
-
Oh, I'll be able to add some kind of block or nipple under the lid (machinist) Thinking it will be bolted to the bottom of the pocket in between the two element holes that will be added to allow the element to pass through from the bottom since they used to pass through the top front. Did the nipple clamp/support the ends of the element?
-
Has/does anybody used this type of silicone (single part out of a tube) successfully in making a lead pouring mold? The silicone that I thought was used is 2 part.
-
Jeff Hahn, I can add a post to my Hot Pot ... But I need to know how to attach the cord and element together. An insulator board? I know that it will need to able to stand up to high temps. Can you post a pic with the cover off and showing the connection?
-
Awesome looking! Thanks for the reply
-
Sorry! lol I too had gone through 2 or 3 elements on my original Hot Pot which I still have. I was asking about the conversion to save a few $ Purchasing a Hot Pot 2 is a little more than just an element, but not that much more. Thank you for the reply and happy pouring!
- 11 replies
-
- 1
-

-
- hot pot
- heating element
- (and 3 more)
-
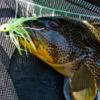
Good looking colors for Rockfish(cod for the west coast) and Lings. If those are powder coated, where did you get the metallic purple and orange from?
-
Has anyone converted their original Hot Pot (heating coil in with the lead) to the replacement Hot Pot II heating coil which is mounted to the bottom of the cast iron pot? I am capable of adding new holes to the cast iron pot if needed. Also wondering how the ring that surrounds the bottom coil is attached? Here are some pictures for measurement comparison.
-
Very nice rigging! Can you add a skirt to those heads?
-
Saw this video recently. Very interesting and easy to do. What do you think of it? Would this work with a swimbait or grub?
-
Nice job! I'm curious if the the video was stabilized by youtube during the upload I see the date stamp jumping all around but the video images are pretty stable I've uploaded to youtube and they have offered to stabilize the shaky parts but I have declined Thanks!
-
If you don't mind me asking, what is this blue and white putty you speak of? Does it stand up to the high temperatures of molten lead? Dries rock hard? I'm envisioning an epoxy stick that you slice a piece off and knead it to mix the two layers
-
Thank you Apdriver I do appreciate the info and willingness to help one another here I've learned a lot from visiting and reading all the questions and answers given.
-
Thanks Mike. Glad to hear that it is working good for you! This mod could work out for making those "ned rig" heads to mold them without the collars and maybe a wire keeper. The product that I used is "Permatex High-Temp Red RTV Silicone Gasket" Widely availible at most auto parts stores
-
The next day, I carefully removed the dummy heads, used them on the other half and filled the other side of the mold and allowed that side to completely dry. Making sure that the silicone has reached full hardness, you will need a sharp razor blade (new is good) to trim the silicone flush. That's about it! You're ready to start using your mold
-
I recently did this reversible mold modification and thought that it may be of use to others. I used high temp. silicone to create a dam so the lead would not fill the collar area of a Do-it Poison tail mold. I also filed in a groove on either side of the hook shank to allow a straight piece of stainless wire to lay when the mold is closed Later, after the head is molded, the wire will be bent to create a hook keeper On this mold, the first step was to create the channels next to the hook shank for the wire to lay when the mold is closed. I used a round, fine tooth file. The diameter of the portion of the file was approx. 3/16" (tapered file) Carefully remove the corners but do not deepen the shank channel (see pic below) I actually needed the aid of an magnifying glass to see what I was doing. You get a good view of the wire channel next to the hook shank in this pic I then poured some dummy heads, minus the hooks. I cut and filed the collar off, but left the sprue on to act as a handle to remove the head. I degreased the mold collar area with solvent to assure good adhesion of the silicone I then used petroleum jelly on the dummy head to prevent the silicone from sticking to it and set them in the mold I overfilled the collar area on half the mold and let it dry overnight
-
I wasn't aware of the "Ned Rig" at the time, but now I know what you are using this modified mold for I've been experimenting with a single strand of .024 nylon weedguard and also 30-50lb. fluorocarbon as weedguard material and it seems to do it's job at a local city park lake. I'm gluing them in a 1/16oz ball head that I too have cut the collar off and supergluing it on half of a z-man senko I'm going to have to give the Ned Rig a try in my local saltwater bays and harbors. We have a natural worm that's called an Innkeeper Worm that the Ned Rig resembles perfectly This is the twisted, stiffer wire Painter1 is referring to
-
^^^^^^^^^^^^^^^^^^^^^^ Yep, this is what I would try High temp red silicone around the eye cavity Degrease the surface to help with proper adhesion
-
This one looks like a match as far as the shape http://www.barlowstackle.com/Do-It-Tapered-Tube-Skirt-Jig-Molds-P209.aspx
-
houla, Sorry for the delayed reply The cast aluminum molds actually weld nicely without warping I relocated the hook eye to the tip and added in a weedguard slot in this "style 9" shad head I had the original hook eye channel welded up so I could add the weedguard slot in that area I've also used high temp RTV silicone with good results to fill slots to keep the lead from flowing into them as seen in this mold: I don't know about using a dremel to create a new hook channel. I've seen some attempts and it doesn't seem to go well. You might be better off to drill a shallow hole in the correct spot for the hook eye, then filling it with high temp RTV then let the hook eye compress the RTV when you close the mold As far as Fish Trap swimbaits, I don't see them in the stores anymore Barry Brightenberg was the owner. He's a fishing guide now. You can try to contact him: http://www.alwaysanadventurecharters.com/Welcome.html Alternative baits would be: Big Hammer, MC Swim Baits, Bass Trix, Pearl Swim Baits and Warbaits come to mind
-
You can fill the existing weed guard channel with high temp RTV silicone (overfill, then trim with a sharp razor blade after it cures. Lay the wire on the silicone and close the mold. The silicone will compress and pinch the wires. Silicone is easily removed when you want to switch back
-
If you have the Do-it Shad Head Jig-SHB-2-43 on order, it looks like it may be a close match. Relocating the hook eye back might help with matching the balance of your original jig head. I'm guessing that your original head is not made with a Owner hook because the large Owner jig hooks that I've seen have the "cutting point" tips. More than likely, it's poured with a Mustad BLN hook. If you need help relocating the hook eye, I might be able to help you modify your mold