


aulrich
-
Posts
530 -
Joined
-
Last visited
-
Days Won
11
Content Type
Profiles
Articles
TU Classifieds
Glossary
Website Links
Forums
Gallery
Store
Everything posted by aulrich
-
Need an accurate RC 1.5 and maybe a 2.5 stl
aulrich replied to Mad Moose Baits's topic in Hard Baits
No I have not bought anything yet for the scanning, building my cnc(just about done) has given me a bit of a bug for electro mechanical tom foolery. Yes Fusion, but there are other options. For now I 3d print my lures, I had not thought of CNC'ing lures a whole lot. That said A rotary Y axis has been stewing in the back burner of my mind, I can swap out the router for a laser module and etching mugs and stuff is on my kids etsy radar. But that is a future thing right now I have built my cnc as short as possible since the goal is to cut aluminum molds for soft plastics. Just typing this reply out it comes to mind I could just cut out lure halves. Get a nice flat piece of something cut the exterior shape out leaving it in the plank with tabs. flip the whole plank and cut the internals. -
Need an accurate RC 1.5 and maybe a 2.5 stl
aulrich replied to Mad Moose Baits's topic in Hard Baits
Some of the new phones have 3d scanning function(anything with facial recognition) or something like photo grammy (A collection of photos processed into a stl. 3d scanning standard lure bodies and making 3d printed stencils has been on my radar for a while but the price of entry is pretty steep and the market for product pretty small. A while back I did run into an Arduino based scanning system, but at this point I am in the middle of a CNC router build so making this has been pushed to the maybe someday list. Sort of depends if the CNC router build works out. if I can actually make stepper motors work then maybe I swing buy this project again. this is the scanner project link https://en.openscan.eu/openscan-classic -
I worry a little less about lead while pouring, (I do do the basic well ventilated and a fan), then if I have to file or saw the lead vapors go away lead dust will stay on your work bench and other places so you can pick it up months later. if I am stuck filing i do it right over the lead pot or at least over a paper to capture the bits. For the most part I avoid the issue by using pre-made shapes lead shot either bird shot or buckshot
-
That Ukranian mold company mold material (Baitmold.com)
aulrich replied to aulrich's topic in Soft Plastics
Thanks for the name, as it turns out there is local suppliers and I might be able to hit up cabinet guys for cutoffs. Got the steel yesterday, I have something like 200 hours of printing ahead of me so first step is to really dial in the printer so it has the best dimensional accuracy I know I am reasonably close so this is just due diligence. -
So my DIY bug is needing a scratch and I am planning on making a simple CNC router. So obviously mold making must be tried. In theory it should be able to mill aluminum but if I could figure out what material that bait molt are using and how to source it it would probably be easier to machine. Any ideas? my initial guess is some sort of countertop material but that is only a guess. and just for the curious this is the CNC build https://docs.v1e.com/mpcnc/intro/
-
One other thing to consider is the line tie position, I have increased action by dropping the line tie. I tend to start at the centerline but it seems to end up under the center line
-
I am a pretty unimaganative painter, probably has to do with primarily fishing for pike. It's scarry how fast they can ruin a lure. So I have a standard set of colors ranging from "natural" to loud Perch Blue/Perl Silver/white (Moving towards Silver Foil) Pike Rainbow Trout (sometimes) Walleye Green/Gold/white (sometimes depending on the lure) Flo Purple/Pearl Gold/ Flo Orange (Moving towards Gold Foil) Fire tiger Flo Green/ Flo Yellow/ Flo Orange - Black stripes Tiger Tiger Black/Flow Orange/white - black stripes (Sometimes) Pink Lady Flo Purple/Flo Pink/White - black stripes (Sometimes) I 3d print most of my lure now so anything that is a pattern is painted with a stencil
-
This just hit my Youtube feed a company that will do custom metal 3d printing. just thought I would post it here so folks know what is possible.
-
I use CA glue on my 3d printed lures as well, it buys me a couple of things, FDM prints are not water tight, it hides most of the layer lines and it make the plastic easier to sand. I think it also affects the temp where it the lure should warp, but I think the top coat of epoxy plays a part too.
-
Just came back from the swim test. it worked like a charm, the action went a bit down the tail, but I can work it much faster without blowing out. The top line tie was a bit of a gamble I was hoping it would work for ice fishing giving a horizontal presentation and a quick test off the dock I got pretty much what I wanted I suspect it will kick butt through the ice. just need a real field test to see if I have heavy enough eye hardware good thing I have a trip coming up
-
The down side is the short duty cycle, according to the internet somewhere around 25 castings, but for personal use and prototyping that is OK. I was really please that I did not damage the mold master I can always print another but it's nice to get more than one use out of parts.
-
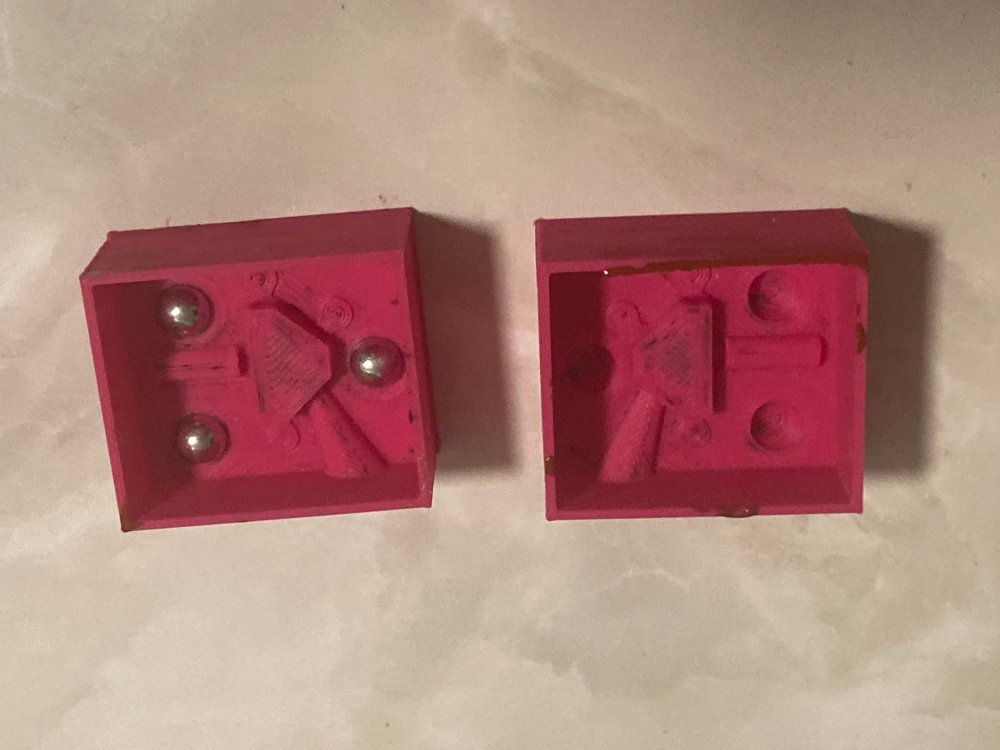
No, the 3d printed part is the mold for the mold. The lead is poured into Smooth-ON Mold Max 60. Mind you you could possibly do pewter in some resin 3d prints, one resin I have can handle 400f. think of the printed part as a split master and mold box in one
-
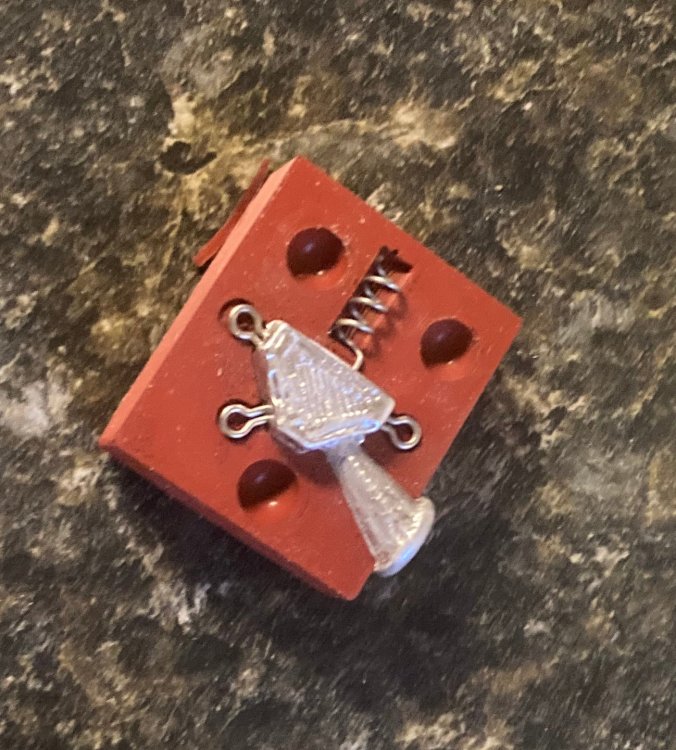
Got my first casting of the prototype and it seems to have worked, I do need to test. Just a hair over 1/4oz looking to also have 3/8 and 1/2. The bait is a 6" do-it shad it's serous pike candy. The bottom picture is the mold of the mold.
-
For proto typing my swimbait head this is the process I am using. In the video he uses a resin printer, I just used my cheaper FDM
-
I was thinking that should work, I was thinking about using aluminum shavings myself
-
Hillbilly at some point I will need to get your CNC contact from you. Do you do your own CAD work or does your CNC contact do it. I need to start learning designing with standard machining in mind I can get away with different things 3d printing. For my proto typing I print a mold of a mold. Buy high temp silicon has a very limited lifetime (20 castings ish according to the internet) When I finalize the shape I will want a proper mold so I need to start out with the ultimate end goal in mind
-
Those look interesting Thanks
-
Even though I have a plan I would be interested if you could post a link to those molds if you could. The plan at this point I will be 3d printing a mold of a mold and use smooth-on mold-max 60 which can handle the heat (at least for a while). Once I have the shapes and sizes finalized I'll eat the CNC cost
-
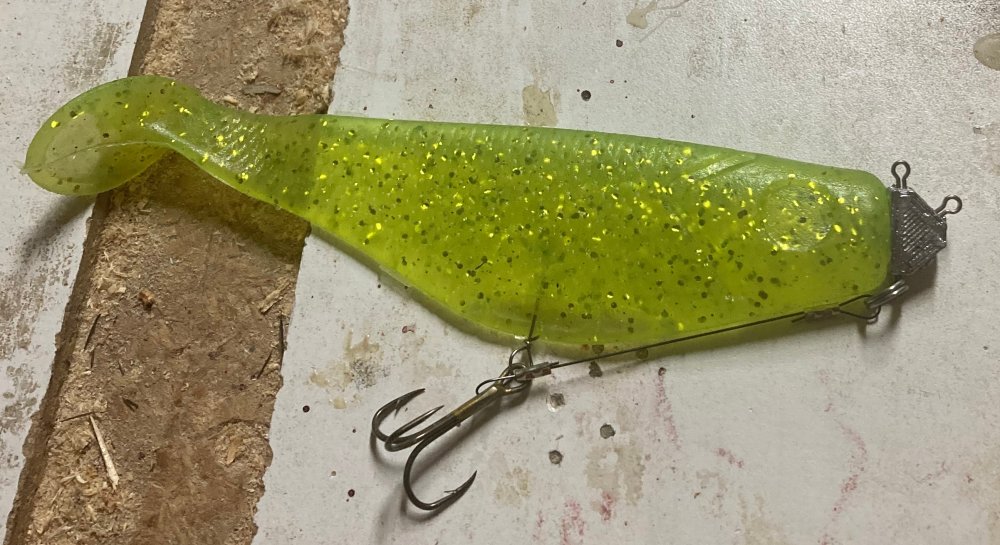
This is the rig as of now the bait is a 6" shad. off of the football head I have the snaploc and a titanium stinger hook held in position by a spike. We have been using this for a number of years now and in general works like a charm. After the pike hits it the spike pulls out and you fight the fish with the wire and not the bait so that makes the baits last way longer. The bait will eventually get too chewed up but the record is well over 20 fish on one body. And that is something when we have had storm wildeye pike destroyed by one bite Here is the digital bar napkin drawing of my improved idea. the circles represent sinker eye inserts The improvements I am looking for. Hopefully the fixed screw lock fixes two issues. 1. Reduce the hook catching the line in a head wind there is plenty of slop so I am guessing fixing that joint should reduce the hook catching the line but not really effect the lure action 2. Removing the slop will also stop the baits tendency to swim sideways at higher speed. there is that time in early summer (a week or 2 either side of July 1)when old timers would say the pike have "lost their teeth" so they are not eating as much. But I think it's the time of year when the cabbage is short and the pike get a long time to look at a bait. A fast moving bait just above the weeds can be very effective that time of year. The top line tie is for ice fishing


-
I trying to build a bit of a side hustle so I would rather use pre-fab parts, the do-it ones are ok. What I mean by OK is that I have only lost one bait to the screw pulling out of the bait body . I was hoping to find a slightly bigger diameter screw, but I can continue with the do-it screws. At .09$cad per its hard to justify home made.
-
Thanks, I should have been more clear. I am looking for a screw lock that can be worked into a casting. I am designing a lead head for an external wire swimbait rig. At this point I am using the do-it clip screw lock on a football head and there is a bit too much movement and the rig has a tendency to hook itself.
-
I am guessing you mean something like this? https://www.amazon.ca/Automatic-Stirrer-Portable-Stainless-Eggbeater/dp/B0BMYNK9CN/ref=sr_1_17?crid=24KBKL1JG2SDT&keywords=automatic+pot+stirrer&qid=1692628074&sprefix=automatic+pot+stirrer%2Caps%2C134&sr=8-17 I can work with that.
-
No volcanos are not normal with most powders at least with the right amount of flow, adjusted properly it just fluffs up. I gave up on Princess Auto (Canada's HF) pretty much right out of the gate. One thing that just came to mind is, has somebody found a better bottom membrane IIRC my DIY fluid bed used printer paper the last time I did a batch of jigs was 4-5 years ago. Has there been any improvement in the las few years. One thing that has come to mind is shop vac filter bag? The airbrush compressor idea was I am not sure if I just need more flow or more psi or both. I know with good powders things work better. I had expected better from the brand, the white does work. There was a different chrome maybe I could do a quick exchange. With luck I do find my old stash of powders there was a chrome in there that actually worked there is a down side to doing 5 years of jigs at one time, stuff just wanders off.
-
At this point I am using the standard aquarium pump diy fluid bed. But some powders mostly automotive don't fluidize. The other day I got two eastwood powders white and chrome the white behaved like normal, but the chrome would just not move a bit of volcano'ing but that is it. I was thinking about replacing the aquarium pump with and airbrush compressor. Would that work? Another option is to do a mechanical fluidizer like Engineered angler has built with a palm sander.
-
Smooth-on Mold-max 60 is what I will be using for proto typing a swimbait head. As I understand it you should get at least 25 casts out of it. I'll know more in a month or so once I actually do it and not just what I see on youtube.


