JRammit
-
Posts
1,809 -
Joined
-
Last visited
-
Days Won
25
Content Type
Profiles
Articles
TU Classifieds
Glossary
Website Links
Forums
Gallery
Store
Everything posted by JRammit
-
Finally got to the real world test.... good thing i took the time to make a second diver modeled off the first one, because i lost the first one right off the bat... pretty sure i trolled over a barbed wire fence, i didnt think it ran out that far from shore, but i snagged the hell out of somthin If it was the fence, it would have been about 4' tall, water was 27' deep and i had 100' of line out, so thats roughly 20' deep which correlates with almost losing the second one in 21' of water Kinda frustrating that the only way to test the depth is to run it until it drags bottom, especially since this thing seems to dig into the bottom.... so thats another design aspect to think about, something that can drag bottom without getting stuck So... it worked... but its not ideal
-
For smaller/thinner swim baits i use twisted wire eyes and spinnerbait wire for the pin... For normal sized jointed baits i use screw eyes and a bicycle spoke for the pin
-
No prob... definitely easier to see in a picture than to explain in words The hard part tho, for me, is cutting the hinge slots once you have your pieces separated... i came up with an idea for that, but havnt tried it yet.... cool thing about PVC is it melts, so next time im gonna try heating up a nail or a piece of wire and melting the slots instead of cutting them
-
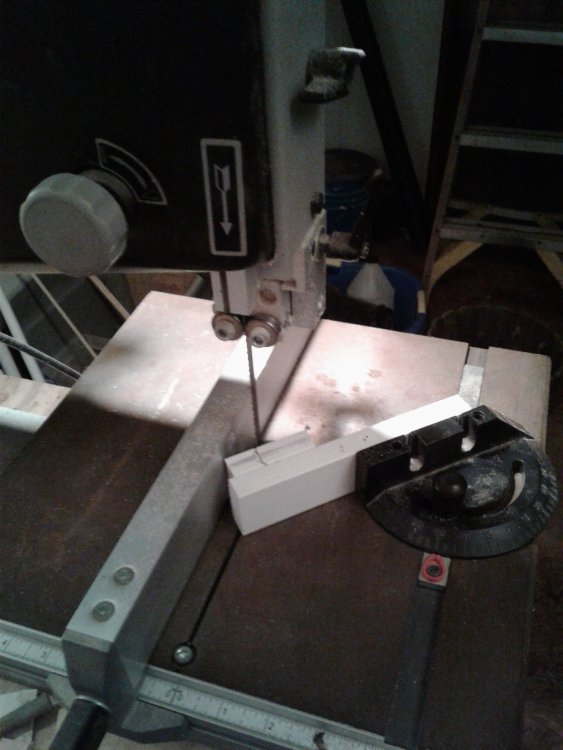
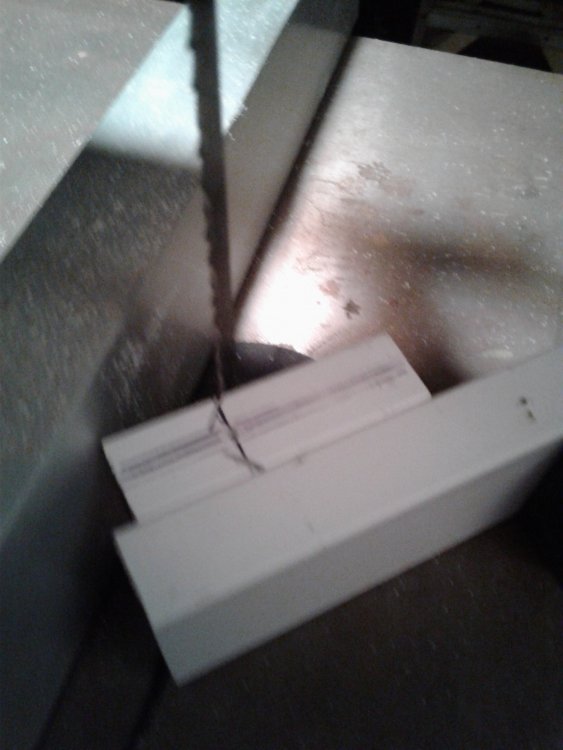
Heres the basic idea... just set your fence up at the length you want to cut your joint and set your (idk what its called, angle guide) at 45 degrees... then cut without cutting all the way thru, then flip the block over without moving the fence and cut again....... then drill your pin hole.... then cut out your shape and do all your carving
-
I will as soon as i can get back in the shop... its our busy season at work (i haul propane) and these 14 hour days dont leave alot of time between work and sleep
-
Oh, and its also easier to drill the pin holes in the block before cutting... youll need an acurate center line around the block to line up the tru hole on each side.... heres an easy way to mark the center of any flat piece of material
-
Easiest way for me was to partially cut the joint before ever cutting out the lure shape.. in other words, cut a 45 degree angle part way thru each side of a block, then cut out your shape and do all your carving.. when youre finished carving, go back and finish the cuts A band saw makes this alot easier since you can use the fence to line up the cuts perfectly on each side... and a little trick i found to finish the cuts without destroying the lure (or cutting off a finger), open up the door to the top blade wheel and turn it by hand
-
 Not sure, never used wake baits before, just decided i wanted one... the jointed tail definitely gives it a lively/wide action, and i figure if fish are active enough to hit top water then theres no reason to go for subtle action
 -
 Thanks.. it wasnt as difficult as i thought it would be.. the key is getting the line tie location right.. i made 4 indentions to try different line tie locations, but the first one i tried worked great, so i didnt even have to drill any holes to fill later
 -
3D scanning?... probably not... ive seen a few guys here use 3D printing to make molds, but usually of their own design.... maybe youll be the first, then some time in the future when someone asks about it again you can chime in
-
Thats a good idea.... wish i woulda thought of that before i wrote down the weights and sizes in that space
-
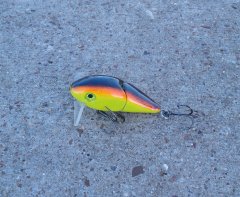
2" PVC body... 1/8 oz split shot pressed into the eye hole... rattle chamber made by drilling a recess with a brad point bit, then drilling thru with a smaller bit, then putting a Daisy bb inside and capping each side with a cut up beer can...... finish is foil under epoxy, then spray paint blue/black back with white belly and more epoxy for top coat
-
This has been on my to do list for a long time, finally got around to it and figured id share Until now ive just used split shot sinkers as ballast weights, theyre surprisingly consistent in weight (down to a few hundredths of a gram), but got tired of my ballast and hook hangers fighting for hardware space Here i was trying to make 2 cavities each of the sizes i use the most, 1/16 oz and 1/8 oz... i got as close as i could using drill bits of the same diameter and the actual split shots themselves to set the stop nut on the drill press... i was off by a couple tenths of a gram on each size, but ill take it The picture is pretty self explanatory... super glued a few nails with points cut off for keys, then started each hole with a brad point bit and finished the depth with standard bits (using split shots for measurement as mentioned).. hook hanger eye inserts drilled out with 5/32" brad point

-
My only idea is build what you want, then youre not limited to what you can find... plus its 100x more satisfying to catch fish on a lure you made with your own hands
-
Havnt done this personally, but agree with Jig Man... the silicone mold is a "negative", use some type of resin to pour a "positive" then you can copy it to infinity with more silicone and make infinity "negative" molds from the resin master Fiberglass resin without the fiber seems to me would be fine for the job... or one better, an Alumalite or comparable brand hard plastic resin would be less messy to work with and less likely to stick to the original mold
-
Post your pics of your work station and/or man cave
JRammit replied to Socal399's topic in Soft Plastics
Your bench looks shiny, i like it... what did you coat it with? -
Post your pics of your work station and/or man cave
JRammit replied to Socal399's topic in Soft Plastics
Just noticed this thread was in the soft baits forum, so i guess i could provide a little more info on the soft bait section of my bench Ventilation was the cerntral point of the design.. when i first built the bench i was working out of a little space in the hallway to the laundry room of our old house.. there were no windows in the room, so i came up with the idea of venting thru the floor (which was a valid option since it was a mobile home)... then came the obstacle of airflow, the amount of CFM i needed for the *whole room* would have warranted an awful big hole in the floor.... solution: don't vent the whole room, rather confine the working space to a small 2'x2' box, then the proper airflow can be acheived using a small inline duct fan When we moved into the new house with a shed in the back yard the design was still preferable... nobody wants a wide open window in winter (or in the heat of Texas summer).... its quiet, weather friendly, and most important it works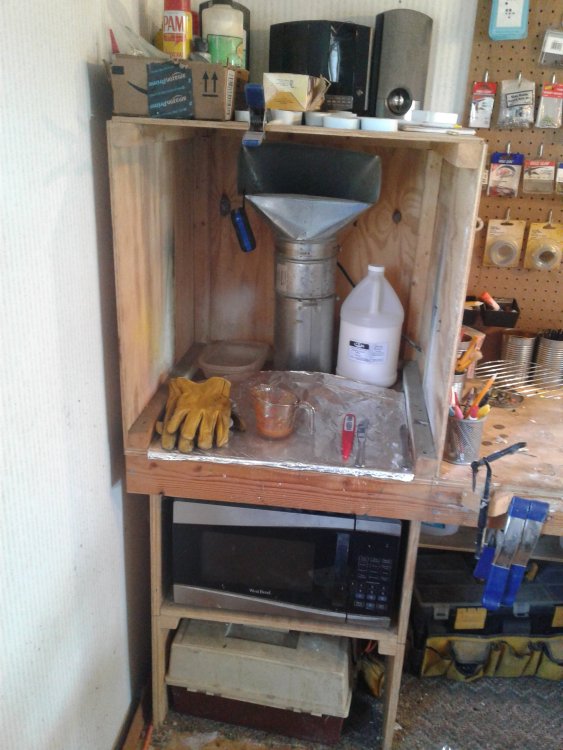
-
Post your pics of your work station and/or man cave
JRammit replied to Socal399's topic in Soft Plastics
I like these kinda threads.. heres mine... plastic melting/self contained ventilation station on the left, work bench in the middle, hard bait cutting/sanding/drilling station on the right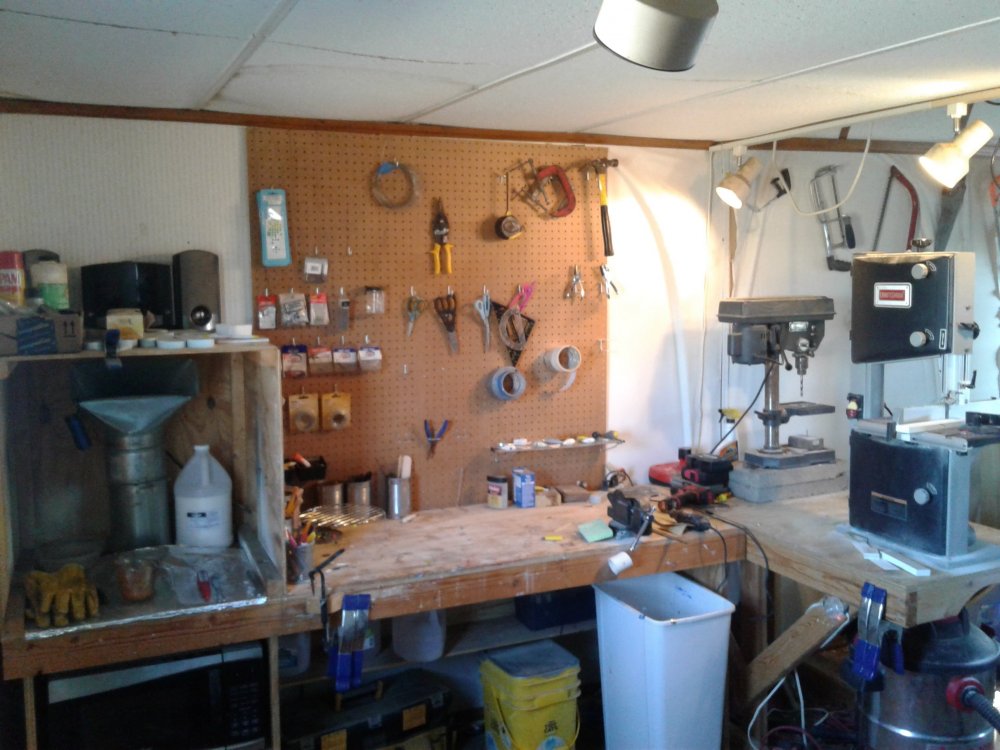
-
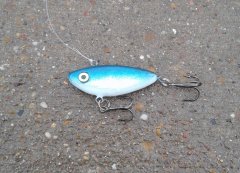
Got tired of waiting for a replacement airbrush, so i just finished this one with the ol' spray cans... 2" long made from PVC trim board... first wake bait ive ever made, took longer to get the lip size right than it did to carve the bait, suprising how wide of a lip these things need to swim above the water compared to under
-
Just looked on Balsa USA, theres no options or mentions pertaining to density.... is there a standard density you could kinda expect to get if they dont specify?? Ive never used balsa, but was recently thinking id like to give it a try
-
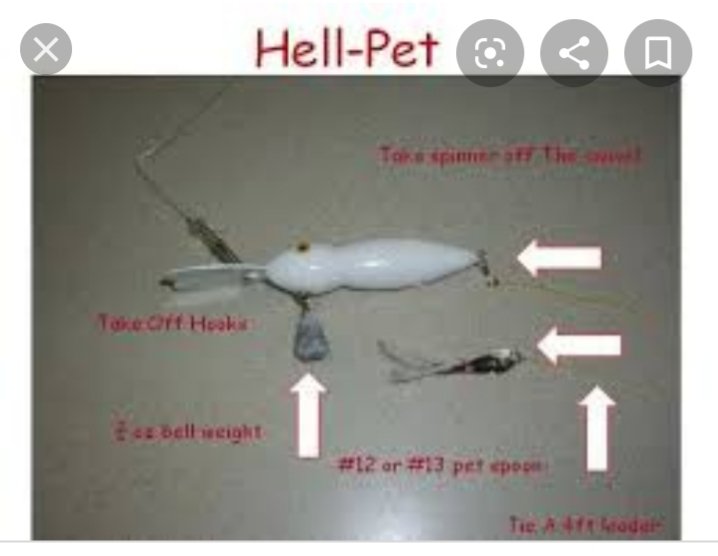
I think white bass fishing for most of the country begins and ends with the spring creek spawn run, then theyre forgotten for the rest of the year... i caught the verry end of it this year on Denton creek, got a few wading with maribou jigs... they cant compete with crappie in the frying pan, but theyre exceptionally good cooked whole on the grill!! For those that continue to target sandies thru the year, a popular rig is the "Hell Pet".... similar to what youre describing, minus the three way... its a clasic Hellbender crankbait used as a downrigger with a spoon (usually a pet spoon) trailing behind it
-
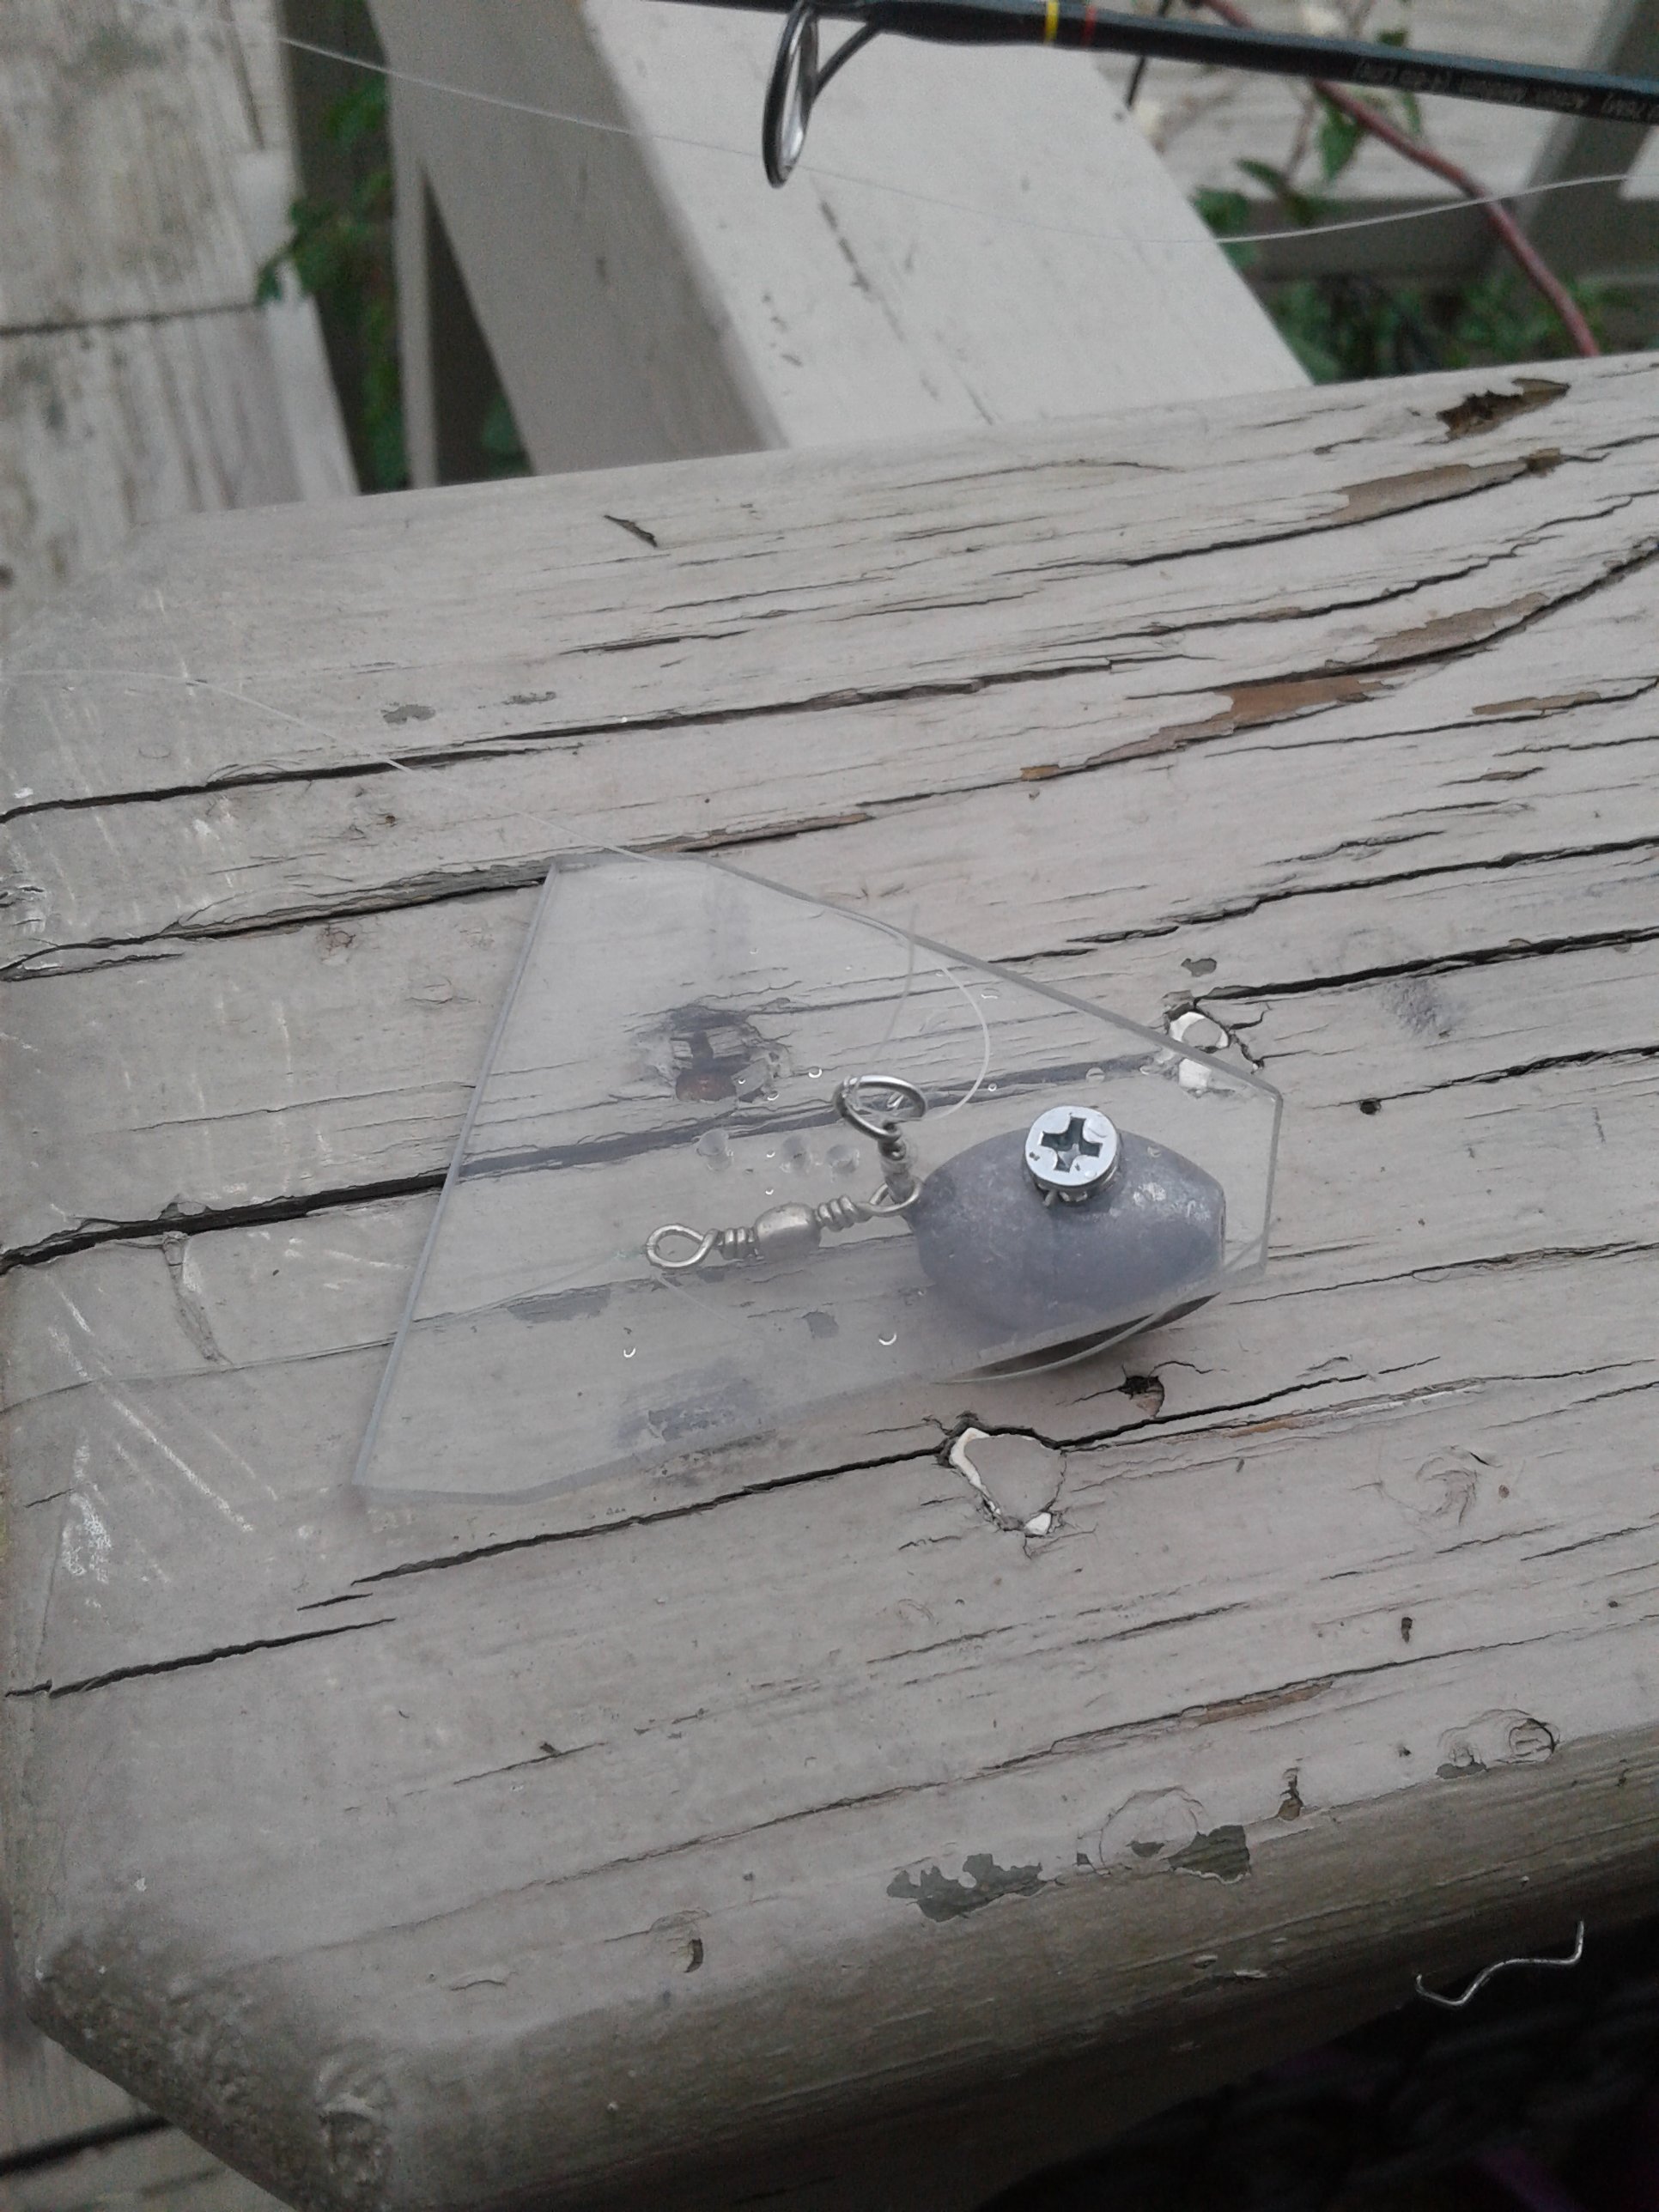
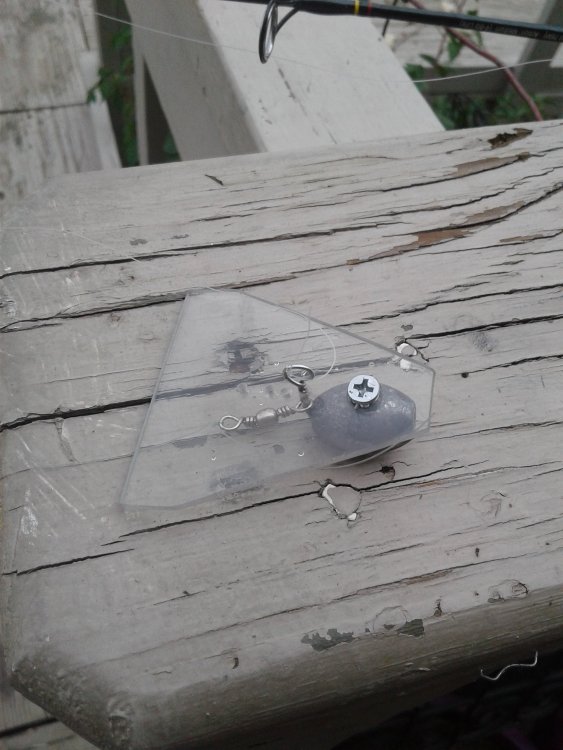
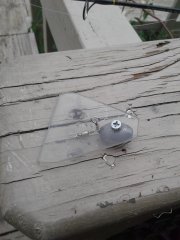
Heres my first go at it 2 1/4" long x 2" wide, 1/8" thick lexan, 3/4 oz sinker Pool test went well.... tried 4 different tow points and ended up using the hole 1" from the front edge, any further back and the contraption wiggles like a crankbait, i figure thats wasted energy that would take away from the max diving depth.... only have a few feet of water in the pool since we're getting it ready for winter, so to test the diver i cast it across the pool, let it sink to the bottom, and then see if i can lift it off the bottom by lifting the rod instead of reeling..... no dice... the thing hugs the bottom and comes back to me no matter how hard i tug at it The real test will be my next trip to the lake... not sure when that'll be, sooner than later if i can help it
-
 Finally got around to this project, and i might have nailed it on my first try...... tested in the swimming pool by casting across, letting it sink to the bottom, then lifting up on the rod instead of reeling... it hugs the bottom no matter how hard i try to pull it up..... now for the all important lake test, stay tuned
 -
If its getting cold in your neck of the woods, temperature can make epoxy almost impossible to work with..... in the winter i make sure to heat up not only my epoxy, but also the mixing tray and of course the lure itself
-
Few years ago i screwed up a bait and decided to use it to test the limits of twisted/epoxied eyes by hanging it in a tree by a clothes hanger on one end and dangling a 30 lb dumbbell on the other...... the eyes were distorted and ovalized probably beyond repair, but they never pulled out