


LHL
-
Posts
50 -
Joined
-
Last visited
-
Days Won
4
Content Type
Profiles
Articles
TU Classifieds
Glossary
Website Links
Forums
Gallery
Store
Everything posted by LHL
-
The tech sheet for artresin (https://cdn.shopify.com/s/files/1/0770/0749/files/ArtResin-Technical-Data-ENG-FR-ES-DEU-ITL-DUT-Nov2019.pdf?1111) says 24 hours to harden but 72 hours to fully cure. Maybe you're testing them too soon? 1 coat of epoxy is plenty for a test but large toothy critters will eat through it. For bass fishing 1 coat is plenty but for musky typically 3-5 coats is needed.
-
How long are you allowing the baits to cure after applying the epoxy? Can you put up any pictures of the baits to show what it looks like? Are these baits in contact with anything else? I've heard that some things like soft plastics can cause a chemical reaction that causes the topcoat to melt off. It shouldn't happen with epoxy but a link to the exact product you have would be helpful as well.
-
Completely agree with this. Even wood that is cured will still retain moisture. If the plug is left out in the sun on the deck of the boat too long or on the dashboard of your truck, it will most certainly swell and cause cracks like this.
-
Hi Dave! Not sure if anyone has pointed this out to you but your specific gravity for envirotex lite is actually incorrect. According to the spec sheet here (https://www.eplastics.com/pdf/envirotex-lite-resin.pdf) the HARDENER has a specific gravity of 0.97 but if you scroll down to page 9 you'll see that the resin has a specific gravity of 1.15 Since these are mixed in a 1:1 ratio I would assume (maybe incorrectly) that the specific gravity would then be 1.06 when mixed together; making it more dense than water. In which case I would agree, more etex buildup near the thickest part of the lure (the head) will cause the nose to dip down. - Andy
-
The soft tail tip is absolutely genius! Never thought of that but I have a bunch of cheap flexible cutting boards I use to catch epoxy that I should definitely turn into tails.
-
I seal my baits with epoxy to seal them. I just mix a bit up of envirotex lite (it's very thin compared to 5 min epoxy) in a container, put on some gloves, and dip a rag in there and wipe the epoxy over the bait pressing hard to get it into the pores of the wood. Even better if you thin the epoxy with some denatured alcohol to really let the wood soak it up. It will penetrate a couple millimeters deep so you can sand off the excess on top and still have a sealed bait which is nice. All sealers will add some weight to the lure but I haven't found much difference in my methods.
-
It's all good my man! Asking questions is how we all progress! If you're up for the challenge, I would still cut the joint and make the connections and go through the process to see if you can get it to work! Everything you do is a great learning experience so trying new things with this bait will make the next one you make that much easier. And if you mess something up it's no big deal because you weren't planning on making this the perfect bait anyway. I know how heartbreaking it can be to spend days/weeks on a lure just to mess one little thing up and end up with a dud. It's why this is the perfect opportunity to just plow through and mess some stuff up through trial and error but still learn how to make the next one great!
-
Let's try to address one thing at a time here: 1. You can cut the joint to go through the fin. It will look okay and should still work. 2. Since the bait is already carved, I would cut a straight joint like a Bucca Bullshad: You can then either pin the hardware or have a double hook eyes/loops to form the connections. 3. You can use a 5 gallon bucket as well to try to check the sink. It's not as telling but will work. 4. Yes you must seal the wood before you put it in the water. 5. To weight it you can use anything from pre-cut lead weights, to split shot, to pouring your own lead. 6. I'm guessing you can buy soft tails for swimbaits but, yes you'd likely have to make your own by carving one and casting it in silicone. 7. Mark your centerline before you round over the sides. Stack up some wood with a pencil on top about half way and run the lure along it. Then flip the bait and do it again. The center between those two lines is true center. You can only do this while the wood is still flat on the two sides. 8. The size of the hardware is tough to call but I personally think bigger is better. The longer the screw eye the stronger it will be. I personally twist my own wire. 9. picking the right treble hooks will all depend on the lure. I have an assortment of hooks I test to see what looks right. On the 10.5 in glide I used 4/0 hooks. 10. There are dozens of clear coats out there and all have their purpose. I recommend using a 2 part epoxy for maximum durability but that also means you'll need to build a rack to turn your baits so the epoxy doesn't run off. Envirotex lite is a good enough place to start. If you have toothy fish though it won't hold up too well. And finally, please PLEASE don't look at anything when it comes to building lures as a "waste of time." I see it all too often with people who just start out and they give up quick because of it. Everything that is a 'failure' is a learning opportunity. Ask anyone here and they'll show you the bins of failed baits they made trying to get 1 good one. No one makes the perfect bait on the first try. Hang it up as a reminder and start on a fresh piece of wood with the new knowledge you've got.
-
The video works great! Your explanation is great throughout your whole design process and the action looks amazing! Cheers!
-
I carve everything out of wood so I know nothing about resin haha. Perhaps someone with more experience can chime in.
-
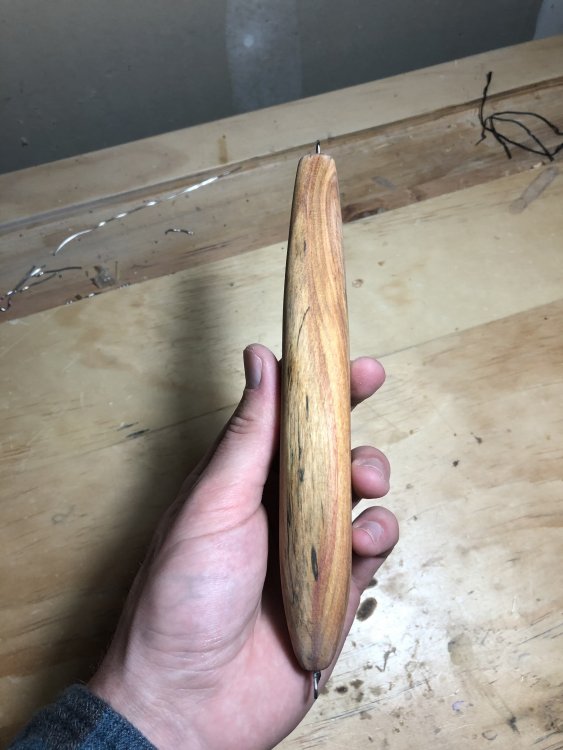
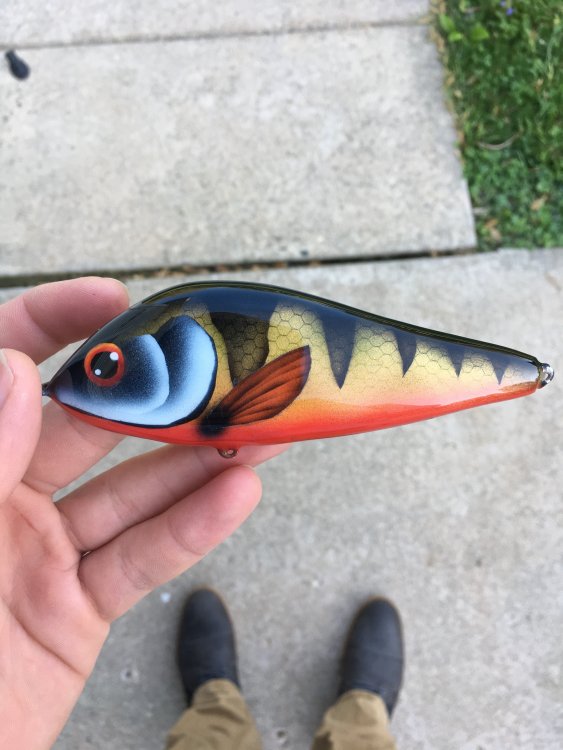
This looks like a great start! I've got some experience with big swimbaits but I've got to admit that I mostly go by what feels right vs. the scientific approach. Are you looking to have this as a 2 piece glide or a multi jointed swimbait? What style joint do you want to use? All have their place but a V-shaped joint with two twisted wires is pretty standard and simple, along with a flat cut joint or a pinned V-shaped joint. Generally it is much easier to cut the joint about 90% of the way when the wood is still flat/square and then you can carve after. Carving and cutting the lure before and then trying to cut a symmetrical and straight joint after is not as easy but can be done. Typically what I've found for the 2 piece glides is that you should weight the lure so that it falls slowly and completely level, and you want the hinge to be as free as possible so the back half falls at the same rate as the front half. This will give the least amount of resistance between the joints which will give for a smooth swim. You'll probably have to experiment a bit with the placement to get the perfect glide but a fish tank will help to see how it sits/sinks in the water. Since the tail won't be bearing any load (the fish won't be pulling on it) epoxying the broken piece and sanding smooth is plenty fine, especially after you clear coat over the top of the paint. Your tail fin looks thin enough for a two piece glide. Below is a 10.5in shiner glide I made which you can see I didn't go very thin on the tail or fins at all. If you want a multi jointed swimmer then a hard tail will kill the action. You'll have to cast a soft one and glue/pin it in place. For carving, I've used the flexcut knives and like them just fine. Just make sure you keep your blades sharp to make carving easy and safe. There are a dozen videos out there on carving so watch some of those for tips. Typically I'll score a line on the detail I want to carve straight down, and then I'll come back on a 45 ish degree angle and cut to the line I just scored to remove the material.

-
Pencil surface lures are generally weighted with all of the weight in the back 1/3 of the lure so that the nose sticks out of the water. Because it is such a thin lure, the hooks and split rings act as the ballast instead of weighting below the center line of the lure. The difference is that with the back half of the lure in the water and the front half out, the drag is significantly different from back to front, which is how the walking action is achieved. Over these past weeks I just built a 10 inch glider and was finally able to test it at the local lake. With the weight distributed over the entire belly of the lure, I can still get it to roll if I twitch the bait way too hard. It's because I built this one out of maple which is much more dense than the traditional cedar glides. Maybe try to not jerk the bait so hard, but work it soft and methodical. Each lure, especially when handmade, will have it's quirks. Once you figure them out, you'll be able to get them to dance. Last thought, you can always add a rear stability plane like they have on the Drifter Hell Hounds which will significantly decrease it's ability to roll: - Andy
-
I'm not sure about the chart but I found this video pretty informative:
-
How wide is the back? Generally speaking I like a glider to be taller than it is wide. What I would also try to do is to continue to add external weight until you get it to glide. Sometimes for some reason a lure needs more weight to get the action that you want at the sacrifice of a faster sink rate. If this is the case you might want to redesign the lure as the shape may not be ideal to get it to do everything you want it to.
-
If you could get a lazy S motion like a jointed glider, but with the body roll of lure with a backlip boot tail, it could produce a very interesting action.
-
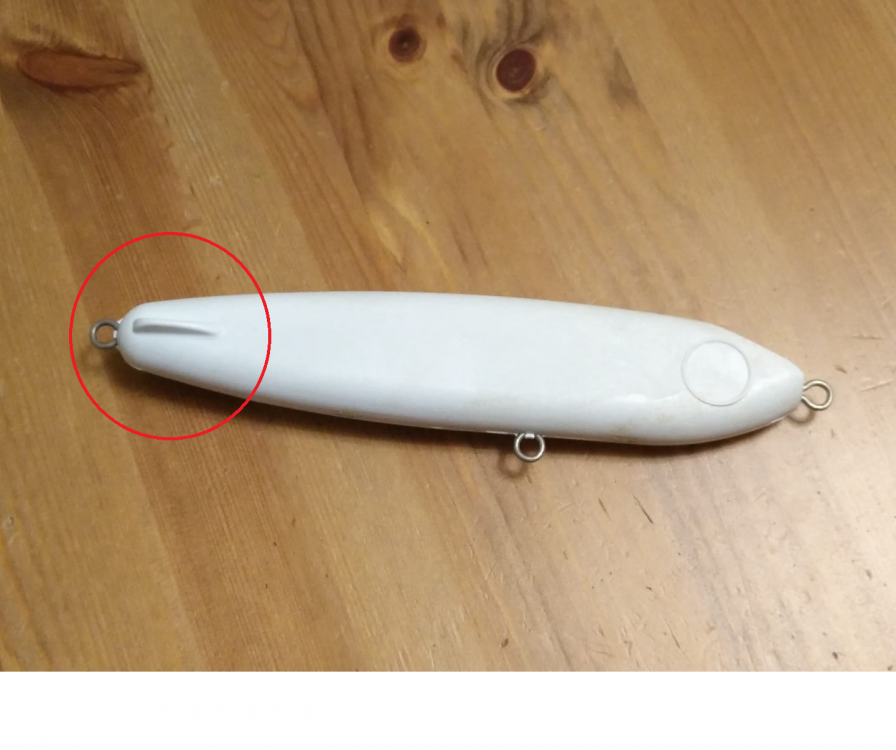
There are two methodologies to weighting a single piece glider. Either have an even distribution of weight across the entire body (more in the head where it is larger and therefore more buoyant, and less in the tail section), or concentrate the weight around a central pivot point. Having the lure sit flat in the water will give it the furthest glide possible but is also the trickiest to balance. Having the lure sit slightly nose up will certainly make it easier to work but your glide will be short. If the lure does 'nothing' when you weight it, I would try to taper the face in to come almost to a point where the eye on the nose is (like in the attached image). When pulled, the water should catch the tapered sides and push the lure to one direction. Once you get the glide to swing to one side, it is much easier to keep a cadence and get the lure to glide from side to side. If your lure is doing a lot of rolling it means that your weight is too close to the central axis and needs to be lowered to keep it stable. Many gliders in the musky fishing world are desirable if they can both glide, and roll on the retrieve As for your question, I think that all gliders, flat, rounded, etc. work equally as well. - Andy
-
Check out JW Lures Backlip It's a single piece boot tail design but you can see the boot comes off at an angle. Maybe some inspiration if you're still trying this concept out.
-
Yeah you don't have much weight to work with to begin with which makes things tricky. Let us know how that goes and if it changes anything. Thanks
-
This is the style I am refering to.
-
I'm going to assume this is a flat sided jerbait. The shape looks perfect but my thought is that this being a smaller jerkbait (typically this size is seen on 150mm+ sized lures) there's not much room to add weight without going above the midline. My guess would be to increase the height of the lure (bluegill style jerks perform much better in this compact size) or to distribute a lot more weight in very small pieces along the bottom of the lure. Again you'll be limited because it's a small bait.
-
Do you have any pictures of the lure? I've created several jerks/gliders now of various shapes and sizes but never any out of resin. A pic of the bait might make things easier to visualize. In general everything said here is spot on though.
-
I'm in line with what Hillbilly's definition is. The 'design' may not be wholly the customers idea because frankly speaking many of them don't know what it takes to build a successful lure, but they may give you details about the specific qualities they want in the lure. They may give specifics for size, color, sink rate, action, etc. and then it is up to the builder to design something that can achieve that to a certain degree.
-
Absolutely! You'll need to experiment though as a lip that is too narrow may cause the lure to stop wiggling all-together.
-
The 'walk' of that lure shouldn't be so erratic that the fish will miss left/right of the lure. It's more like a jitterbug so, yes, it has some left/right movement but it's mainly in line. I agree with Dave though, a video of the action may make things more clear. You may need to make modifications to fit your specific lake/river scenarios. I personally would try the feathered treble hook to 1) give the fish a target and 2) reduce the motion of the lure by increasing the drag, which may be enough to get them to hook up. I have the same issue with smaller pike on gliders where the lure will dart left and the fish will swipe right and completely miss. Luckily the pike are usually aggressive enough to swipe at it several times before giving up.
-
In my humble experience fishing a homemade wake bait these past two years is that pike are blind when it comes to a top water strike haha. I had a small pike come completely out of the water but missed the bait by about a foot and a half.... I think the little jack pikes are just too enthusiastic when it comes to anything top water and completely misjudge the strike. As for big bass and musky, the don't seem to have a problem sucking it down. Lost my PB bass twice now due to my own stupid mistakes but both fish had solid hookups on the front hook. Most of the fish I have landed were a headshot except the few 20in pike.


