JasonB14
-
Posts
31 -
Joined
-
Last visited
Content Type
Profiles
Articles
TU Classifieds
Glossary
Website Links
Forums
Gallery
Store
Everything posted by JasonB14
-
Not sure but I do know that out of all the ones I watched videos of and seen around the web, all but 1 used a grinder with saw blade....I’m eventually gonna try a chainsaw blade just working on getting a few baits made up right now. For sanding the balsa I use 180 grit by hand and it literally takes less time than the machine takes to make the next. Cedar will be a little harder so the drum type flap sander in a drill press may be your best bet
-
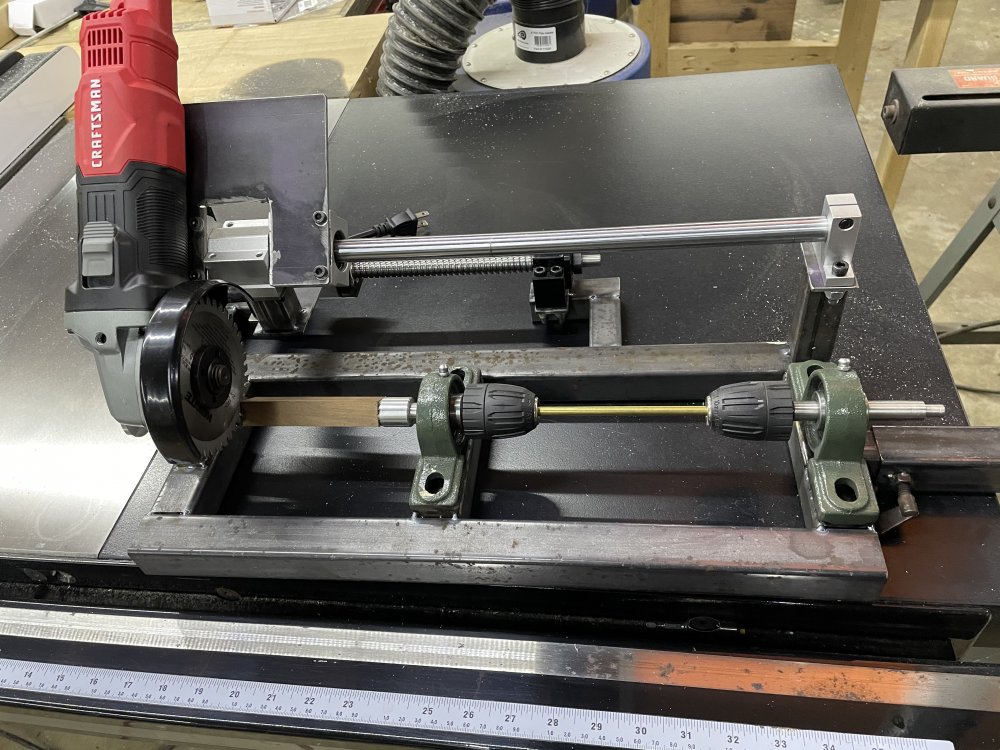
I made a new more permanent master, made it in 2 pieces and put a 1/8 rod dead center of the body so no more wobble. I’ve tried different feed speeds and it seems to not matter much the micro ridges are there but I can also confirm that with 180 grit sand paper by hand that they sand out in less than 2 minutes. Pretty happy with it at this point

-
Only need 1 ...I didn’t notice that was for 2, that’s what I use to pay for 1.
-
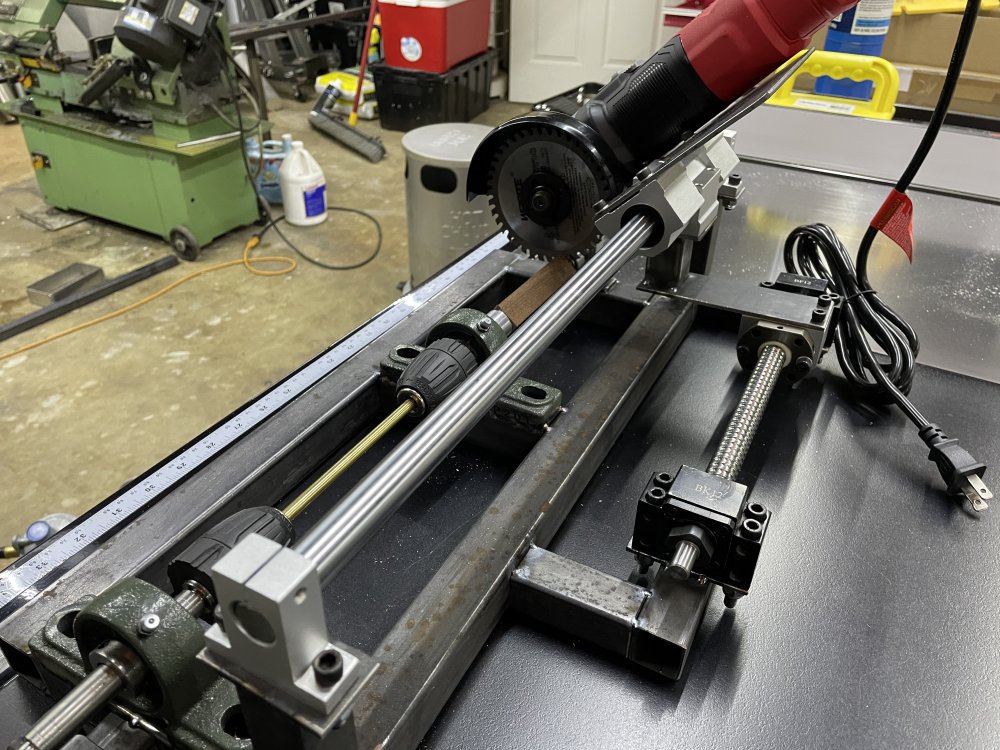
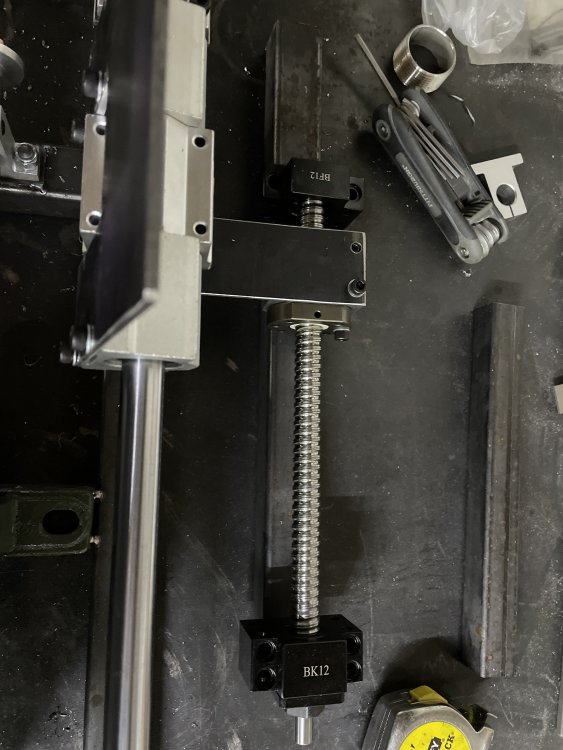
Wayne my ball screw is 12” long and 16mm diameter so it’s pretty hefty and like I said there’s practically no weight on mine because the bulk of my weight is riding on linear rails and bearings. as far as power, you could go with a converter or do what I did and source an old 12v server power supply. The ones I use out out 12.4 volts and 75amps, which is waaaay more than you’ll ever need and because of their purpose they’re super reliable and really cheap. if you go this route I can help you with the very slight modifications you have to make to get it to work outside a sever https://www.ebay.com/itm/193605326994
-
The way I have mine built there is very little weight on the screw. So depending on how you build it would depend on the size of the threaded rod and how much deflection it has. And ball screw prices are no where near as costly as they use to be...with both end blocks the nut and nut cap was 54$
-
My ball screw is 300mm or 12” ish I’m not using nearly all of it. The motor is very strong, don’t think it would have any problems, but a wiper motor may work better for you.
-
Wayne I personally didn’t want to deal with gears and chains so I went with 2 separate motors and direct drive with PWM speed controllers...the ball screw has a very aggressive pitch and normally used with stepper motors or servo motors. The motor I’m using cost like 15$ from Amazon and it’s so small you could probably hide it in your hand
-
Wayne the ball screw is a 4mm pitch (4tpi)and the the drive motor is 3rpm max so that’s just under 1/2” per minute feed. I can slow that down to about 1/8” feed per minute but just gotta see if that improves the surface finish. I’m not overly concerned with time as I can do the sanding by hand while the next one is cutting...and of course version 2.0 will have multiple cutters and possibly dc powered grinders. This was fun to build and learn and hopefully I can make it even better and make some killer balsa cranks. The next step though is to make a back poured mold to hold the blanks perfectly square for cutting the the lip slots. I have a plan but I’m open to ideas. I’m thinking about a dremel with a saw wheel held vertical and the blank sits belly down in the mold and slid across the saw blade at the desired angle
-
In that temporary master I didn’t get the pins dead centered which caused the wobble you see, however the end result was not affected at all as it is for all intents and purposes identical to the master...I’ll make me a 2 piece master and put a solid pin all the way through it and that should fix that issue, also the motor driving the ball screw can be turned down more, I started with it wide open but that’s only 3rpm, I slowed it down during that cut and the ridges got smaller. I think a round tooth blade would help some but haven’t found one yet.....maybe even a 4 1/2 chainsaw blade. Overall for no test runs I’m pretty pleased. Thanks for the advice along the way. I’ll probably pull it all apart and paint it this weekend and then work on some sort of box around it to hook my dust collection system to....balsa dust can’t be healthy as fine as it is.
-
Wayne that’s ultra fine ridges and balsa ....sanding takes about 45 seconds. vodkaman...I’ll make it public...I thought the link would let you view it. here’s the public link
-
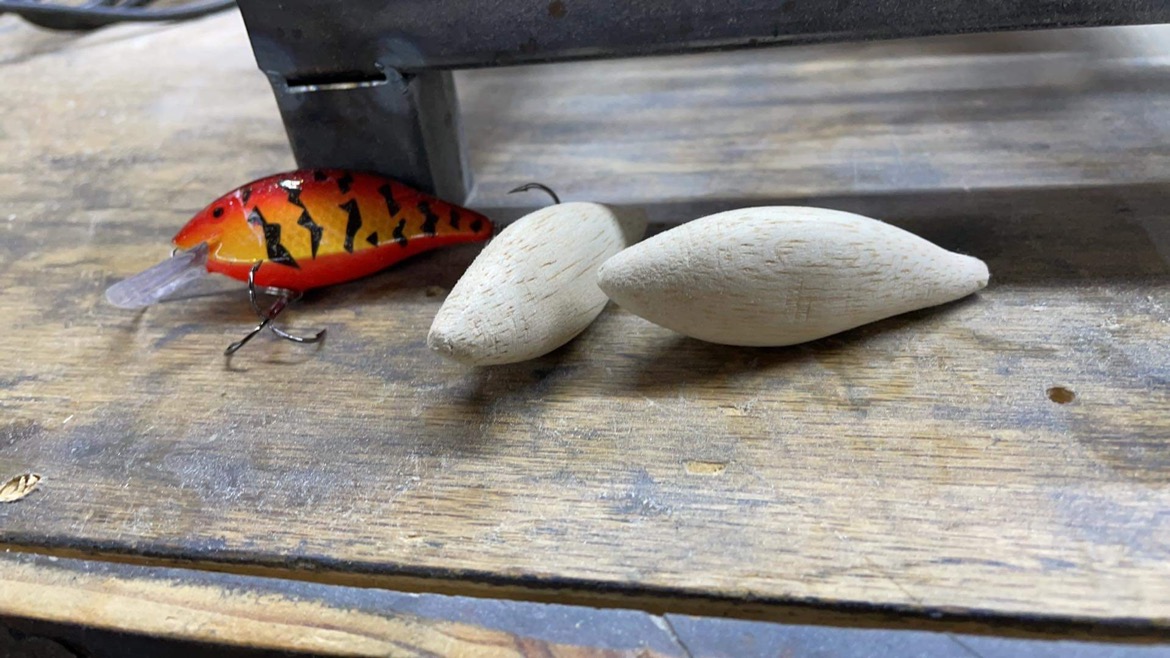
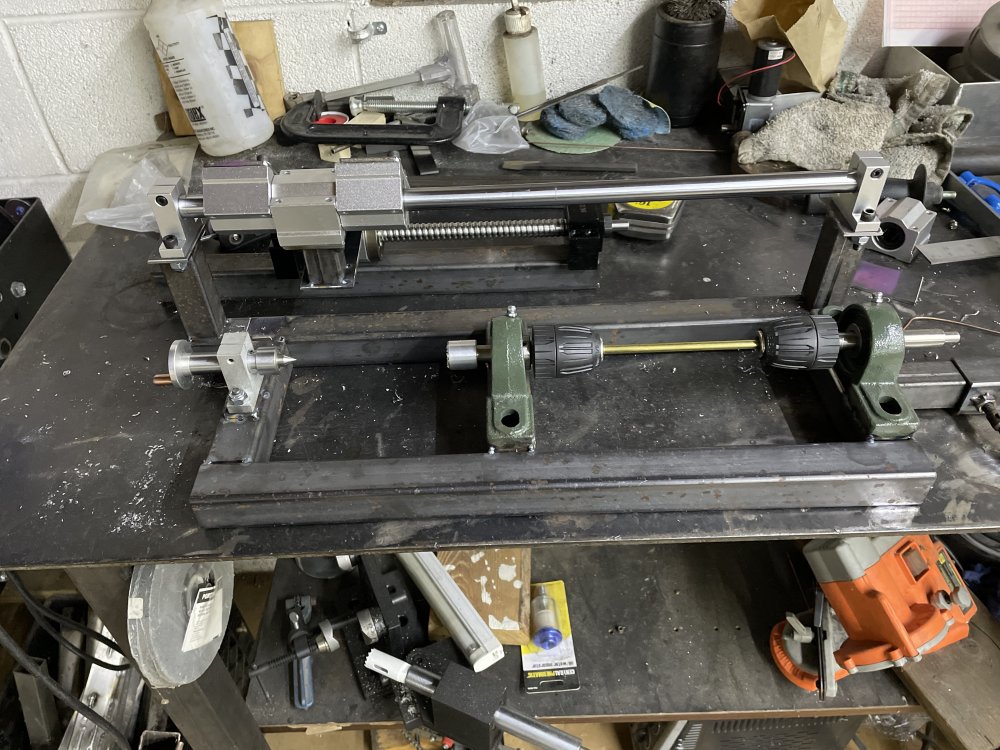
Well machine is functional...here’s a link to YouTube video...it’s private so only access is through link. And here’s a picture of very first copy...I got really lucky or I’m really good...not sure which lol. That master was just a quick mock up to try machine. Still have to finish welding and put in my adjustment rods for limit switches. But so far I’m satisfied

-
Took a little break over the weekend to do some rigging on the boat and got back to the machine last night. It’s at about 75% completion but I started wondering if I could make my master a little over sized and then offset the stylus and the blade to get the carving original size? I’m sure it can be done but anyone that has made one of these, have you played with that at all?
-
Waaaay past the barb now lol i
-
Thank you kind sir!!
-
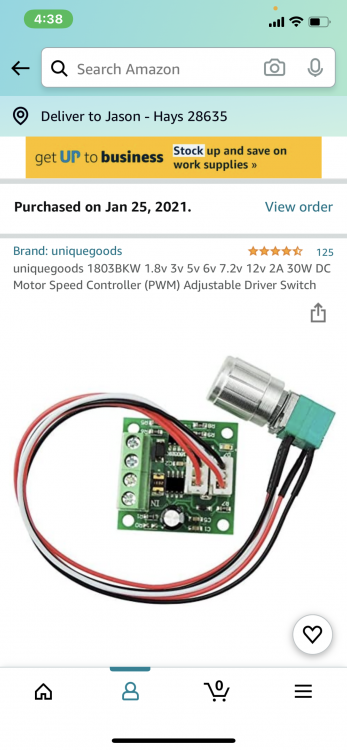
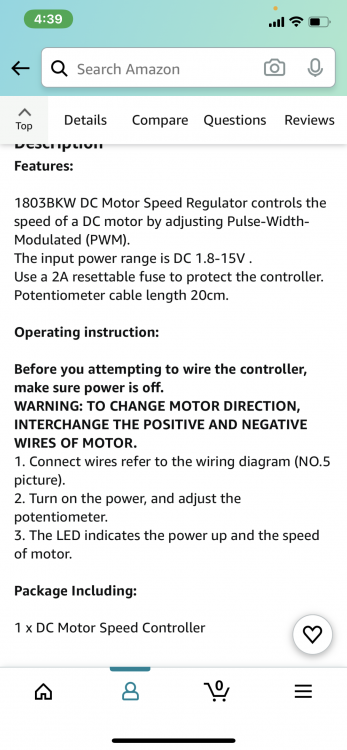
Nothing in package...found this picture on Amazon
-
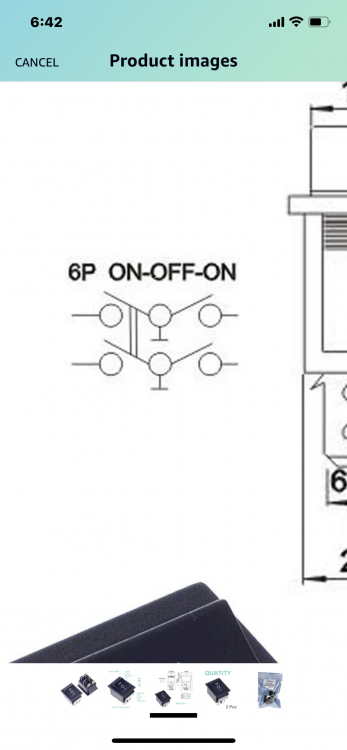
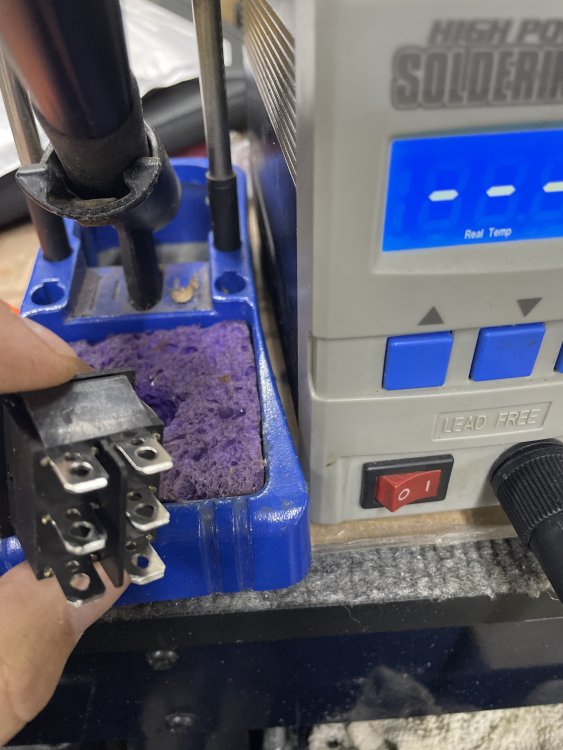
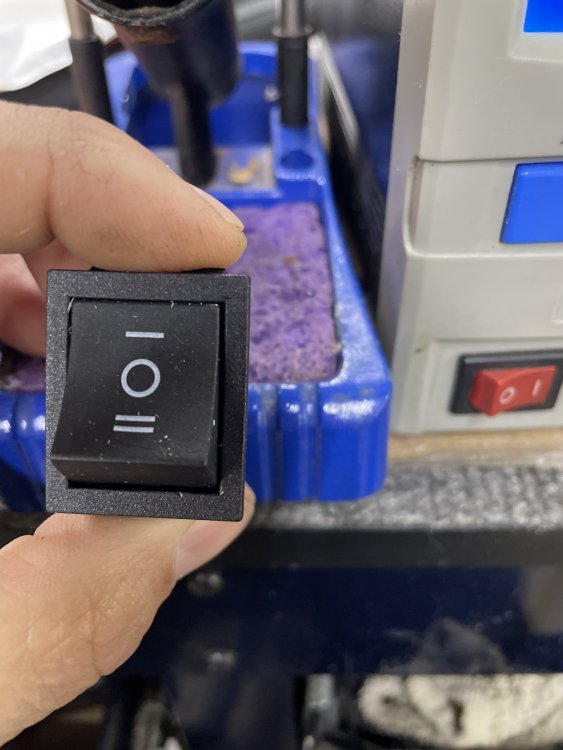
So the DPDT switch I have has 3 terminals per side. And switches have 3 total I know the one on the side is common.
-
Making progress...switches and dpdt’s should be here tomorrow
-
Thank you and just so I’m clear.. positve from PWM goes to 3 and 1 negative from pwm goes to 4 and 2 correct?
-
That will be waaaay over my paygrade im sure....that would tying dc to ac also....I just wanted limit switches so that it stops when it gets to the end lol
-
Thank you Dave!
-
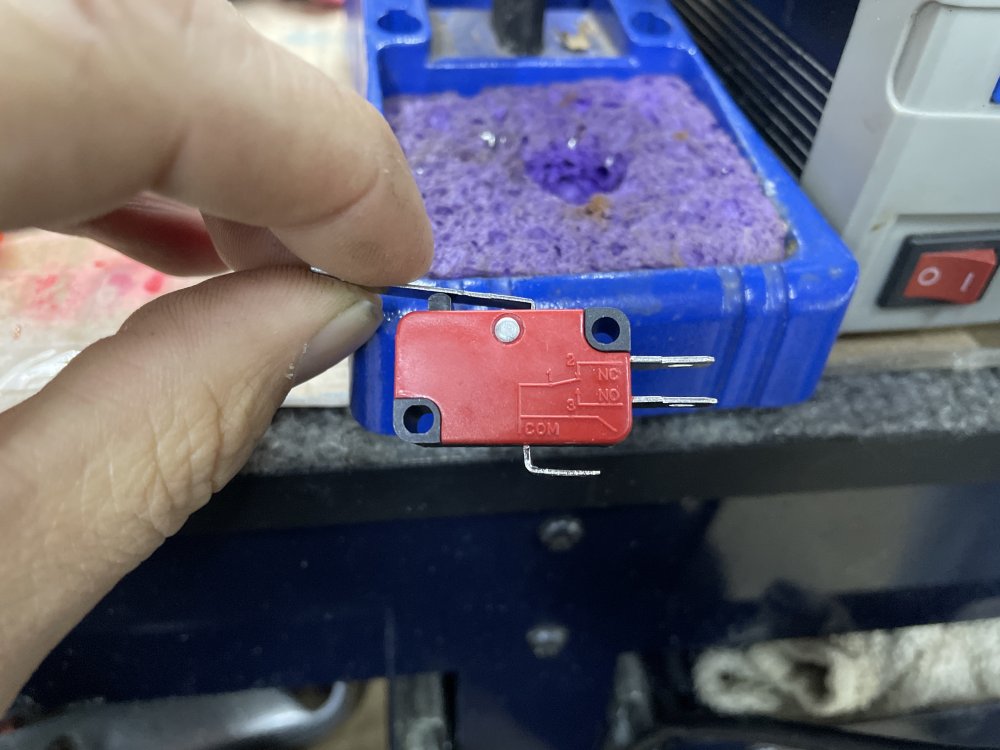
These are the items I already have...the motor and speed controller...where I get fuzzy is running that through a reversing switch and a limit switch
-
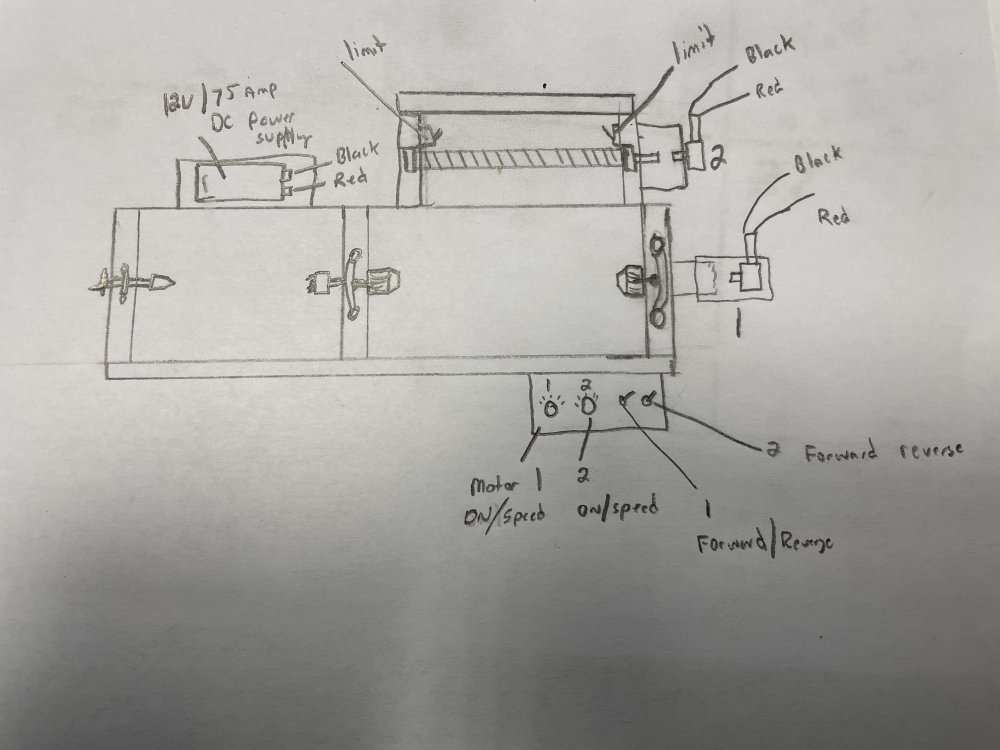
I mocked up my machine on wood base and it appears everything is gonna work out just fine, so now im in the fabrication stage. Im gonna need help with with wiring a couple of limit switched and a switch to reverse the motors. Is there anyone that can draw a diagram to show me how to do that? Ive googled it and that just further confused me lol. Im not by any means an engineer or an electrician so reading electrical diagrams is like reading a foreign language. Its probably more simple than it seems looking at the internet. I have attached a sketch of my plan if some one could look at it and give me some guidance....not an artist either. Basically i need to wire the power supply to both motors, both through a potentiometer, limit switches on number 2, and forward/reverse switch on at least number 2.
-
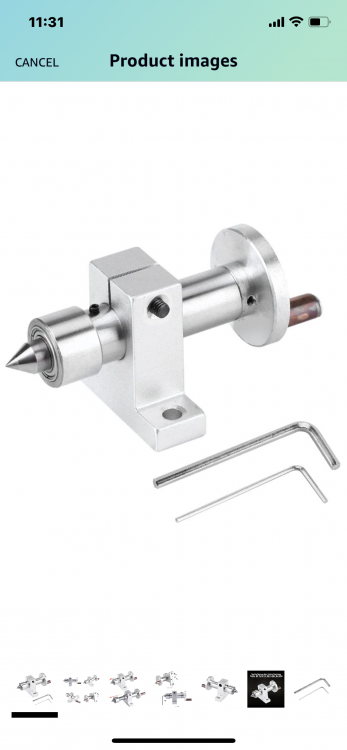
Thanks again for the help, I ended up ordering a contraption that I’ll make work...got just about all the parts ordered now, just need to go to the steel yard and get some tubing to make the frame and carriage. Should be able to have mocked up by the weekend. Here’s the tail stock I ordered to press wood into the spur...I’ll probably cut the point off the live center and make some teeth in it.
-
I can deal with a little sanding on balsa. im now to the point of holding the wood blank I was thinking a wood lathe drive spur in the middle that will ride in pillow bearings and on the other end a drive spur that will also ride in a pillow bearing but will have some sort of acme screw to clamp wood between centers.....problem I’m having is finding drive spurs that are not Morse tapered, so I see me machining those, unless you have a better idea....do you have any pictures of yours?
-
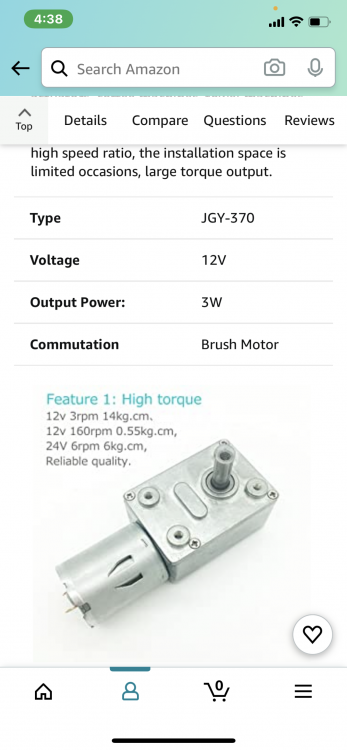
Dave the motors I’ve chose are high torque 12v dc motors with gear boxes very similar to wiper motors and only 12$ a piece. If for some reason they don’t work I’m not out much. On another side note that ball screw has a 4mm pitch, so with my 10rpm motor I could just dial it back to around 6rpm and get the 1” of travel per minute ....right? I think I read here or somewhere that was the optimal speed with round tooth blade for best finish...?. Or did I dream that?