


RiverSmallieGuy
-
Posts
475 -
Joined
-
Last visited
-
Days Won
6
Content Type
Profiles
Articles
TU Classifieds
Glossary
Website Links
Forums
Gallery
Store
Everything posted by RiverSmallieGuy
-
 Sounds good! That sounds (and looks) like it works great! Thanks man!
 -
Yeah, I do similar stuff where I make baits specifically for certain bodies of water. I am currently building a 6.5" pine/cedar glide bait for a couple ponds that are less than a mile from me that have some 4 and 5 lb largemouth in them, I haven't caught any out of there, but I have caught a ton of bass between 10 and 12 inches, but I have seen 3 and 4 pounders in them. And the ponds are less than 5 acres. So i decided to build a glider that would appeal to the larger bass. I am going to try to rattle-can a rainbow trout on it. Any thoughts on a clean way to do this? I have a couple ideas, but I am curious if there is a better way. Thanks man!
-
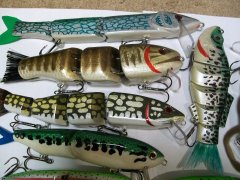
Is the top one a mackerel? Not 100% sure what it is. Looks really natural either way.
-
Love that smallmouth paint job! The pike is really nice too. I love that crappie color on the right too. Incredible job man!
-
Alright. I will have to look at that today then. I'll have to paint some lures here in Kansas as soon as I have some baits ready and the weather isn't ice-cold... Winter sucks... Anyway, thanks man, appreciate it! Braden
-
I haven't seen this lure, but based on the fact that it is a Do-It product, it is likely an aluminum mold, meaning that the paint adhesion is not determined by the shape of the lure, rather the plastisol, silicone, or whatever material you are making the lure out of. As for the legs, I would just do trial and error, and see what works better than other methods, generally you find some little niche tricks that make it easier. Sorry if this doesn't really help much, just my knowledge on this topic. Tight lines! Braden
-
Makes sense, just trial and error until I get it right then... Im cool with it! Thanks! Braden
-
I do that as well, I am trying to learn how to do detail with rattle-can. I know theres like graffiti caps and stuff, but I know nothing about that. I use stencils but don"t get super clean lines like I want. Is there any way to get super clean scales with rattle-can? Braden
-
Is there anybody else out there who paints their lures with rattle-can? Rattle-can spray paint is a great way to learn to paint lures, and if you look at Ceaser Chavez's Toxic Baits, he paints everything with rattle-can, so there are ways to do it, I am just looking to learn a new technique or two here, along with you guys that paint with rattle-can. Braden
-
Not sure if all of you guys are familiar with this lure, but the Megabass Vision 110 jerkbait-- I believe that a big part of it's erratic action is because the lip flexes a little bit when you jerk it, making every twitch a little different. I am going to assume that you can incorporate that effect into a crankbait if you use a thin circuit board lip, which could be deadly for a super shallow running crankbait for pond bass where you aren't hitting any hard structure, but the bait has that erratic hunting action that triggers reaction strikes. Braden
-
I am curious as to what you guys think the best kinds of wood are for swimbaits. What I have found works well is pine, but I also know poplar works pretty well, and basswood too. I know that buoyancy can hinder action because of the amount of lead (or tungsten) needed to get the sink rate you want, which can in turn be too much mass for the joints to move. What do you guys think? (P.S. I know I am posting a lot on here, I am just sharing and learning along with the rest of you guys!) Braden
-
Forgot to mention, do not spray this inside your home, spray it outside, unless you have really good ventilation. This keeps your respiratory health safer, than if you were spraying inside without really good ventilation. Braden
-
If you have molded detail in a resin lure that you want to maintain, it's not the perfect option, but KBS sells their Diamond Clear in a spray can. Its pretty tough, and you can put as many coats as you want on there, while still keeping it thin and durable, which will maintain the carved detail. Braden
-
I generally order my balsa online or go to craft stores. I order my balsa from Hobby Lobby, Amazon, and anywhere else that sells balsa. Balsa isn't really cheap by any means, but if buoyancy is what you want, balsa is what you need.
-
If you are doing pin slot joints, have two screw eyes, pinned into the lure, or if you're using double screw eyes or twist wire joint connections, use two of them to eliminate the twist that you would have if you use one. Unless you want the twist, of course. Braden
-
The way I would go about that is place weight in only the head piece and have two anchor points on each joint to test it, and if you don't get the action you want, try putting weight throughout the bait more. If you want a very fast, aggressive serpentine action, remember that a bait will move faster when there is less leverage needed to make it move. (so place the weight close to the part that would be generating the motion) Braden
-
Jointed Lexan Tail-- What effect does it have? (if any)
RiverSmallieGuy replied to RiverSmallieGuy's topic in Hard Baits
I included the video because it had a section that goes in depth on how the tail mechanism works and to explain the tail to those that are not too familiar with the lure. If you skip to the section on the tail mechanism, that's all you need to watch. The video is time-stamped. I apologize for the misunderstanding. I am not affiliated with Black Dog Baits and receive no money from them. Braden -
Jointed Lexan Tail-- What effect does it have? (if any)
RiverSmallieGuy posted a topic in Hard Baits
I am currently building a 3 pc 6 inch swimbait, and I am planning to have a jointed Lexan tail similar to that of the Black Dog Baits Shellcracker G2. So far, in my swimbait building journey, I have found that a jointed tail doesn't have a negative effect on action, but I have only had that kind of tail two times, so that evidence is not really proven. Will this kind of tail be conducive to the fast, serpentine action of a Triple Trout style lure? Thanks! (I have attached a video that goes very in-depth on this lure and the tail mechanism.) Braden -
Vertical undulating action in jointed swimbait?
RiverSmallieGuy replied to Flyingfisher's topic in Hard Baits
Nice! Let me know how your swimbait goes man! Braden -
perch wakebait.jpg
RiverSmallieGuy commented on Matt Thayer - RI's gallery image in Best Homemade Hardbait
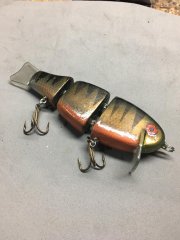 No problem! Did she work good? Braden
 -
Vertical undulating action in jointed swimbait?
RiverSmallieGuy replied to Flyingfisher's topic in Hard Baits
I would make the lure a flatter bodied bait, like a shad on it's side, and put the weight in the side of the shad and cut the V joint normally, just put the lead in the side to make it sit side facing down. I am not 100% sure this works, just how I would go about achieving this action. -
That makes sense. I would just look at other people's lures and see what the average price is for a custom painted lure.
-
Not sure if you want to paint your own baits, but a really good way to affordably paint baits is with rattle can spray paint. I love using rattle can, you can use stencils and such to create designs you want. Not saying this is what you asked, just a thought for what you may want to do if you want to paint them yourself affordably. Braden
-
If there is anything that I may be incorrect about, let me know! This is just me posting a rough guide for the beginners who may be interested in building a swimbait. If anybody wants to reply with any tips on joint leverage, joint angle, joint size, head shape, line ties, or anything that affects swimbait action, go ahead! Make this the trusted standard topic for swimbait building on TU!
-
I have been reading a large amount of topics where home builders are taking their first shot at making swimbaits, and I noticed a pattern; most of the questions that they had were about weight placement. So I thought I would post a topic about generalized logic and opinions on swimbait weighting systems. *This is not a 100% guarantee for a perfect swimbait, regardless of category. This is just a starting point; a rough guideline. -3 pc Swimbaits These are a great entry level lure to build for your first swimbait, as they are more beginner friendly and less finicky than, say, a 2 pc glider. When you weigh these, think of a lever. Is it easier to push a lever down at its highest point or its lowest point? Clearly its highest point. If you place all of your weight up in the head, or the back of the second piece, or even the back of the third piece of a 3 pc swimbait, you're essentially creating a lever that will prevent the bait from moving correctly. What you could do, however, if you want a slower, wider action, is place most of the weight very close to the joint, to free up most of the motion and then put a little bit of weight a little more toward the head. I will talk about utilizing this effect more later. Now, of course, there are ways to increase joint leverage, but I don't truly understand how to manipulate that. If you can find a way to increase the leverage that a joint produces, then that's great, you can place more weight up at the head and get a really slow, wide S pattern, not the S pattern of a glidebait, but the S pattern of a methodical, slower action 3 pc swimbait. These swimbaits can float, as well and have a very aggressive Triple Trout or Bull Shad style action to them. It is a little more complicated getting a 3 pc floating swimbait to function as you want it, because there is less water inside the joints to move them. -2 pc Glidebaits When you are weighing a 2 pc glidebait, based on my experience, they are the hardest lure to get right. Don't be worried about failure, though, take a stab at this, but don't expect to make a perfect bait on your first try. A good way to get into making glidebaits that I have found, is to make a 10+ inch bait, just to get the feel for it. It is far easier to get a 10+ inch (25.4+ cm) lure to work well than a 5 or 6 inch (12.7-15.2 cm) lure. I assume that this is because there is more water interacting with the lure. Back onto the topic of weighting systems, when you weigh these, you are looking for both pieces to have a very even fall rate where the centerline of the lure is parallel with the waters surface. This is very hard to achieve, especially if you have fins on the belly of your swimbait. You want the pieces to have identical fall rates so that there is no interference with the joint. When you are making a glidebait, specifically 2 pc gliders, you want a slower, more lazy action than say a 3 pc swimbait. To achieve this, we utilize the lever effect I spoke about above. You place a decent amount of the weight close to the joint, to free up more motion, then you place some ballast at the head to restrict some motion to achieve the slower, more methodical glide that we want when making these. A slower glide equals a wider glide as well. You want to make the chin of these bait very hydrodynamic as well, the chin isn't generating the action, the joints are. A hydrodynamic chin allows for a wider glide as well because of it's ability to travel better with less resistance from the water. -Wakebaits (all varieties of joint configurations) These are fun. You want a good beginner swimbait? These are about as good as it gets. You don't have to weigh these perfectly because of the large lip they have in the front, that lip is going to move the head of the bait regardless. Only if you place the line tie correctly and shape your lip properly. As for weighing these baits, remember what I had said about placing the weight close to the joint on a 3 pc swimbait? It is the polar opposite in wakebaits, because the joints aren't making it swim, the lip is, so you place majority of the weight right up close to the lip. You can always utilize the lever effect I spoke about above, but it is not 100% necessary because the lip is generating the movement, not the joints. The joints simply follow the movement of the head that is created by the lip and create that tantalizing lazy S action that you want out of a lipped wake bait. If you are making a 2+ piece wakebait, you want to put enough lead, or tungsten or whatever you're using to hold the other pieces upright so that that the buoyancy of the material you are using on the other pieces does't interfere with the movement of the joints, especially if you're using a very buoyant material like balsa or tupelo. One final bit of information on wakebaits is that you generally want a wider lip, not a longer lip, and you generally want that lip to be 75-80 degrees, rather than 90 degrees. -4+ pc Swimbaits These can be tricky, because you think about the 3 piece swimbait where you place the weight right next to the joint in all of the pieces to hold it vertical, and you try to think about the 4 piece, and you try to apply the same principal where you place a little lead in each piece, you don't generally want that on a 4 piece. You mostly just want to place enough lead in the first 2 pieces so that it sits upright and swims with that really smooth S action. You do not place any lead in the 3rd piece, if you have the hook on the 3rd piece. That hook is generally enough to hold it vertical enough to get the action you want. Continue to use the lever effect principle on these swimbaits, and you should figure it out. -Crankdowns (all varieties of joint configurations) These are very similar to the wakebaits. The primary difference in these is that the lip is less wide, but longer to aid it in diving. Another key difference with crankdowns is the weight, you put more weight in these to aid it in diving. The final difference is the lip angle. The lip angles on these can be around 75-65 degrees to help it dive. You also want to put the line tie fairly close to the lip to increase the action due to the increase in weight, which could prevent quite a bit of motion with the bait.

