


JimP
-
Posts
183 -
Joined
-
Last visited
-
Days Won
2
Content Type
Profiles
Articles
TU Classifieds
Glossary
Website Links
Forums
Gallery
Store
Everything posted by JimP
-
Some of the poly intended for wood is not "waterproof" and will turn white when submerged for a period of time. Also some super glue gasses off and condenses into a white looking powder that shows most on dark thread. Some super glues gas off less than others. A bottle of Loon will last a long time. What ever it cost is better than tying a bunch of flies that you find out much later they are messed up.
-
Kris, I have used various acrylic inks and treated them no different than the acrylic paints that most of us use. I'm using the inks inter mixed with acrylic paints in most cases. The brand names of acrylic ink that I'm using are "Daler-Rowney" and another "Amsterdam" and using ETex as a top coat for most lures. I have so far never used "Pledge" which is it self is an acrylic finish. ( pretty sure about that) The "Pledge" is probably an unnecessary step. If D2 and KBS can be used on your acrylic paint without reaction I expect it to be safe with the inks. However I would to a quick test of your brand of acrylic ink. Do a test and get back to the group: Just wipe a thin ink film on a price of glass, plastic what ever, let it dry then add a drop or two of your top coat.
-
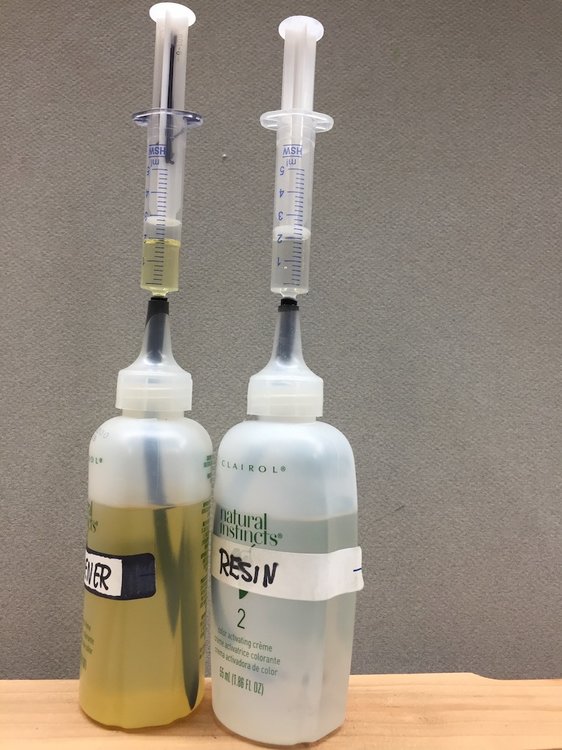
About your syringe, make sure you get the ones "without" the black rubber gasket attached to the plunger. They are probably lubed with a silicone lube and will transmit into the epoxy and cause fish eye problems. The rod maker catalogs have the gasket free syringes that are color coded. Always use one color for resin and another for hardener and there is no need to clean up after use. Just pull the plunger back and store outlet side up in a paper cup. Or try putting a tube into a nozzle lid, something like in this photo. Just snug fit the tube into the nozzle and cut to length to fit the bottle. The syringe is kept in the position shown. Withdraw the amount of each component needed then replace back into the tube for storage. These two bottles and syringes have been in use for months without ever being cleaned. CAUTIONARY NOTE: The bottles need to be vented with a pin hole in the bottle itself or with loosely fitted caps. If not an increase in room temperature will cause the liquid to be expelled from the tube and make a sticky mess.
-
Terry: I think you are inquiring about the inline spinner bodies. Model (LB - 5 - A) The 1/8 oz is 20 mm X 4 mm The 1/16 oz is 14 mm X 3.9 mm The 1/32 oz is 11 mm X 3 mm Powder coat is the best way to coat them and I prefer to cast them directly onto the wire that will be used for the spinner. I purchased this mold for the same reason you mention, the cost of the brass bodies. These will serve your purpose very well.
- 1 reply
-
- 1
-

-
Might try CSI Seal Coat, a water base urethane product. Near epoxy qualities without the mixing hassle and dries very quickly. You will need apply at room temp and rotate for about an hour, more if humidity is high. One coat might be all it takes for a painted jig. Most of the big tackle making retailers sell it in various sized containers.
-
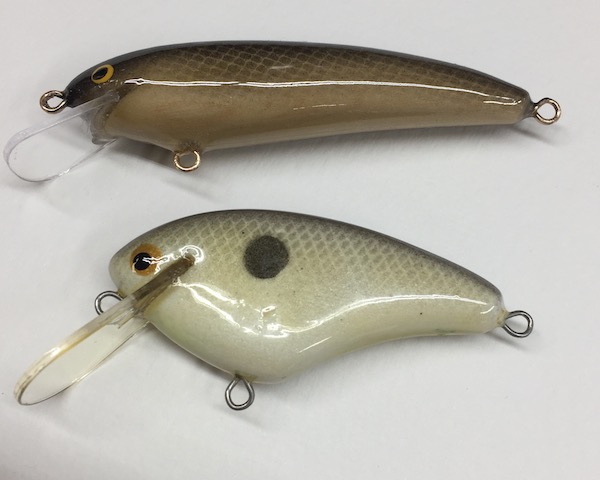
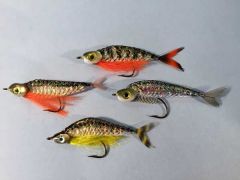
"AMBER ALERT" From my past experience with Min Wax "Fast Dry Polyurethane" it will provide a high gloss , up side. The finish will turn very amber in a short period of time, down side. White belly lures become tan belly lures. The amber toning is not a problem when used as a wood finish, it's intended purpose. The bottom lure had fewer coats of MinWax poly but the lip was also dipped with noticeable amber toning.
-
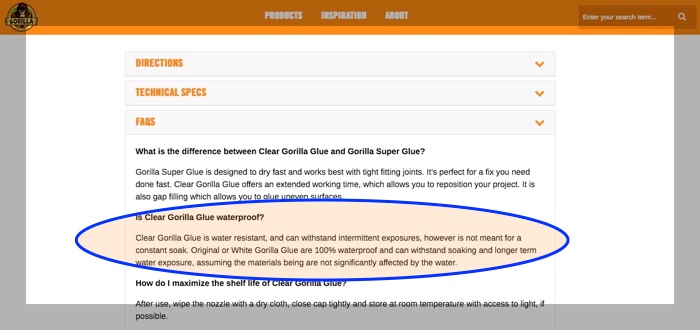
I just coated a test lure with the Gorilla Glue "Clear" . It goes on smooth, flows out just like "Etex", and needs to be rotated for a period of time. At first glance it looks promising. However the company web site declares that it is not a water proof product. Still worth a try.
-
You might try "flame polish". I always flame the lexan lips I cut to remove the micro scratches that happen during shaping and sanding the edges. You will probably have best results with a small butane torch set to about a medium low flame. I'm not going to try and tell you how its done. Just do a web search and you will find several instructions. Work quick and then quit. Don't come back more than once and keep it moving unless you like melted plastic. Practice on junk plastic.
-
Here is where myself and most others error. Plan carefully for electrical outlets and lighting fixtures then double it.
-
Mark: A top coat will be required if you want the paint (actually an ink) to be durable. The ink is alcohol based and most colors are transparent. Some folks have a problem with colors running under the clear. As long as you can apply a fast dry (non-alcohol based) intermediate layer you can use almost anything as a top coat. I should also add this does not replace a regular airbrush since its is not capable of the level of detail of a good airbrush. For tinting and adding scales it works well and is very inexpensive, the pens seem expensive but last a long time and are refillable. As with anything new to your system experiment before using on the final step of a labor intensive lure.
-
Copic air brush is exactly what you need. I use a Copic brush on fly rod poppers to tint just like you are doing except in a smaller way. Increase the distance between the brush and lure to give a soft blush. Don't mess with the small cans of propellant. You can rig it to run on any compressed air system you have.
-
Synthetics works great. I have almost fully switched to synthetic materials for flies and fly rod poppers. The colors are vivid and much more durable than natural hair. I have lots of poppers that have some age to them, some have had birthdays, and look as good as new. The natural materials look ragged after a year, even less if put away wet a time or two. You might have a bit of a learning curve trying to figure the different textures as they relate back to the materials you are used to tying. The synthetics can be tied in combination, along with naturals with good results. Bucktail is the one of the common tying materials that has not been duplicated by modern materials. At least one company has made synthetic "BuckTail" and tested by a few tiers with mixed results. I have no experience with the synthetic bucktail however.
-
Not as a US resident, if you lived in Canada no problem.
-
Should be very easy to tie directly onto the wire shaft. I have made several "Rostertail" type spinners without any problem. Attache the loop the holds the hook into the vice and go to town. Much easier to tie the wire shaft than the hook. No sharp points to deal with. The logic behind tying the shaft instead of the hook is the hook points are near the tip of the tied in hackle instead of being half way up and inside the hackle collar resulting in fewer missed strikes. Worn and tattered hackle can easily be replaced on the wire shaft at anytime. The only part that is different is the whip finish when done. You could just use a couple of half hitches and follow up with a good head cement. UV cure is great, one coat and done. You could also get some thin poly tubing that's used to tie 'Tube flies". Pre-tie onto about 1/4" sections and slide over the wire.
-
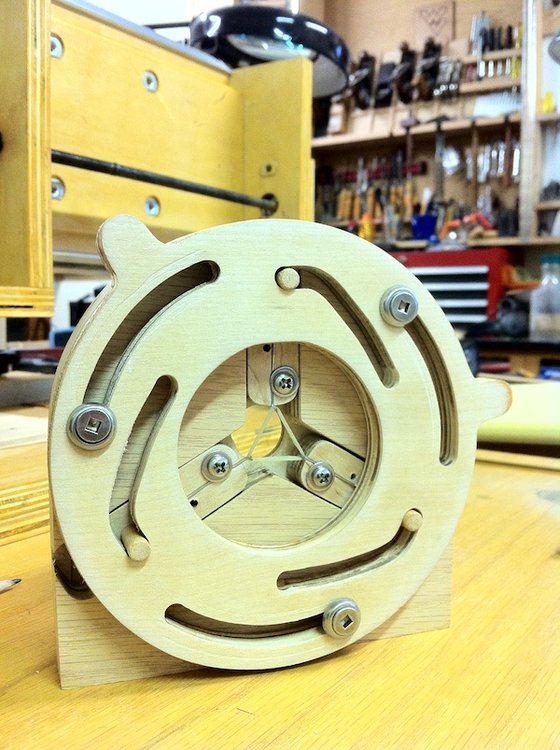
Here is a version of the devise you mention that I made a few years ago. This is made with oak plywood and worked well. The original wooden pin holders were replace with PCV board version which were slicker worked better. Also this one is slightly larger than the purchased one. Even being made on a CNC machine it is too much effort to turn out for what they were asking. I know they no longer make them. Just letting you know you can make one.
-
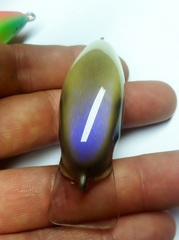 Wow, very nice. That would be sharp over foil. Just a hint of color depending on direction.
 -
By all means test with any liquid. Ideally something as close to the normal material as possible in density and thermal conductivity. But do a test, lets say using water, record the results and adjust settings and repeat test. Better response or worse? Also place the temperature sensing probe near the heat source so the probe has minimum time lag. If you could agitate the liquid during heating would also be helpful.
-
Temperatures are some the hardest loops to tune because to the time lag. You apply a heat source and some time later depending up on the capacity of the vessel, relation of the temp probe to the heat source, insulation, and and the amount of energy applied as heat. Is would be normal for the indicated temperature to cycle above and below set point and your tuning is to flatten the cycles as much as possible. If you can "AutoTune" with derivative turned off I'd try that. Derivative might be taking you out in anticipation of reaching set point and is probably not needed in a small vessel. Otherwise since you have already completed an auto tune simply turn it off and test run again. Make yourself some detailed notes and record you settings along with response time and the amount of overshoot. Only change one setting at a time, and keep notes. No one can give you a valid number. Way too many options. You will probably see a different response with low level in the pot compared to a full pot. So it might be helpful to try and maintain a somewhat constant level in the pot and expect to see the loop to cycle again if you add a large amount of plastic at on time. I have several years of industrial instrumentation experience but have been away from hands on for a while. Good luck!
-
I mix by weight also. No measuring tools to cleanup, just pour directly from the bottle into the mixing cup. If you read the labels I bet there will be a ratio for mixing. The epoxy I'm using right now is "System Three" and the ratio listed is 1 unit of resin to .44 units of hardener. Just pour about 2/3s the amount of resin you think you will need into the mixing cup that has been tared on the scale. Take the weight and multiply by the ratio .44 (in my case yours might be different). Your number does not have to be exact, while the posted ratio in the goal its better to under shoot the hardener than to over shoot. Yup, grossly too much hardener will make the surface tacky.
-
jonister: I have had success with Copic markers not running by top coating with- Company:CSI Coatings Product: "Seal Coat" Quick dry, water clean up, you will need to apply and turn until dry.
-
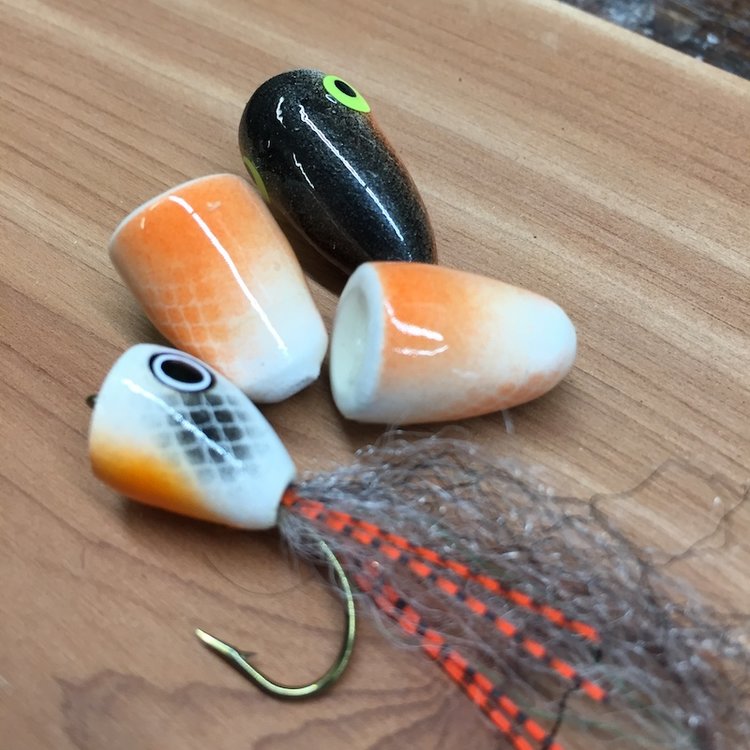
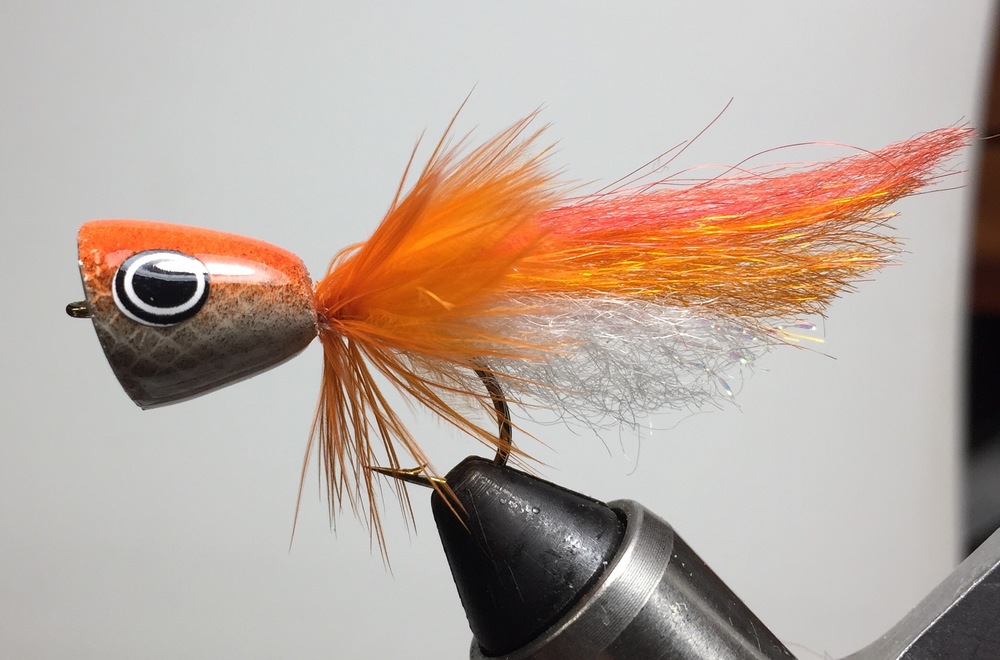
Ranger: Here is a fly rod popper that was finished with a Copic. Copic/copic markers are used for about 50% of my finish work. Most base coating is done with an airbrush. The airbrush is also used for fine detail when needed. The Copic is mostly used for coarse detail and spot work. It is a handy tool, and zero cleanup. I like that.
-
Thanks Bassinman: The drawing conveys your idea very clearly. Thanks, Jim P
-
Sounds like a great idea. If I understand correctly you end up with 3 blades on the spinner? One at the head and two on the arm? If I'm incorrect how about a drawing.
-
Use this web site to play with mixing colors. It was shared just a few days ago on this website I think. This tool needs the 6 digit HEX value in this case #e8cf7c. You can also just click and play. http://trycolors.com/colors/e8cf7c/ It is set up to take you to the color that is close to the one that you are looking for. As a starting point try 5 parts yellow, 1 part Magenta, 1 part blue, 4 parts white. You can get small apps for any operating system and phones that allow you to move a cursor around your screen and measure the color under the cursor. Most tools will give you the RGB (red,green,blue) value of the color that is displayed on the screen. This next tool will convert RGB TO HEX, the HEX value is used with the link above to get the mix formula. http://www.rapidtables.com/web/color/RGB_Color.htm Keep in mind the color displayed on screen might be very different than intended color because of any miss adjusted equipment in the long path from source to your screen. Have fun!
-
 Thank You


