Leaderboard


Popular Content
Showing content with the highest reputation since 09/25/2024 in all areas
-
No. That’s not the product that I have. I sent them an email asking if the still handle the UV powder. It’s a light yellowish powder and I didn’t find it in their store. When I find out, I’ll reply back.2 points
-
Since the OP already has other molds, I don't understand the advantage of having a single mold for tying and pinning plastics? Since Smalljaw ties bucktail on a no collar head, perhaps the best solution would be a wire keeper head which can be cast with or without the keeper. Do-it conveniently offers many jig head styles utilizing both eye sockets and wire keepers to suit both aesthetic and functional preferences.2 points
-
I make some baits with UV. Personally, I like it and think the bass do too. It only takes a pinch or a smidge in a cup of plastic so don’t over do it. Another thing I will do is add it to my topcoat when covering eyes on my leadheads. Works very well.2 points
-
2 points
-
I use just a standard bobbin. There is nothing special about it. I have more than one. I bought them at a local fly shop. I would be hard pressed to get by without one.1 point
-
I'll have to experiment with that. I have a pint of baitplastics softener and worm oil but switched to dead on black label. I'll see if using baitplastics causes any issues. It'll be nice to save a few bucks without needing to buy dead on worm oil/softener.1 point
-
I'm close to that same ratio. I'll use that amount to drop my MF medium to soft. If I'm adding salt or glass beading or even floating additive, I adjust from there. I'll even add softener to the soft blends when using additives. As far as using the same brand softener in like brand plastic, I wouldn't worry too much. I've been mixing and matching for years without issue. I don't want to keep buying more softener every time a manufacturer changes formula for their plastisol, and I change brands. I just use what I have whatever I have on hand. Example- I have almost exclusively used MF plastisol. But I can't get it anymore. I had also tried Dead On, and bought their softener to go with it. When I was able to get MF again, I just used Dead On Softener in my MF. No problems. Same with Bait Plastics. I used either MF or Do It brand of softener, no issues then either. Now I can't get MF again But still have at least a quart of Dead On softener. Don't know what platic I'll get to replace the MF, but I won't spend$$ for new softener. Same with Hardener. I've tried them all. I have LureCraft. I hate it because of the color and smell, so I tried Do It Crystal Clear. Worked fine in whatever plastic I was using. Others may have had different results. This is only my experience. Best I can tell you is, experiment And have fun.1 point
-
Thanks you Sir! Saw your post and already ordered.1 point
-
Here you go Tiderunner. They still have it and emailed me about it this morning. Here’s the link. https://store.do-itmolds.com/search.asp?keyword=912531 point
-
Up to a point, the narrower the lip the more rocking motion a bait will have, flashing its sides up and down. Wider lips have much less rock and more tail wag. If you make a lip more narrow than the width of the bait, it can cause the bait to blow out and begin to spin on a constant retrieve. That matters more on regular crankbaits and less on jerkbaits.1 point
-
Yes, they are.1 point
-
Much appreciated. I didn't find it there either.That's why I thought it might be the powder paint. If they no longer carry it, I can always try the Spike It brand.1 point
-
Any of you guys try this jig? https://barlowstackle.com/do-it-hover-jig-mold/?utm_source=Klaviyo&utm_medium=campaign&_kx=m1ZtKI6WNjPliDaX3IhCPF8P2YM4rDdv6qTxaNw2Zv8.HY2xRH1 point
-
I ordered the mold from Barlow’s with Gami hooks. I’m hoping to modify a swim bait mold so I can mold the plastic around the jig.1 point
-
Looks like a modified knock off of my Nail Head designed 15 yrs ago. Without the weight of a head to stabilize a hook point upright position, a pinned bait could roll or even spin. Very responsive to angler imparted twitch darts. http://leadfreejigheads.com/images/nails.JPG1 point
-
I have it also. Poured a bunch but my boats down and haven’t fished them either. It pours really well. I don’t think I had one bad cast out of it. The mold is designed to fish a small minnow type bait using Forward Facing Sonar. It will fit completely inside the bait with the only thing exposed is the hook point\bend and the hook eye aft of the nose on the bait. It’s mostly an open water technique.1 point
-
No, custom molds are not hard to have made and, I do own my share of them. But they are not cheap. A brand new Do-It mold is $56 and can ship today. A custom mold is easily $180+ and will likely take a few months to arrive. Plus the viper head still does not meet his minimum requirements that he listed in the first post. There's no keeper for a grub tail, and there's no eye sockets. Why compromise on those, and pay 4× as much money for the viper head? I sure wouldn't. There are several Do-It molds that do meet those criteria at a much better price point. Or a stock mold from Shawn Collins eBay store that while spendier will still ship within a weeks time! But, I didn't come here to argue. You're obviously stuck on this viper head being the best mold ever. It's not one I would ever use and does not meet the OP's minimum requirements. But you do you! Have a great day and good fishing to you!1 point
-
But, where can a guy buy this mold? That's the part you seem to be ignoring! If the mold isn't sold anywhere then it doesn't do him any good. What good is a jig he can't get a mold for? This is a tackle making forum. One where we buy the molds and such to make things ourselves! Unless the viper head mold is sold somwhere it's NOT going to work for him!1 point
-
If you can't find that post, you can always try what I and I'm pretty sure a lot of others here do. Heat up some plastisol, add softener pour some baits and keep going until you get the softness or firmness you want. Remember to write down your amounts. And keep in mind everybody may have a different idea on what a soft bait is, or a firm bait. Etc. And of course different baits call for different firmness. Good luck. I wish I had your problem of a good buy on plastisol! Hard or not.1 point
-
Good info Tyler..Nathan1 point
-
Just pored a bunch today 2- 8 oz. New jersey is much shallower. We go 3 miles offshore and your still in 60ft of water.
 1 point
 -
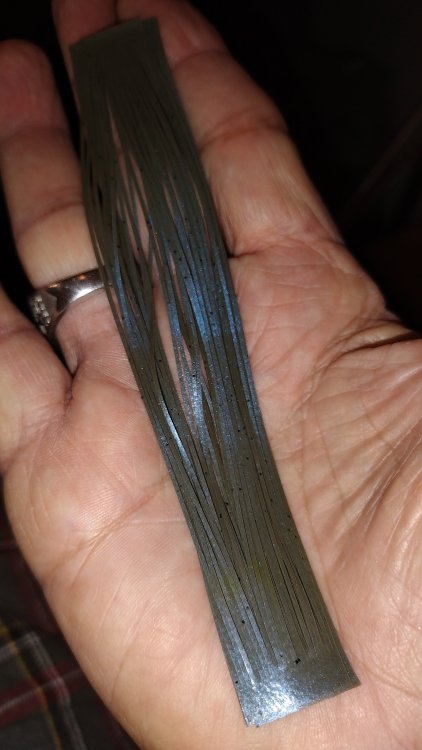
Magic craw
 1 point
 -
Can't say enough good things about Barlow's Nova Stone Chameleon paint. With that said, it's really hard to go wrong with Protec Magic Craw Blue. Excellent powder paint that.1 point
-
I’ll take a look at the 7247 and the 114 but I’m not crazy about the Gami prices. I had enough 2831’s left to get me by for now. Luremaking suggested a Mustad 3205 as a replacement but it does have a shorter shank than the 2831’s. Really need that longer shank so thanks for your suggestion.1 point
-
Thank you, I will check those out. Hopefully they will get some like the newest version Unfortunately backwater is out, and didn't return my call to find out if they will have them soon. The other one is a bit different with only one spinner on it. I might order some just to try1 point
-
VMC 7247 ? Gamakatsu 114 has a slightly longer shank relative to point gap ie: a 2/0 Gami has a 1/0 gap, so its comparable to a longer shank standard 1/0. Eye legs might be undersize compared to 32831. I use 114 up to size 2/0, dunno about bigger sizes.1 point
-
https://www.sugartitcustomlures.com/product-page/economy-spybait https://backwateroutfitting.com/product/spinspy/1 point
-
https://brightbaits.com/softbait-paint ... if from USA is not possible, then let try with Europe. Bye Cami1 point
-
Contact Spike It again and ask if you can get the VPI paint shipped. SB Coat is airbrush ready and in small containers only. VPI isn't airbrush ready and is only available in quart cans. The Bruce that frank mentioned in that post used to work for ColorTechnologies (Spike It/Lureworks)1 point
-
You could also try wrapping it in woven fiberglass tape to help insulate.
 1 point
 -
For your reference, I have the 6oz BassTackle dual injector and am able to shoot 8 cavities of the anglingai 3.8 inch rip rap mold with a little leftover. I do need to preheat my injectors a little first though so that the first shoots dont set up too quick in the injector.1 point
-
Using concrete sealer as a wood sealer can be an unconventional yet effective solution in certain situations. Concrete sealers are designed to penetrate porous surfaces, providing protection against moisture, stains, and wear. When applied to wood, they can form a durable barrier that helps repel water and resist weathering, similar to traditional wood sealers. However, it's important to choose the right type of concrete sealer, as some may be too rigid or inflexible for the natural expansion and contraction of wood. Always test a small, inconspicuous area before full application to ensure compatibility and desired results.1 point
-
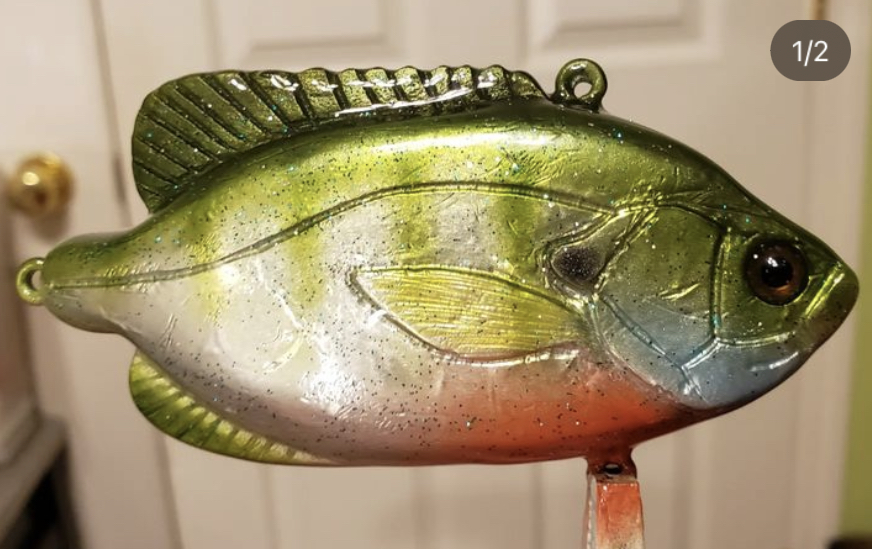
Fish hunter green/Blue interference
 1 point
 -
Off the rack soft plastics have been satisfactory for all sizes of walleye, so I have no need for ties. I prefer a custom designed forward eye flat bottom down weighted head for mounting plastics or a downsized version for tying trout jigs. Not sure which production molds include these features.
 1 point
 -
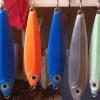
I use AC foil (sure tape) with Devcon clear. The clear does not stick as well as it does with wood, but it does work. I hade a huge snook rip up a foiled bait and it did not peel, I patched with UV resin and kept using it. you can see some damage on this side, but the other side was much worse. Here a some other examples.


 1 point
 -
 Foil scaled vertical jig1 point
 -
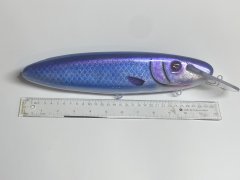
Shoulders are usually quite a bit bigger than the bottom of the lure, the belly weights should be as low as possible and static. This is the learning curve of building your own bait, knowing were and how much weight is tricky at best. Ad weight to the belly hook and see how it affects the swim. Remember +/- 1 gram can be the difference between a good bait and a paper weight.1 point
-
Today's his actual birthday. Happy Birthday Ben Siegel, wherever you are. You are missed1 point
-
Happy Birthday Ben Siegel, wherever you are. You are missed1 point
-
The lip seems a little far back. That line tie next to the lip should make it wobble wear as the one on the nose should make it shimmy.1 point
-
Any kind of lip will prob impart some action. I was thinking of a tear drop shaped lipless crank with a lot of forward weight. The fat bottom should keep with from wobbling. If you go with a lipped bait try putting the line tie way forward on the lip, this should kill the action.1 point
-
1 point
-
1 point
-
I've been trying to make a slightly larger copy of a jointed Rapala topwater bait that I really like but I've struggled with getting much action out of my attempts. Based on this thread I took a closer look and, to my surprise, the bill is concave. Not just bent concave, but actually shaped like a soup spoon with a hollowed out "bowl". I can't believe I didn't notice it earlier. This morning I 3D printed a prototype and, sure enough, it has perfect action. I should note that despite my training in engineering and statistics I changed two things at once: I added the concave hollow to the lip and moved the cut line so that the head of the bait was about 45% of the length vs. my original 30% so I can't conclusively say the the concave lip was what created the improved swimming action.1 point
-
1 point
-
1 point
-
I know I’m a bit late to the party here but good ole Elmers Rubber cement works great to hold bills in place for testing and then peels of clean not damaging the lure surface..Nathan1 point
-
Good example of Vortex Shedding, bite was slow so took this video.1 point
-
As I understand the subject, the lateral line is the fish's ears, a row of sensitive pressure sensors along each side of the fish's body. Just like with our hearing were not only can we hear sounds, but with an ear on each side of our head, we can tell roughly where the sound is coming from. When a fish moves through the water, it is pushing and pulling at the water making pressure changes, just like when you shout, you set up pressure changes or waves in the air. those changes in pressure travel away from the source, gradually getting weaker until they dissolve away to nothing. it is the same in water except it is movement rather than sound. The vortex disturbance that our lure sends out create an image of something moving rhythmically through the water. An inanimate object would not send out such a sound wave, thus creating an image of something alive and possibly edible. Of course, the image may be the equivalent of a Keystone Cops video, but real enough to warrant further investigation. I hope this helps. Dave1 point