Leaderboard


Popular Content
Showing content with the highest reputation since 02/02/2011 in Image Comments
-
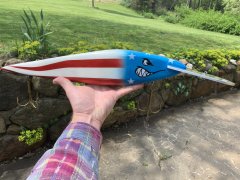
 This. Is. Awesome. I bet it's about the right size for great white sharks and orcas.4 points
 -
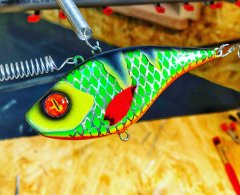
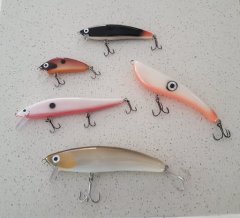
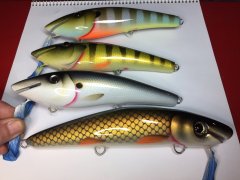
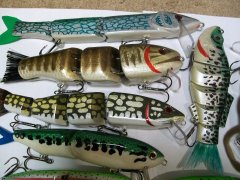 There is a rattle can rainbow trout clipped at the bottom this pic. It is also in pic 2 at the top. What I do is: 1. paint+primer flat white base coat on whole bait 2. pearl mist on belly with belly directly facing nozzle. Sometimes I skip this and keep the white bottom for stained water. 3. You can use a fine mesh here for scales if you want. Metallic silver or Shimmer Metallic silver (Krylon) with back(top) of the lure facing nozzle at slight angle so the paint hits the shoulder and fades down the sides. Give a good dry time here. 4. Use low adhesion masking tape to mark a stripe area down each side of the bait. Spray a few light passes in pink. I found a can of ‘English rose’ color that makes a good rainbow trout stripe. Here you can also do something like paint the stripe purple, keep tape on and let dry, apply mesh, and hit same are with pink so you get purple and pink in the stripe. 5. Spray the back of the bait with a green with the center of the back directly facing the nozzle. The top will get hit and fade onto the shoulder. I have used army green, camo green, dark olive, forest green. 6. Dot with black or purple Sharpie. Or hand dot with small brush. I have used small cans of Rustoleum here because I have a bunch of them. 7. Optional- you can do another light pass of the green on the back here to blend in the shoulder dots a touch. 8. Optional- hit the sides with a quick light pass of Krylon Glitter blast in gold or silver. Keep the nozzle a bit further away from the bait. Only looking for a light dusting here. I do a practice spray away from the bait to gauge the spray flow so I don’t cover the paint job in glitter. I have done a bunch of rainbow trout baits. I sometimes change the colors a bit depending on what I have and what is on sale. It is easy but there is some drying time in between steps. You can use a hair dryer to speed this up if you keep the coats light.3 points
 -
swim video?3 points
-
 Work. Of. Art. I think I need it lol. just to umm... Yaknow, to do some prototype testing...2 points
 -
 Does that blade chatter well with that big lure body on it? Excellent catch!2 points
 -
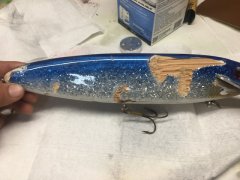
 Got munched!2 points
 -
 Thanks...this is my first attempt at a big thread fin2 points
 -
Looks good man!2 points
-
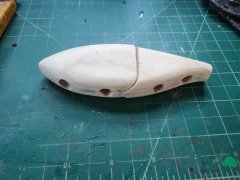
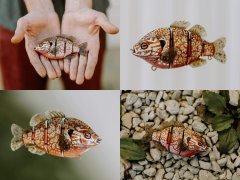
 This bait was made for the lure contest but I thought it was open through the end of April rather then closing on the 29th. so I hope you enjoy this bait here instead. It is a sunfish glide bait bade from colored pencils.2 points
 -
 Thanks gentlemen!2 points
 -
 Still a cool looking swimbait and would be interested in see some of your other work. But if I remember you won with this same lure last year2 points
 -
 Wayyy better than what I was making at 15 haha…nicely done!2 points
 -
 Exceptional work Ryan. Your stuff is so clean and well done.2 points
 -
 Awesome Sauger Pattern!2 points
 -
 Thanks both! Fishin Big: it's cunningly designed to scare off the smaller fish and only catch the big, tough ones.2 points
 -
Wow... Your spoon/spoonplug type baits never cease to amaze me!2 points
-
 The sheer depth of this paint job is really nice...love it!2 points
 -
 Not perfect, but the bait looks great! It's amazing how much information is on this site. So many people have so much experience. I've learned a bunch over the last couple years. My next jump is going to be into using an airbrush, as the finish is just so much higher quality looking. Did you airbrush this?2 points
 -
 Thanks, yea totally use the idea. I'm definitely not the first one to do this! Honestly, I don't exactly make lures just to sell, but I made a few of these as gifts last year, and they were super popular. So I made more this year, and sold more than I could make before Christmas. You end up reaching a MASSIVE demographic of people who would never buy a lure, but know someone in their life who loves hunting/fishing. It makes a great gift for any "man cave".2 points
 -
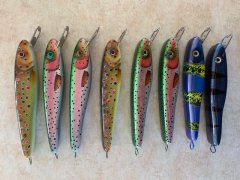
 More pumpkinseed cranks, this time with the turquoise applied with an airbrush over mesh. The fat one on the left has already caught a bunch of fish.2 points
 -
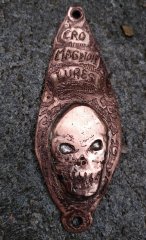
 Almost didn't see the spider haha...looks sick!2 points
 -
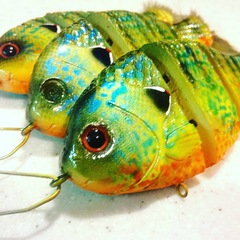
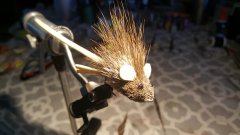 I like it! Reminds me of a baby porcupine too2 points
 -
 We're gonna need a bigger boat!2 points
 -
 Sic!1 point
 -
 Definitely. Thanks again man.1 point
 -
Great work! The level of detail on here is impressive! This is a great build, and the process was a great read on SU. It was really cool to see the whole process and all the steps that lead to completion.1 point
-
 Hand- Carved , Hand - painted…. Top water Creepin Turtle !!! By Greg Nimmer1 point
 -
 Nice work! There's a lot of layers to airbrushing to learn, but this looks like a great start.1 point
 -
 yes i designed the blade and have them laser cut1 point
 -
 Very nice clean work. Well done!1 point
 -
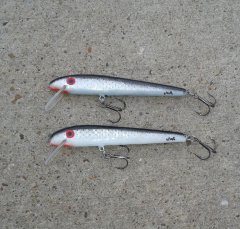
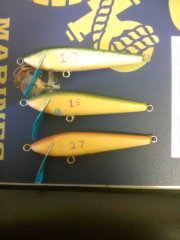 Testing weight placement and action. All about 3" with aluminum lips. Top one has 1 size 7 split shot, middle has 1 size 5, and bottom has 2 size 7.1 point
 -
 Ha, that's awesome! Great detail on this bait too!1 point
 -
1 point
-
 Super clean, super cool, super creative. Awesome Ryan!1 point
 -
 Thanks eastman, and yes!1 point
 -
 3Lb is a VERY nice fish. The biggest I ever saw was 1Lb from a bomb crater pit on the Wirral, UK. Before and after that day the water only produced 4oz perch. Dave1 point
 -
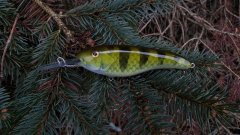
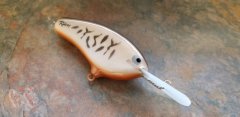 This is actually my favorite color pattern for fishing in Canada. There's a lake I used to fish a lot with this pattern, I used to catch quite a few smallmouth, walleye, and the odd pike with this in about a 2 1/2" crank.1 point
 -
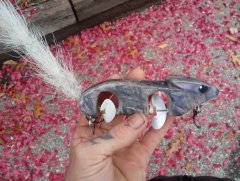
 Thanks...Tbh those were the last 2 pairs of eyes i had in so they were getting used either way lol1 point
 -
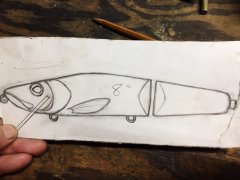 Cool to see the drawing , how nicely you copied your details in wood and then the final product painted so clean like always . I dig it1 point
 -
 Nice! I've been thinking of something similar. can we get a couple of pics out of the water? Thanks.1 point
 -
 These were done for a customer and I asked him the same question. The line tie wire goes through lead in the metal lips and wrapped to the main wire.1 point
 -
 Beautifully done.1 point
 -
1 point
-
 Great work as well !1 point
 -
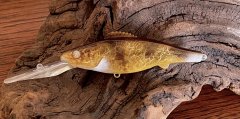
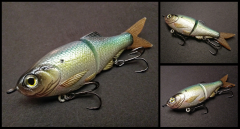
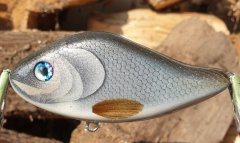
 Looks good. I struggle getting a golden shiner pattern I like as well but it looks like you hit a good balance of colors for it. Nice work.1 point
 -
 Just could not let the old girl go to lure heaven could you lol nice job bringing it back to life1 point
 -
 Can't wait to see this bad boy painted up!1 point
 -
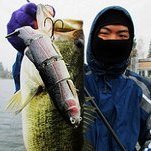
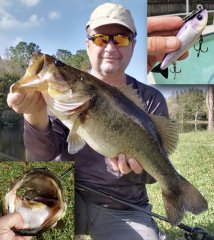
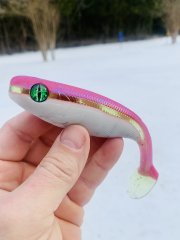
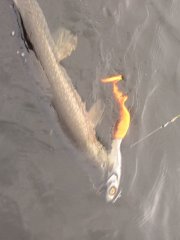
 I also tested with one 1/32 oz weight in front of the hook hanger, it swam with a more x action, looked ok but not what i wanted... you get more flash from the foil with a y action Finally got to real world test today at the lake... perfect day for it!... cloudy, dead calm, 60 degrees outside, water temp in the low 50's... caught 3 largies and 1 abnormally large spotted bass (batteries died in my scale, id estimate about 3 lbs on the spot)1 point
 -
 Beautiful lures! Even the eyeless one, he must have been bitten.1 point
 -
 Beautiful work. Turned out great. Barry1 point